Call +(254) 703 030 000 / 751 483 999 / 721 704 777
.....Read More
Frequently Asked Questions
What are the best types of cleaning brushes for kitchens and bathrooms?
For kitchens, the best cleaning brushes include:
1. **Dish Brushes**: These have stiff bristles and a comfortable handle, ideal for scrubbing pots, pans, and dishes. Look for ones with a scraper edge for stubborn food residues.
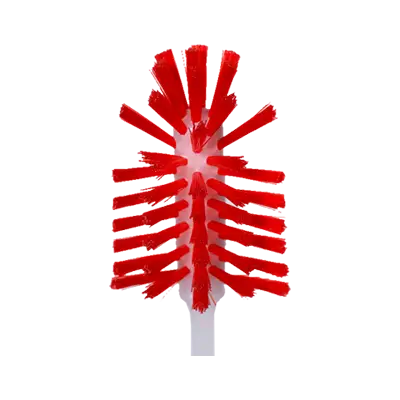
2. **Bottle Brushes**: Designed with long, flexible handles and narrow heads, these are perfect for cleaning inside bottles, jars, and narrow glassware.
3. **Vegetable Brushes**: With softer bristles, these are used to clean fruits and vegetables without damaging them.
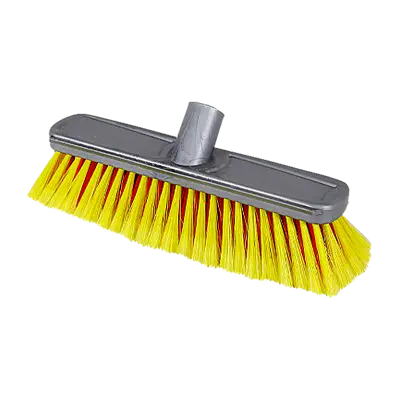
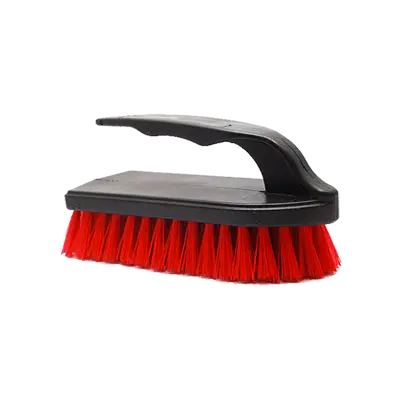
4. **Scrub Brushes**: These have strong bristles and are used for cleaning countertops, sinks, and stovetops. Some come with ergonomic handles for better grip.
5. **Grout Brushes**: Featuring narrow, stiff bristles, these are excellent for cleaning grout lines on tiled kitchen floors or backsplashes.
For bathrooms, the best cleaning brushes include:
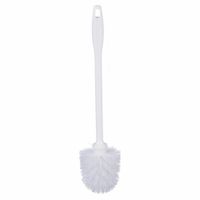
1. **Toilet Brushes**: Essential for scrubbing the inside of toilet bowls. Look for ones with a sturdy handle and durable bristles.
2. **Tile and Grout Brushes**: Similar to kitchen grout brushes but often with a more robust design to tackle bathroom mold and mildew.
3. **Shower Scrubbers**: These often have extendable handles and are used for cleaning shower walls and bathtubs. Some come with replaceable heads for different surfaces.
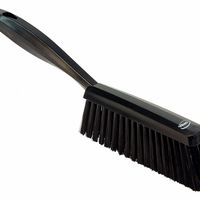
4. **Detail Brushes**: Small brushes with stiff bristles, perfect for cleaning around faucets, drains, and other tight spaces.
5. **Electric Scrubbers**: Battery-operated brushes that reduce manual effort, ideal for large bathroom surfaces like tiles and tubs.
Choosing the right brush depends on the specific cleaning task, the surface material, and personal comfort with the brush design.
How do I choose the right scrub brush for removing stubborn grime?
1. **Identify the Surface**: Determine the material of the surface you need to clean. Different surfaces require different types of brushes to avoid damage.
2. **Bristle Material**:
- **Nylon Bristles**: Suitable for most surfaces, including tiles and grout, as they are durable and flexible.
- **Natural Bristles**: Ideal for delicate surfaces like wood, as they are softer.
- **Metal Bristles**: Best for tough surfaces like grills or concrete, but can scratch softer materials.
3. **Bristle Stiffness**:
- **Soft Bristles**: Use for light cleaning and delicate surfaces.
- **Medium Bristles**: Good for general-purpose cleaning.
- **Hard Bristles**: Effective for heavy-duty scrubbing on tough grime.
4. **Brush Shape and Size**:
- **Handheld Brushes**: Offer control and are good for small areas.
- **Long-handled Brushes**: Ideal for reaching high or low areas without bending or stretching.
- **Specialty Brushes**: Consider angled or narrow brushes for tight spaces or corners.
5. **Ergonomic Design**: Choose a brush with a comfortable grip to reduce hand fatigue during extended use.
6. **Durability**: Look for brushes made from high-quality materials that can withstand repeated use without wearing out quickly.
7. **Purpose-Specific Brushes**: Some brushes are designed for specific tasks, like grout brushes or bottle brushes, which can be more effective for particular cleaning jobs.
8. **Brand and Reviews**: Consider reputable brands and check customer reviews for performance insights.
9. **Price**: Balance cost with quality. A slightly more expensive brush may last longer and perform better, offering better value in the long run.
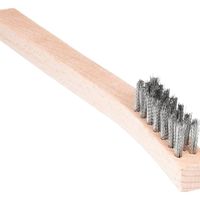
What are wire scratch brushes used for?
Wire scratch brushes are versatile tools used for a variety of cleaning, surface preparation, and finishing tasks across different industries. They are primarily employed to remove rust, paint, and corrosion from metal surfaces, making them essential in metalworking and automotive repair. These brushes are also used to clean welding slag and spatter, ensuring a smooth and clean surface for subsequent welding or painting processes.
In woodworking, wire scratch brushes help in cleaning and preparing wood surfaces by removing old finishes, dirt, and debris, allowing for better adhesion of new finishes or paints. They are also used to create a distressed or weathered look on wood by selectively removing softer wood fibers.
In the construction and maintenance sectors, wire scratch brushes are used to clean masonry surfaces, such as bricks and concrete, by removing efflorescence, dirt, and other surface contaminants. They are also effective in cleaning grills, ovens, and other cooking equipment by removing burnt-on food and grease.
Wire scratch brushes come in various shapes and sizes, with bristles made from different materials like steel, stainless steel, brass, or nylon, each suited for specific applications. Steel and stainless steel bristles are ideal for heavy-duty cleaning and rust removal, while brass bristles are softer and suitable for delicate surfaces that require a gentler touch.
Overall, wire scratch brushes are indispensable tools for maintenance, restoration, and surface preparation tasks, providing an efficient and effective means of cleaning and finishing a wide range of materials and surfaces.
How do I clean and maintain my cleaning brushes?
1. **Rinse Immediately After Use**: After using a cleaning brush, rinse it under warm water to remove any debris or cleaning solution.
2. **Soak in Soapy Water**: Fill a basin with warm water and add a few drops of dish soap. Submerge the brush and let it soak for 15-30 minutes to loosen dirt and grime.
3. **Scrub Bristles**: Use a comb or another brush to scrub the bristles, removing any remaining dirt. For stubborn grime, use a toothbrush to get between the bristles.
4. **Disinfect**: Prepare a disinfecting solution by mixing one part vinegar with one part water or use a commercial disinfectant. Soak the brush for 10 minutes to kill bacteria and germs.
5. **Rinse Thoroughly**: Rinse the brush under warm water to remove soap and disinfectant residue.
6. **Dry Properly**: Shake off excess water and place the brush bristle-side down on a towel to air dry. Ensure it dries completely to prevent mold and mildew.
7. **Store Correctly**: Store brushes in a dry, well-ventilated area. Hang them or place them in a holder with bristles facing down to maintain their shape.
8. **Regular Maintenance**: Clean brushes regularly, ideally after each use, to maintain their effectiveness and longevity.
9. **Replace When Necessary**: Inspect brushes for wear and tear. Replace them if bristles are frayed or if the brush is no longer effective.
10. **Special Care for Different Brushes**: For natural bristle brushes, avoid soaking for too long to prevent damage. For metal brushes, ensure they are completely dry to prevent rust.
What is the difference between natural and synthetic bristles in cleaning brushes?
Natural bristles are made from animal hair, such as boar, horse, or badger. They are softer and more flexible, making them ideal for delicate surfaces and tasks requiring a gentle touch. Natural bristles have a unique structure that can hold more liquid, which is beneficial for tasks like painting or applying cleaning solutions. They are biodegradable and environmentally friendly but can be more expensive and less durable than synthetic options. Natural bristles can also be prone to damage from chemicals and may harbor bacteria if not properly maintained.
Synthetic bristles, on the other hand, are made from materials like nylon, polyester, or polypropylene. They are generally more durable and resistant to chemicals, making them suitable for heavy-duty cleaning tasks. Synthetic bristles are often stiffer, providing more scrubbing power for tough stains and surfaces. They are typically more affordable and easier to clean, as they do not absorb water or cleaning agents. However, they may not be as effective in holding liquids as natural bristles and can be less environmentally friendly due to their plastic composition.
In summary, the choice between natural and synthetic bristles depends on the specific cleaning task, the surface being cleaned, and personal preferences regarding durability, cost, and environmental impact.
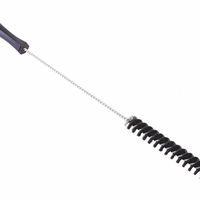
How do I clean the inside of pipes and tubes effectively?
To clean the inside of pipes and tubes effectively, follow these steps:
1. **Identify Material and Contaminants**: Determine the pipe material (e.g., metal, plastic) and the type of contaminants (e.g., scale, biofilm, grease).
2. **Choose Cleaning Method**:
- **Mechanical Cleaning**: Use brushes, scrapers, or pigs for physical removal of debris. Suitable for large-diameter pipes.
- **Chemical Cleaning**: Use appropriate chemicals (e.g., acids, alkalis) to dissolve deposits. Ensure compatibility with pipe material.
- **Hydro Jetting**: Use high-pressure water jets to dislodge and flush out debris. Effective for stubborn blockages.
- **Foam Cleaning**: Inject cleaning foam that expands and scrubs the pipe interior. Useful for complex pipe networks.
3. **Prepare Equipment**: Gather necessary tools and safety gear. Ensure all equipment is in good working condition.
4. **Safety Precautions**: Wear protective gear (gloves, goggles, masks) and ensure proper ventilation. Follow safety guidelines for chemical handling.
5. **Cleaning Process**:
- **Mechanical**: Insert brushes or pigs and push through the pipe. Repeat as necessary.
- **Chemical**: Circulate cleaning solution through the pipe. Allow time for reaction, then flush with water.
- **Hydro Jetting**: Insert nozzle and apply high-pressure water. Move nozzle slowly for thorough cleaning.
- **Foam**: Inject foam and let it expand. Rinse with water after the recommended dwell time.
6. **Inspection**: Use cameras or borescopes to inspect the pipe interior post-cleaning. Ensure all debris is removed.
7. **Rinse and Dry**: Flush with clean water to remove residues. Dry the pipes if necessary to prevent corrosion.
8. **Regular Maintenance**: Implement a routine cleaning schedule to prevent buildup and ensure optimal flow.
What safety precautions should I take when using wire brushes?
1. **Wear Personal Protective Equipment (PPE):** Use safety goggles or a face shield to protect your eyes from flying debris. Wear gloves to protect your hands from sharp wires and a dust mask if working in a dusty environment.
2. **Inspect the Brush:** Before use, check the wire brush for any damage, such as loose wires or cracks. Replace the brush if it shows signs of wear or damage.
3. **Secure the Workpiece:** Ensure the object you are working on is securely clamped or held in place to prevent movement during brushing.
4. **Use the Right Brush:** Select the appropriate type and size of wire brush for the task and material. Using the wrong brush can lead to ineffective cleaning and potential damage.
5. **Follow Manufacturer’s Instructions:** Adhere to the manufacturer’s guidelines for the correct speed and pressure to apply when using the brush.
6. **Maintain a Safe Distance:** Keep bystanders at a safe distance to avoid injury from flying debris.
7. **Avoid Excessive Pressure:** Apply only the necessary amount of pressure. Excessive force can cause the wires to break and fly off.
8. **Check the Speed:** Ensure the tool’s speed does not exceed the maximum safe speed rating of the wire brush.
9. **Use Guards and Shields:** If available, use guards or shields on power tools to provide additional protection.
10. **Store Properly:** Store wire brushes in a dry, safe place to prevent damage and maintain their effectiveness.
11. **Clean Up:** After use, clean the area to remove any debris or broken wires that could cause injury.
12. **Regular Maintenance:** Regularly maintain and replace wire brushes to ensure they remain effective and safe to use.