Bathroom Fixtures

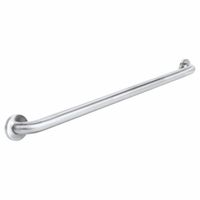
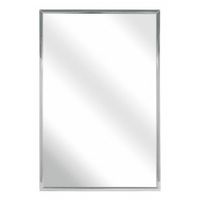
Bathroom fixtures include functional parts and components that enhance usability and improve restroom appearance. Bathroom grab bars attach to walls near toilets and showers to assist people when lowering and lifting themselves. Bathroom mirrors are fastened to walls in public restrooms or motels an .....Read More

Frequently Asked Questions

1. What are the best materials for bathroom fixtures?

The best materials for bathroom fixtures are those that combine durability, aesthetics, and ease of maintenance. Here are some top choices: 1. **Stainless Steel**: Known for its resistance to rust and corrosion, stainless steel is ideal for faucets, showerheads, and other fixtures. It offers a sleek, modern look and is easy to clean. 2. **Brass**: This material is highly durable and resistant to corrosion, making it a popular choice for faucets and showerheads. Brass fixtures often come with a polished or brushed finish, adding a touch of elegance. 3. **Chrome**: Chrome-plated fixtures are popular due to their shiny, reflective surface and affordability. They are easy to clean and maintain, though they may show water spots and fingerprints more easily. 4. **Ceramic**: Often used for sinks and toilet components, ceramic is durable and resistant to scratches and stains. It offers a classic look and is available in various colors and designs. 5. **Porcelain**: Similar to ceramic, porcelain is a type of ceramic that is fired at higher temperatures, making it more durable and less porous. It is commonly used for sinks and toilets. 6. **Glass**: Used for sinks and decorative fixtures, glass offers a modern and elegant appearance. Tempered glass is strong and resistant to thermal shock, though it requires regular cleaning to maintain its clarity. 7. **Acrylic**: Lightweight and versatile, acrylic is used for bathtubs and shower enclosures. It is resistant to chipping and cracking and retains heat well, providing a comfortable bathing experience. 8. **Cast Iron**: Often coated with enamel, cast iron is extremely durable and retains heat well, making it ideal for bathtubs. It is heavy and requires proper support but offers a classic, timeless look. Choosing the right material depends on the specific needs, style preferences, and budget considerations for your bathroom.

2. How do I install bathroom grab bars?

1. **Choose the Location**: Identify where the grab bars are needed, typically near the toilet, in the shower, or bathtub. Ensure they are within easy reach and at a comfortable height. 2. **Select the Right Grab Bars**: Choose bars that are ADA-compliant, made of rust-resistant materials, and have a non-slip surface. Standard lengths are 12, 16, 18, 24, 32, and 36 inches. 3. **Gather Tools and Materials**: You will need a drill, drill bits, a stud finder, a level, a pencil, a screwdriver, and appropriate screws (usually included with the grab bars). 4. **Locate Wall Studs**: Use a stud finder to locate the studs in the wall. Mark the center of the studs with a pencil. Grab bars must be anchored into studs for maximum support. 5. **Mark Drill Holes**: Hold the grab bar against the wall at the desired height and position. Use a level to ensure it is straight. Mark the screw holes on the wall with a pencil. 6. **Drill Pilot Holes**: Use a drill bit slightly smaller than the screws to drill pilot holes into the marked spots on the studs. This prevents the wood from splitting. 7. **Attach the Grab Bar**: Align the grab bar with the pilot holes. Insert the screws through the grab bar’s mounting holes and into the wall. Use a screwdriver or drill to tighten the screws securely. 8. **Check Stability**: Once installed, test the grab bar by pulling on it firmly to ensure it is securely attached and can support weight. 9. **Seal the Installation**: If installed in a wet area, apply a waterproof sealant around the edges of the mounting plates to prevent water from seeping into the wall. 10. **Final Inspection**: Ensure the grab bar is level and securely fastened. Adjust if necessary.

3. What size bathroom mirror should I choose?

When selecting a bathroom mirror, consider the following factors to determine the appropriate size: 1. **Vanity Width**: The mirror should generally be a few inches smaller than the vanity or sink area. A common guideline is to choose a mirror that is 2 to 4 inches narrower than the vanity. This ensures a balanced look and prevents the mirror from overpowering the space. 2. **Proportion and Balance**: The mirror should be proportionate to the wall space and other fixtures. It should not extend beyond the vanity or be too small, which can disrupt the visual harmony of the bathroom. 3. **Height**: The height of the mirror should accommodate the tallest user while also being accessible to shorter users. Typically, the mirror should be installed with the center at eye level, around 57 to 65 inches from the floor. For a more expansive look, consider a taller mirror that extends closer to the ceiling. 4. **Lighting and Reflection**: Consider the placement of lighting fixtures. The mirror should reflect light effectively without causing glare. If you have wall sconces, ensure the mirror fits comfortably between them. 5. **Style and Design**: The mirror’s style should complement the bathroom’s decor. Frameless mirrors offer a modern look, while framed mirrors can add a decorative element. The frame should not add excessive width to the mirror. 6. **Functionality**: Consider the mirror’s purpose. If it’s primarily for grooming, a larger mirror may be beneficial. For decorative purposes, a smaller, uniquely shaped mirror might suffice. By considering these factors, you can select a bathroom mirror that enhances both the functionality and aesthetic appeal of your space.

4. How do I maintain and clean bathroom fixtures?

To maintain and clean bathroom fixtures effectively, follow these steps: 1. **Regular Cleaning**: Clean fixtures weekly to prevent buildup. Use a mild, non-abrasive cleaner suitable for the material of your fixtures. 2. **Faucets and Showerheads**: Wipe with a damp cloth and a mild detergent. For mineral deposits, soak a cloth in vinegar, wrap it around the fixture, and leave for 30 minutes before rinsing. 3. **Toilets**: Use a toilet bowl cleaner and a brush to scrub the bowl. Clean the exterior with a disinfectant wipe or spray. Pay attention to the base and handle. 4. **Sinks**: Use a non-abrasive cleaner or baking soda paste. Rinse thoroughly and dry with a soft cloth to prevent water spots. 5. **Bathtubs and Showers**: Use a bathroom cleaner or a vinegar-water solution. Scrub with a non-scratch sponge. For grout, use a toothbrush and a baking soda-vinegar paste. 6. **Mirrors and Glass**: Use a glass cleaner or a vinegar-water solution. Wipe with a microfiber cloth to avoid streaks. 7. **Preventive Measures**: Install water softeners to reduce mineral deposits. Use a squeegee on glass doors after each shower to prevent soap scum. 8. **Deep Cleaning**: Monthly, remove and soak showerheads in vinegar to clear clogs. Check and clean faucet aerators. 9. **Maintenance**: Regularly check for leaks or drips and repair promptly. Replace worn-out washers or seals. 10. **Ventilation**: Ensure proper ventilation to reduce mold and mildew. Use exhaust fans or open windows during and after showers. By following these steps, you can keep your bathroom fixtures clean, functional, and looking new.

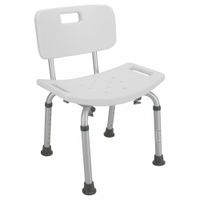
5. What are the benefits of using a shower chair?

A shower chair offers numerous benefits, particularly for individuals with mobility challenges, the elderly, or those recovering from surgery. Firstly, it enhances safety by providing a stable seating option, reducing the risk of slips and falls on wet surfaces. This is crucial for maintaining independence and confidence during bathing. Secondly, a shower chair promotes comfort and convenience. It allows users to sit while showering, which can be less tiring than standing, especially for those with limited stamina or balance issues. This seated position also makes it easier to reach and clean different parts of the body without straining. Additionally, shower chairs can be adjusted to fit the user's height, ensuring ergonomic support and reducing the risk of strain or injury. Many models come with backrests and armrests, offering extra support and making it easier to sit down and stand up. For caregivers, a shower chair simplifies the process of assisting someone with bathing, as it provides a secure and stable platform for the person being cared for. This can make the task less physically demanding and more efficient. Moreover, shower chairs can be equipped with non-slip feet or suction cups to prevent movement, further enhancing safety. Some models are foldable or have wheels, offering flexibility and ease of storage or transport. In summary, a shower chair is a valuable tool for improving safety, comfort, and independence in the bathroom, making it an essential aid for those with mobility challenges or those seeking a more secure bathing experience.

6. How do I choose the right towel bar length?

To choose the right towel bar length, consider the following factors: 1. **Space Availability**: Measure the wall space where you plan to install the towel bar. Ensure there is enough room for the bar and the towels to hang freely without obstruction. 2. **Towel Size**: Consider the size of the towels you use. Standard bath towels are about 27 to 30 inches wide, so a 24 to 30-inch towel bar is ideal for a single towel. For hand towels, a shorter bar of 18 inches may suffice. 3. **Number of Towels**: Determine how many towels you need to hang. If you need to hang multiple towels, consider a longer bar or multiple bars. Double towel bars can also be an option for maximizing space. 4. **Bathroom Layout**: Consider the overall layout and design of your bathroom. Ensure the towel bar complements the style and does not interfere with other fixtures or the door swing. 5. **Aesthetic Preference**: Choose a towel bar length that fits your design preference. Longer bars can create a more streamlined look, while shorter bars can be more discreet. 6. **Mounting Location**: Decide whether the towel bar will be mounted on a wall, door, or shower enclosure. This can affect the length you choose based on available space and structural support. 7. **User Needs**: Consider the needs of the users. For instance, in a family bathroom, a longer bar might be necessary to accommodate multiple users. By evaluating these factors, you can select a towel bar length that is both functional and aesthetically pleasing for your bathroom space.

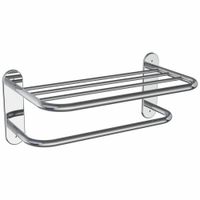
7. What is the best way to organize bathroom shelves and baskets?

To organize bathroom shelves and baskets effectively, start by decluttering. Remove expired or unused items. Categorize remaining items into groups such as skincare, haircare, oral hygiene, and cleaning supplies. Use clear, labeled containers or baskets to keep similar items together, making them easy to find and access. For shelves, place frequently used items at eye level and less frequently used items higher or lower. Use tiered organizers or risers to maximize vertical space and ensure visibility. Consider adding small trays or lazy Susans for easy access to smaller items. In baskets, use dividers to separate different categories or individual items. Opt for stackable baskets to save space and maintain order. Label each basket clearly to ensure everything has a designated spot. Utilize the back of cabinet doors with hooks or hanging organizers for additional storage of items like hair tools or cleaning supplies. Install tension rods under the sink to hang spray bottles or baskets. Regularly review and tidy up the shelves and baskets to maintain organization. This system ensures a neat, efficient, and functional bathroom space.

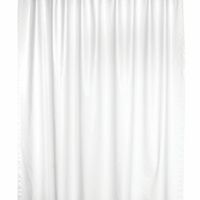
8. How do I properly install a shower curtain rod?

1. **Choose the Right Rod**: Select a rod that fits your shower space. Tension rods are ideal for most bathrooms, while fixed rods may require drilling. 2. **Measure the Space**: Measure the width of your shower area to ensure the rod fits properly. For tension rods, extend it slightly longer than the width to ensure a snug fit. 3. **Prepare the Area**: Clean the walls where the rod will be installed to ensure a secure grip. For fixed rods, mark the desired height on both walls using a level to ensure it’s even. 4. **Install a Tension Rod**: - Twist the rod to extend it to the desired length. - Position one end against the wall and compress the rod slightly to fit it into place. - Release the rod to allow it to expand and hold firmly against the walls. 5. **Install a Fixed Rod**: - Drill holes at the marked spots on both walls. - Insert wall anchors if necessary for added support. - Attach the mounting brackets using screws. - Slide the rod into the brackets and secure it with screws or set screws, if applicable. 6. **Hang the Curtain**: Thread the shower curtain rings or hooks through the curtain and onto the rod. Ensure the curtain hangs evenly and covers the entire shower area. 7. **Test Stability**: Gently tug on the rod to ensure it is secure. Adjust as necessary to prevent slipping or falling. 8. **Final Adjustments**: Ensure the curtain opens and closes smoothly. Adjust the rod or curtain rings if needed for optimal functionality.

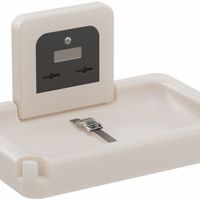
9. What are the safety standards for changing stations?

Safety standards for changing stations typically include the following key elements: 1. **Structural Integrity**: Changing stations must be robust and capable of supporting a specified weight limit, often around 50 pounds or more, to ensure they can safely hold a child. 2. **Secure Installation**: They should be securely mounted to the wall or other stable surfaces, following the manufacturer's installation instructions to prevent tipping or detachment. 3. **Safety Straps**: Equipped with safety straps to secure the child and prevent falls. These straps should be adjustable and made of durable materials. 4. **Smooth Surfaces**: The surface should be smooth and free of sharp edges or protrusions to prevent injuries. 5. **Non-Toxic Materials**: Made from non-toxic, hypoallergenic materials to ensure they are safe for children’s sensitive skin. 6. **Easy to Clean**: Surfaces should be easy to clean and sanitize to maintain hygiene and prevent the spread of germs. 7. **Clear Instructions**: Clear usage instructions and safety warnings should be provided and easily visible to users. 8. **Compliance with Regulations**: Must comply with local and national safety regulations and standards, such as those set by the Consumer Product Safety Commission (CPSC) in the U.S. 9. **Regular Maintenance**: Facilities should regularly inspect and maintain changing stations to ensure they remain in safe working condition. 10. **Accessibility**: Should be accessible to all users, including those with disabilities, in compliance with the Americans with Disabilities Act (ADA) or equivalent regulations in other countries. 11. **Proper Location**: Installed in a location that provides privacy and convenience, away from hazards like doors or high-traffic areas. These standards help ensure the safety and well-being of children and provide peace of mind to caregivers using the facilities.

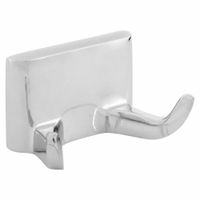
10. How do I select the right bathroom hooks for my needs?

To select the right bathroom hooks, consider the following factors: 1. **Purpose and Load Capacity**: Determine what you will hang on the hooks. For heavy items like robes or towels, choose hooks with higher load capacity. For lighter items, standard hooks will suffice. 2. **Material**: Opt for materials that resist moisture and rust, such as stainless steel, brass, or plastic. These materials ensure durability in a humid bathroom environment. 3. **Design and Style**: Match the hooks with your bathroom decor. Choose from modern, traditional, or minimalist designs to complement your existing fixtures and overall aesthetic. 4. **Installation Method**: Decide between adhesive hooks, which are easy to install and remove without damage, or screw-in hooks, which offer more stability for heavier items. 5. **Space and Placement**: Assess the available space and decide on the number and placement of hooks. Consider wall-mounted hooks for small spaces or over-the-door hooks for added convenience. 6. **Size and Shape**: Choose hooks that are appropriately sized for the items you plan to hang. Ensure the shape of the hook can securely hold the items without slipping. 7. **Brand and Reviews**: Research brands known for quality bathroom accessories. Read customer reviews to gauge satisfaction and performance. 8. **Budget**: Set a budget and find hooks that offer the best value for money without compromising on quality and functionality. By considering these factors, you can select bathroom hooks that meet your functional needs while enhancing the overall look of your bathroom.