Bathroom Partitions & Partition Hardware

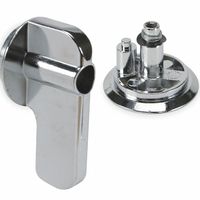
Bathroom partitions install in public or commercial restrooms with appropriate hardware to fully or partially enclose toilets and urinals for privacy. Hardware and replacement parts for bathroom partitions include fasteners, brackets, and accessories for installing partitions and equipping them for .....Read More

Frequently Asked Questions

What are the standard dimensions for bathroom partitions?

Standard dimensions for bathroom partitions can vary based on the type of partition and the specific requirements of the space. However, there are general guidelines that are commonly followed: 1. **Stall Width and Depth**: - Standard stalls typically have a width of 36 inches (91 cm) and a depth of 60 inches (152 cm). - For ADA compliance, accessible stalls should be at least 60 inches (152 cm) wide and 60 inches (152 cm) deep, though a depth of 59 inches (150 cm) is also acceptable if the stall is wider. 2. **Door Width**: - Standard stall doors are usually 24 inches (61 cm) to 36 inches (91 cm) wide. - ADA-compliant doors should be at least 32 inches (81 cm) wide when open at 90 degrees. 3. **Partition Height**: - The typical height for partitions is around 58 inches (147 cm) from the floor. - For increased privacy, some partitions may extend up to 72 inches (183 cm) or higher. 4. **Floor Clearance**: - Partitions are generally installed with a clearance of 12 inches (30 cm) from the floor to allow for easy cleaning. 5. **Urinal Screens**: - These are usually 12 to 24 inches (30 to 61 cm) wide and 42 to 48 inches (107 to 122 cm) high. 6. **Privacy Considerations**: - For enhanced privacy, some modern designs include partitions that extend closer to the floor and ceiling, reducing sightlines. These dimensions can be adjusted based on specific building codes, design preferences, and the intended use of the restroom. Always consult local regulations and ADA guidelines to ensure compliance.

How do you install bathroom partition hardware?

To install bathroom partition hardware, follow these steps: 1. **Preparation**: Gather all necessary tools and materials, including a drill, level, measuring tape, screwdriver, and the partition hardware kit. Ensure the area is clean and free of obstructions. 2. **Layout and Marking**: Measure and mark the locations for the partitions on the floor and walls. Use a level to ensure accuracy. Mark the positions for the brackets, pilasters, and panels according to the manufacturer's instructions. 3. **Install Pilasters**: Begin by attaching the pilasters to the floor. Drill holes at the marked locations, insert anchors if needed, and secure the pilasters with screws. Ensure they are plumb using a level. 4. **Attach Panels**: Position the panels between the pilasters. Use brackets to secure the panels to the pilasters. Drill pilot holes and fasten the brackets with screws. Ensure the panels are level and aligned. 5. **Install Doors**: Attach hinges to the doors and then to the pilasters. Ensure the doors swing correctly and are level. Install door latches and handles as per the hardware kit instructions. 6. **Secure Headrail**: If the design includes a headrail, attach it across the top of the pilasters. This adds stability to the structure. Use brackets to secure the headrail to the wall and pilasters. 7. **Final Adjustments**: Check all components for alignment and stability. Tighten any loose screws and make necessary adjustments to ensure doors open and close smoothly. 8. **Clean Up**: Remove any debris and clean the partitions. Ensure all tools and materials are stored properly. By following these steps, you can successfully install bathroom partition hardware, ensuring a functional and stable setup.

What materials are best for bathroom partitions in high-traffic areas?

For high-traffic areas, the best materials for bathroom partitions are those that offer durability, resistance to moisture, ease of maintenance, and aesthetic appeal. Here are some top choices: 1. **Solid Plastic (HDPE)**: High-Density Polyethylene is highly durable, resistant to moisture, graffiti, and impact. It is ideal for high-traffic areas due to its long lifespan and low maintenance requirements. It does not rust or delaminate, making it perfect for humid environments. 2. **Phenolic Core**: Made from layers of paper or fabric impregnated with phenolic resin, this material is highly resistant to water, bacteria, and vandalism. It offers excellent durability and is easy to clean, making it suitable for busy public restrooms. 3. **Stainless Steel**: Known for its sleek appearance and strength, stainless steel is resistant to rust, corrosion, and vandalism. It is easy to clean and maintain, providing a modern look that is ideal for upscale or high-traffic facilities. 4. **Powder-Coated Steel**: This material involves steel panels coated with a powder finish that is baked on. It offers a balance of durability and cost-effectiveness, providing resistance to scratches and corrosion. It is suitable for environments where budget constraints are a consideration. 5. **Compact Laminate**: This is a solid, dense material made from layers of kraft paper and resin. It is highly durable, water-resistant, and easy to clean, making it a good choice for high-traffic restrooms. Each of these materials offers unique benefits, and the choice depends on specific needs such as budget, aesthetic preferences, and environmental conditions.

How do you replace a broken bathroom partition latch?

To replace a broken bathroom partition latch, follow these steps: 1. **Gather Tools and Materials**: You will need a screwdriver, a new latch kit compatible with your partition, and possibly a drill if new holes are required. 2. **Remove the Old Latch**: Use the screwdriver to unscrew the screws holding the broken latch in place. Carefully remove the latch and any remaining hardware, such as the strike plate. 3. **Prepare the Surface**: Clean the area where the old latch was installed. If the new latch requires different mounting holes, fill the old holes with wood filler or a similar material and sand smooth. 4. **Position the New Latch**: Align the new latch with the existing holes. If the holes do not match, mark the new positions with a pencil. 5. **Drill New Holes (if necessary)**: If new holes are needed, use a drill to create them. Ensure the drill bit is appropriate for the material of the partition. 6. **Install the New Latch**: Place the new latch in position and secure it with screws. Ensure it is tightly fastened and aligned correctly. 7. **Attach the Strike Plate**: Align the strike plate with the latch and secure it with screws. Ensure the latch engages smoothly with the strike plate. 8. **Test the Latch**: Open and close the door to ensure the latch operates smoothly and securely. Make any necessary adjustments to the alignment. 9. **Final Adjustments**: Tighten any loose screws and ensure all components are secure. By following these steps, you can effectively replace a broken bathroom partition latch, restoring functionality and security to the stall.

What are the different types of bathroom partition mounting styles?

There are four main types of bathroom partition mounting styles: 1. **Floor-Mounted (Overhead Braced):** This is the most common style, offering a balance of stability and cost-effectiveness. Partitions are anchored to the floor and supported by an overhead brace, making them suitable for high-traffic areas. They are easy to install and maintain, and the overhead brace provides additional support. 2. **Ceiling-Hung:** These partitions are suspended from the ceiling, providing a clean and modern look. They are ideal for spaces where floor cleaning is a priority, as they leave the floor area unobstructed. However, they require a strong ceiling structure for support and are generally more expensive to install. 3. **Floor-to-Ceiling:** Offering maximum privacy and stability, these partitions extend from the floor to the ceiling. They are highly durable and suitable for high-traffic areas. This style is often used in environments where vandalism is a concern. Installation can be more complex and costly due to the need for precise alignment. 4. **Floor-Mounted:** These partitions are anchored directly to the floor without any overhead support. They provide a minimalist look and are easy to install. However, they may not be as stable as other styles, making them less suitable for high-traffic or vandal-prone areas. Each style has its own advantages and is chosen based on factors like budget, aesthetic preference, and the specific needs of the restroom environment.

How do you maintain and clean bathroom partitions?

To maintain and clean bathroom partitions effectively, follow these steps: 1. **Regular Inspection**: Frequently check for any damage, graffiti, or wear. Early detection helps in timely repairs and prevents further deterioration. 2. **Daily Cleaning**: Use a mild, non-abrasive cleaner suitable for the partition material (metal, plastic, laminate). Apply the cleaner with a soft cloth or sponge to avoid scratches. For metal partitions, ensure the cleaner is non-corrosive. 3. **Stain Removal**: For stubborn stains, use a mixture of water and mild detergent. Apply with a soft brush, then rinse thoroughly. Avoid harsh chemicals that can damage the surface. 4. **Graffiti Removal**: Use a graffiti remover specifically designed for the partition material. Test on a small area first to ensure it doesn’t damage the surface. Follow with a thorough rinse. 5. **Disinfecting**: Regularly disinfect high-touch areas like door handles and locks using a disinfectant spray or wipes. Ensure the disinfectant is safe for the partition material. 6. **Rust Prevention**: For metal partitions, regularly check for rust. Use a rust remover if needed, and apply a rust-inhibiting primer or paint to prevent future rusting. 7. **Lubrication**: Periodically lubricate hinges and locks to ensure smooth operation and prevent squeaking. 8. **Ventilation**: Ensure the bathroom is well-ventilated to prevent moisture buildup, which can lead to mold and mildew. 9. **Repair and Replacement**: Promptly repair any damage such as dents or scratches. Replace partitions if they are beyond repair to maintain a clean and professional appearance. 10. **Professional Cleaning**: Consider periodic professional cleaning for deep cleaning and maintenance, especially in high-traffic areas. By following these steps, you can ensure that bathroom partitions remain clean, functional, and aesthetically pleasing.

What is the cost of installing bathroom partitions in a commercial restroom?

The cost of installing bathroom partitions in a commercial restroom can vary widely based on several factors, including the material of the partitions, the size and layout of the restroom, the number of stalls, and the region where the installation takes place. Here’s a breakdown of potential costs: 1. **Material Costs**: - **Powder-Coated Steel**: Typically the most economical option, costing around $300 to $500 per stall. - **Plastic Laminate**: Mid-range option, costing approximately $400 to $600 per stall. - **Solid Plastic (HDPE)**: Durable and moisture-resistant, costing about $500 to $700 per stall. - **Stainless Steel**: High-end option, known for its durability and sleek appearance, costing between $700 to $1,200 per stall. - **Phenolic**: Highly durable and resistant to moisture, costing around $600 to $1,000 per stall. 2. **Installation Costs**: - Installation costs can range from $200 to $500 per stall, depending on the complexity of the installation and local labor rates. 3. **Additional Costs**: - **Hardware and Accessories**: Locks, handles, and other hardware can add $50 to $150 per stall. - **Customizations**: Special finishes, colors, or custom designs can increase costs. - **Demolition and Disposal**: If old partitions need to be removed, this can add $100 to $300 per stall. 4. **Total Estimated Costs**: - For a basic setup with powder-coated steel, expect to pay around $500 to $1,000 per stall, including installation. - For high-end materials like stainless steel, costs can rise to $1,200 to $1,700 per stall. Overall, the total cost for a commercial restroom with multiple stalls can range from a few thousand dollars to tens of thousands, depending on the specific requirements and choices made.

How do you choose the right bathroom partition hardware?

To choose the right bathroom partition hardware, consider the following factors: 1. **Material**: Select hardware made from durable materials like stainless steel, aluminum, or zinc alloy. Stainless steel is corrosion-resistant and ideal for high-moisture environments, while aluminum is lightweight and cost-effective. 2. **Finish**: Choose a finish that complements the bathroom's aesthetic. Options include polished, satin, or powder-coated finishes. A satin finish hides fingerprints and scratches better, while polished finishes offer a sleek look. 3. **Type of Partition**: Different partition materials (e.g., solid plastic, laminate, phenolic) require specific hardware. Ensure compatibility with the partition type to ensure stability and longevity. 4. **Usage and Traffic**: For high-traffic areas, opt for heavy-duty hardware that can withstand frequent use. Consider features like self-closing hinges and robust latches for added durability. 5. **Compliance and Safety**: Ensure hardware meets local building codes and ADA (Americans with Disabilities Act) requirements if applicable. This includes proper door clearance and accessible latch mechanisms. 6. **Installation and Maintenance**: Choose hardware that is easy to install and maintain. Quick-release hinges and simple latch mechanisms can reduce maintenance time and costs. 7. **Cost**: Balance quality with budget. While higher-quality hardware may have a higher upfront cost, it often results in lower maintenance and replacement expenses over time. 8. **Brand Reputation**: Opt for reputable brands known for quality and reliability. Check reviews and seek recommendations to ensure you select hardware that performs well over time. By considering these factors, you can select bathroom partition hardware that is functional, durable, and aesthetically pleasing, ensuring a long-lasting and user-friendly restroom environment.

What are the ADA requirements for bathroom partitions?

The ADA (Americans with Disabilities Act) requirements for bathroom partitions focus on ensuring accessibility for individuals with disabilities. Key requirements include: 1. **Stall Dimensions**: Accessible stalls must be at least 60 inches wide and 56 inches deep for wall-mounted toilets, or 59 inches deep for floor-mounted toilets. 2. **Door Specifications**: Doors should be at least 32 inches wide when open at 90 degrees. They must swing outward or be sliding/folding to avoid obstructing the stall space. 3. **Clearance**: There should be a clear floor space of at least 60 inches in diameter or a T-shaped space for wheelchair turning. 4. **Grab Bars**: Grab bars must be installed on the side wall closest to the toilet and the rear wall. They should be 33-36 inches above the floor and have a diameter of 1.25 to 1.5 inches. 5. **Toilet Location**: The centerline of the toilet must be 16-18 inches from the side wall or partition. 6. **Toilet Paper Dispensers**: These should be installed 7-9 inches in front of the toilet and at least 15 inches above the floor. 7. **Door Hardware**: Handles, locks, and latches should be operable with one hand without tight grasping, pinching, or twisting of the wrist, and mounted no higher than 48 inches above the floor. 8. **Coat Hooks and Shelves**: If provided, coat hooks should be no more than 48 inches above the floor, and shelves should be no more than 40 inches above the floor. These requirements ensure that bathroom partitions are accessible and usable by individuals with disabilities, promoting inclusivity and compliance with ADA standards.

How do you repair a damaged bathroom partition panel?

To repair a damaged bathroom partition panel, follow these steps: 1. **Assess the Damage**: Determine the extent of the damage. If it's minor, such as scratches or small dents, it may be repairable. For severe damage, consider replacing the panel. 2. **Gather Materials**: You will need sandpaper, a putty knife, filler (such as epoxy or wood filler, depending on the material), primer, paint, and a paintbrush or roller. 3. **Clean the Area**: Use a mild detergent and water to clean the damaged area. Ensure it is dry before proceeding. 4. **Sand the Surface**: Use sandpaper to smooth out the damaged area and remove any loose material. This helps the filler adhere better. 5. **Apply Filler**: Use a putty knife to apply the filler to the damaged area. Smooth it out and ensure it fills all gaps. Allow it to dry according to the manufacturer's instructions. 6. **Sand Again**: Once the filler is dry, sand the area again to ensure it is smooth and level with the rest of the panel. 7. **Prime the Surface**: Apply a primer to the repaired area to ensure the paint adheres properly. Let it dry completely. 8. **Paint the Panel**: Use a paint that matches the existing color of the partition. Apply evenly with a brush or roller. You may need multiple coats for full coverage. Allow each coat to dry before applying the next. 9. **Inspect and Finish**: Once the paint is dry, inspect the repair. If necessary, apply additional coats or touch up any areas. 10. **Reinstall (if removed)**: If the panel was removed for repair, reinstall it securely. This process will restore the appearance and functionality of the bathroom partition panel.