Call +(254) 703 030 000 / 751 483 999 / 721 704 777
Frequently Asked Questions
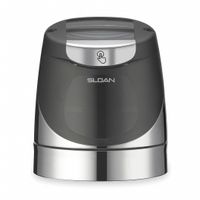
What is a flush valve and how does it work?
A flush valve is a component in a toilet tank responsible for releasing water into the bowl to facilitate flushing. It is typically located at the bottom of the tank and is connected to the flush handle or button. When the handle is pressed or the button is activated, the flush valve opens, allowing water to rush from the tank into the bowl, creating the necessary force to clear waste and refill the bowl with fresh water.
The flush valve consists of several key parts: the overflow tube, the flapper or seal, and the valve seat. The overflow tube prevents the tank from overflowing by directing excess water into the bowl. The flapper or seal is a rubber or plastic component that covers the valve seat, creating a watertight seal to hold water in the tank. When the flush handle is activated, a chain or lift wire connected to the handle lifts the flapper, opening the valve seat and allowing water to flow into the bowl.
Once the water is released, the flapper falls back into place, sealing the valve seat and allowing the tank to refill. The refill process is controlled by a fill valve, which regulates the water level in the tank. The flush valve's design ensures efficient water use and effective waste removal, contributing to the overall functionality of the toilet system.
How do I choose the right flush valve for my toilet or urinal?
To choose the right flush valve for your toilet or urinal, consider the following factors:
1. **Type of Fixture**: Determine if you need a flush valve for a toilet or a urinal, as they have different flow requirements.
2. **Compatibility**: Ensure the flush valve is compatible with your fixture's brand and model. Check the manufacturer's specifications for recommended valve types.
3. **Flush Volume**: Select a valve with the appropriate flush volume. Toilets typically use 1.28 to 1.6 gallons per flush (GPF), while urinals use 0.125 to 1.0 GPF. Choose based on water efficiency needs and local regulations.
4. **Valve Type**: Decide between manual, automatic (sensor-operated), or dual-flush valves. Manual valves are cost-effective, while automatic valves offer convenience and hygiene. Dual-flush valves provide options for water conservation.
5. **Installation Requirements**: Consider the installation process. Some valves require professional installation, while others are DIY-friendly. Ensure you have the necessary tools and skills if installing yourself.
6. **Material and Durability**: Look for valves made from durable materials like brass or stainless steel for longevity. Plastic valves are less expensive but may not last as long.
7. **Water Pressure**: Check your plumbing system's water pressure. Some valves require a minimum pressure to function properly. Ensure compatibility to avoid performance issues.
8. **Brand and Warranty**: Choose reputable brands known for quality and reliability. Check for warranties that offer protection against defects and ensure peace of mind.
9. **Budget**: Balance cost with features and quality. While cheaper options are available, investing in a high-quality valve can save money in the long run through durability and water savings.
10. **Local Codes and Standards**: Ensure the valve complies with local plumbing codes and standards for water efficiency and safety.
What are the benefits of using a flush valve retrofit kit?
A flush valve retrofit kit offers several benefits for both residential and commercial plumbing systems. Firstly, it enhances water efficiency by replacing older, less efficient flush mechanisms with modern, water-saving technology. This can lead to significant reductions in water usage, lowering utility bills and contributing to environmental conservation.
Secondly, these kits improve the performance and reliability of toilets. They often include components that ensure a more powerful and effective flush, reducing the likelihood of clogs and the need for multiple flushes. This not only conserves water but also enhances user satisfaction.
Installation of a flush valve retrofit kit is typically straightforward and cost-effective. It allows for the upgrade of existing toilets without the need for complete replacement, saving on labor and material costs. This makes it an attractive option for property owners looking to modernize their facilities without extensive renovations.
Additionally, many retrofit kits are designed to be compatible with a wide range of toilet models, providing flexibility and ease of selection. They often come with adjustable settings, allowing users to customize the flush volume according to their specific needs, further optimizing water usage.
Flush valve retrofit kits also contribute to sustainability goals. By reducing water consumption, they help in conserving natural resources and minimizing the environmental impact of water treatment and distribution systems.
Finally, these kits can extend the lifespan of existing toilets by replacing worn-out components, thus delaying the need for complete replacements. This not only saves money but also reduces waste, aligning with sustainable practices.
In summary, flush valve retrofit kits offer water efficiency, improved performance, cost savings, ease of installation, compatibility, sustainability, and extended toilet lifespan, making them a valuable upgrade for any plumbing system.
How do I install a flush valve or retrofit kit?
1. **Turn Off Water Supply**: Locate the shut-off valve near the toilet and turn it clockwise to stop the water flow.
2. **Drain the Tank**: Flush the toilet to empty the tank. Use a sponge or towel to soak up any remaining water.
3. **Remove Old Flush Valve**: Disconnect the water supply line from the tank. Unscrew the tank bolts using a wrench and remove the tank from the bowl. Take out the old flush valve by unscrewing the locknut at the bottom of the tank.
4. **Prepare New Flush Valve**: If using a retrofit kit, follow the manufacturer's instructions to assemble the new flush valve. Ensure all gaskets and seals are in place.
5. **Install New Flush Valve**: Insert the new flush valve into the tank's hole. Secure it with the locknut from underneath. Ensure the overflow tube is aligned properly.
6. **Reattach Tank to Bowl**: Place the tank back onto the bowl, aligning the bolt holes. Insert new tank bolts with washers and tighten them evenly to avoid leaks.
7. **Reconnect Water Supply**: Attach the water supply line to the fill valve. Ensure all connections are tight.
8. **Test the Installation**: Turn the water supply back on. Allow the tank to fill and check for leaks around the flush valve and tank bolts. Adjust the water level if necessary.
9. **Adjust Flush Mechanism**: If the flush is not working properly, adjust the chain length or float according to the manufacturer's instructions.
10. **Final Check**: Flush the toilet several times to ensure everything is functioning correctly and there are no leaks. Adjust as needed.
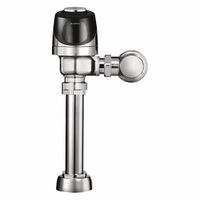
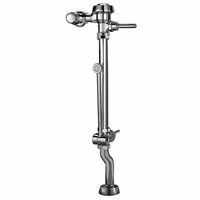
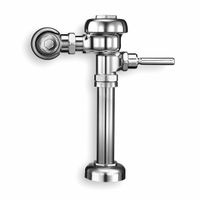
What is the difference between manual and automatic flush valves?
Manual flush valves require physical interaction to operate, typically through a lever, button, or handle. Users must manually activate the flushing mechanism, which opens a valve to release water from the tank or directly from the supply line to cleanse the toilet or urinal. These systems are generally simpler, less expensive, and easier to maintain due to fewer components. However, they rely on user compliance for proper hygiene and water conservation, as users may not always flush after use.
Automatic flush valves, on the other hand, utilize sensors to detect when a toilet or urinal has been used. These sensors, often infrared or ultrasonic, trigger the flushing mechanism without the need for physical contact. This touchless operation enhances hygiene by reducing the spread of germs and bacteria. Automatic systems can also be programmed to optimize water usage, ensuring consistent and efficient flushing. They are more complex and typically more expensive than manual systems, requiring a power source, such as batteries or a direct electrical connection, and may need more frequent maintenance due to their electronic components.
In summary, the primary difference lies in the operation method: manual systems require user interaction, while automatic systems use sensors for touchless operation. Manual systems are cost-effective and straightforward but depend on user compliance, whereas automatic systems offer improved hygiene and water efficiency at a higher cost and complexity.
How do I maintain and troubleshoot a flush valve?
To maintain and troubleshoot a flush valve, follow these steps:
1. **Regular Inspection**: Check for leaks, corrosion, or wear. Inspect the handle, chain, and flapper for any signs of damage.
2. **Cleaning**: Mineral deposits can cause malfunction. Clean the valve seat and flapper with vinegar or a mild cleaning solution to remove buildup.
3. **Adjusting the Chain**: Ensure the chain connecting the handle to the flapper is neither too tight nor too loose. It should have a slight slack to allow the flapper to seal properly.
4. **Flapper Replacement**: If the flapper is worn or damaged, replace it. Turn off the water supply, flush the toilet to empty the tank, remove the old flapper, and install a new one.
5. **Check the Fill Valve**: Ensure the fill valve is functioning correctly. Adjust the float to maintain the correct water level, usually about an inch below the overflow tube.
6. **Seal Replacement**: If the flush valve seal is worn, replace it. Turn off the water, remove the tank lid, and replace the seal at the base of the flush valve.
7. **Handle and Lever Check**: Ensure the handle and lever move freely. Tighten any loose connections and replace any broken parts.
8. **Water Supply**: Ensure the water supply is fully open. A partially closed valve can affect flushing performance.
9. **Troubleshooting Common Issues**:
- **Running Toilet**: Check the flapper and fill valve for proper sealing and operation.
- **Weak Flush**: Ensure the water level is correct and the siphon jet is clear of obstructions.
- **Noisy Fill**: Inspect the fill valve for debris and clean or replace it if necessary.
10. **Professional Help**: If problems persist, consult a plumber to avoid further damage.
What is the typical lifespan of a flush valve or retrofit kit?
The typical lifespan of a flush valve or retrofit kit can vary based on several factors, including the quality of the product, frequency of use, water quality, and maintenance practices. Generally, a well-manufactured flush valve or retrofit kit can last anywhere from 5 to 10 years.
High-quality materials and construction play a significant role in the longevity of these components. Flush valves made from durable materials such as brass or high-grade plastic tend to have a longer lifespan compared to those made from lower-quality materials. Additionally, products from reputable manufacturers often come with warranties that can provide an indication of expected durability.
The frequency of use is another critical factor. In high-traffic areas, such as public restrooms, flush valves and retrofit kits may experience more wear and tear, potentially reducing their lifespan. Conversely, in residential settings with less frequent use, these components may last longer.
Water quality also impacts the lifespan of flush valves and retrofit kits. Hard water, which contains high levels of minerals, can lead to the buildup of scale and deposits, causing wear and reducing the efficiency and lifespan of the components. Regular maintenance, such as cleaning and descaling, can mitigate these effects and extend the lifespan.
Proper installation and regular maintenance are crucial for maximizing the lifespan of flush valves and retrofit kits. Routine inspections to check for leaks, wear, and proper functioning can help identify issues early and prevent more significant problems. Replacing worn-out parts promptly can also extend the overall lifespan of the system.
In summary, while the typical lifespan of a flush valve or retrofit kit is 5 to 10 years, this can be influenced by product quality, usage frequency, water quality, and maintenance practices. Regular care and attention can help ensure these components function effectively for as long as possible.