Call +(254) 703 030 000 / 751 483 999 / 721 704 777

Frequently Asked Questions
What are the most common toilet repair parts needed?
The most common toilet repair parts needed include:
1. **Flapper**: This rubber component seals the flush valve and controls water release from the tank to the bowl. Over time, it can warp or degrade, causing leaks or incomplete flushing.
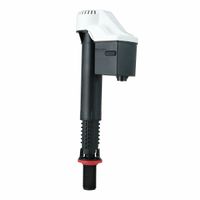
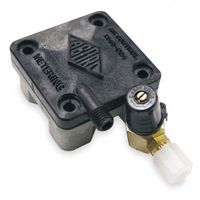
2. **Fill Valve**: This part controls the water level in the tank. A malfunctioning fill valve can lead to continuous running water or insufficient water in the tank.
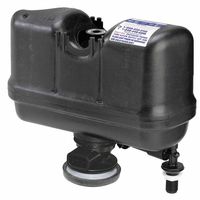
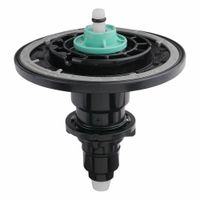
3. **Flush Valve**: This assembly includes the overflow tube and the seat for the flapper. It can wear out, leading to leaks or inefficient flushing.
4. **Toilet Handle and Lift Chain**: The handle initiates the flush, and the chain connects it to the flapper. If either breaks or becomes disconnected, the toilet won't flush properly.
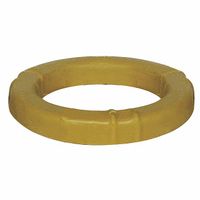
5. **Wax Ring**: This seal between the toilet base and the floor flange prevents leaks. It can degrade over time, leading to water leakage at the base of the toilet.
6. **Tank Bolts and Gaskets**: These secure the tank to the bowl and ensure a watertight seal. Corrosion or wear can cause leaks between the tank and bowl.
7. **Ballcock**: An older type of fill valve that can wear out, leading to water flow issues.
8. **Float Ball and Arm**: Part of the fill valve system, they regulate the water level in the tank. If they malfunction, it can cause overfilling or insufficient filling.
9. **Flush Lever**: The external handle that can break or become loose, preventing proper flushing.
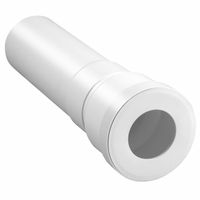
10. **Supply Line**: This connects the water supply to the toilet. Leaks or blockages can occur if it becomes damaged or worn.
These parts are essential for maintaining a functional toilet and addressing common issues like leaks, running water, and flushing problems.
How do I fix a running toilet?
To fix a running toilet, follow these steps:
1. **Turn Off Water Supply**: Locate the shut-off valve behind the toilet and turn it clockwise to stop water flow.
2. **Remove Tank Lid**: Carefully lift the lid off the tank and set it aside.
3. **Check the Flapper**: Inspect the rubber flapper at the bottom of the tank. If it's worn or not sealing properly, it may need replacement. Turn off the water, drain the tank, and replace the flapper if necessary.
4. **Adjust the Chain**: Ensure the chain connecting the flapper to the flush handle is not too tight or too loose. It should have a little slack but not so much that it gets caught under the flapper.
5. **Inspect the Fill Valve**: Check the fill valve for proper operation. If water is continuously flowing into the overflow tube, adjust the float. For a float ball, bend the arm gently to lower the water level. For a float cup, use the adjustment screw or clip to set the correct water level.
6. **Examine the Overflow Tube**: Ensure the water level is about an inch below the top of the overflow tube. Adjust the fill valve as needed to maintain this level.
7. **Test the Flush**: Turn the water supply back on and let the tank fill. Flush the toilet to ensure the problem is resolved. Check for leaks or continuous running.
8. **Replace Parts if Needed**: If adjustments don't work, consider replacing the fill valve or other faulty components.
9. **Reattach Tank Lid**: Once the toilet is functioning correctly, place the lid back on the tank.
These steps should help resolve most running toilet issues. If problems persist, consult a plumber.
What tools are required for toilet repair?
For toilet repair, the following tools are typically required:
1. **Adjustable Wrench**: Useful for loosening and tightening nuts and bolts, especially those connecting the toilet to the water supply line.
2. **Plunger**: Essential for unclogging toilets by creating suction to dislodge blockages.
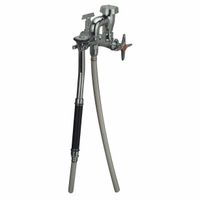
3. **Toilet Auger (or Closet Auger)**: A specialized tool for breaking up or retrieving obstructions further down the toilet drain.
4. **Screwdriver Set**: Both flathead and Phillips screwdrivers are needed for removing and installing screws on the toilet seat, tank lid, or other components.
5. **Tongue-and-Groove Pliers**: Handy for gripping and turning pipes and fittings, especially in tight spaces.
6. **Putty Knife**: Used for scraping off old wax rings or caulk when replacing a toilet or resealing it.
7. **Level**: Ensures the toilet is properly aligned and not tilted, which can prevent leaks and ensure proper function.
8. **Hacksaw**: May be needed to cut through rusted bolts or pipes that cannot be loosened.
9. **Caulking Gun**: For applying caulk around the base of the toilet to prevent leaks and secure it in place.
10. **Bucket and Sponge**: Useful for cleaning up water spills and ensuring the area is dry before and after repairs.
11. **Tape Measure**: Ensures accurate measurements when replacing parts or installing a new toilet.
12. **Flashlight**: Provides better visibility in dimly lit areas, especially when working under the toilet or in the tank.
13. **Replacement Parts**: Such as a wax ring, flapper, fill valve, or flush valve, depending on the specific repair needed.
These tools cover most common toilet repair tasks, from fixing leaks and clogs to replacing parts.
How do I replace a toilet fill valve?
1. **Turn Off Water Supply**: Locate the shut-off valve near the base of the toilet and turn it clockwise to stop the water flow.
2. **Drain the Tank**: Flush the toilet to empty the tank. Hold the handle down to remove as much water as possible. Use a sponge or towel to soak up any remaining water in the tank.
3. **Disconnect Water Supply Line**: Use an adjustable wrench to unscrew the water supply line from the bottom of the fill valve under the tank.
4. **Remove Old Fill Valve**: Inside the tank, unscrew the locknut at the base of the fill valve using pliers or a wrench. Lift the old fill valve out of the tank.
5. **Prepare New Fill Valve**: Adjust the height of the new fill valve according to the tank’s height. Follow the manufacturer’s instructions for proper adjustment.
6. **Install New Fill Valve**: Insert the new fill valve into the tank’s hole. Secure it with the locknut from underneath the tank. Ensure it is tight but not overly so to avoid cracking the tank.
7. **Reconnect Water Supply Line**: Attach the water supply line to the new fill valve’s threaded shank. Tighten with a wrench, ensuring a snug fit without over-tightening.
8. **Attach Refill Tube**: Connect the refill tube from the fill valve to the overflow pipe. Ensure it is positioned correctly to direct water into the overflow pipe.
9. **Turn On Water Supply**: Slowly turn the shut-off valve counterclockwise to restore water flow. Allow the tank to fill and check for leaks.
10. **Test the Toilet**: Flush the toilet to ensure the new fill valve operates correctly. Adjust the fill valve’s float if necessary to achieve the desired water level.
11. **Check for Leaks**: Inspect all connections for leaks and tighten if needed.
What is the best way to fix a leaking toilet tank?
To fix a leaking toilet tank, first turn off the water supply to the toilet by closing the shut-off valve located behind or near the toilet. Flush the toilet to empty the tank and use a sponge or towel to remove any remaining water. Identify the source of the leak, which could be from the fill valve, flush valve, or tank bolts.
If the fill valve is leaking, replace the washer or the entire valve. To do this, disconnect the water supply line, remove the old fill valve, and install a new one according to the manufacturer's instructions. Adjust the float to ensure the correct water level.
For a leaking flush valve, remove the tank lid and inspect the flapper. If it's worn or damaged, replace it with a new one. Turn off the water supply, remove the old flapper, and attach the new one to the flush valve. Ensure it seals properly to prevent leaks.
If the leak is from the tank bolts, tighten them with a wrench. If tightening doesn't stop the leak, replace the rubber washers and bolts. Drain the tank, remove the old bolts, and install new ones with rubber washers on both sides of the tank to ensure a watertight seal.
After repairs, turn the water supply back on and let the tank fill. Check for leaks by observing the tank and floor around the toilet. If leaks persist, consider consulting a professional plumber for further assistance.
How do I install a toilet flange?
1. **Gather Materials**: Toilet flange, wax ring, screws, screwdriver, putty knife, measuring tape, and a hacksaw (if needed).
2. **Remove Old Flange**: Turn off water supply and flush toilet to empty the tank. Disconnect water line and remove the toilet. Use a putty knife to scrape off the old wax ring. Unscrew and remove the old flange.
3. **Inspect and Clean**: Check the condition of the drain pipe. Clean the area thoroughly to ensure a good seal.
4. **Measure and Cut**: Measure the distance from the finished floor to the top of the drain pipe. If the flange is too high, use a hacksaw to trim the pipe.
5. **Position New Flange**: Place the new flange over the drain pipe. Ensure it sits flush with the finished floor. The slots for the toilet bolts should be parallel to the wall.
6. **Secure Flange**: Use screws to secure the flange to the floor. Ensure it is tightly fastened and does not wobble.
7. **Install Wax Ring**: Place a new wax ring on the flange. Ensure it is centered and properly seated.
8. **Reinstall Toilet**: Carefully lower the toilet onto the flange, aligning the bolt holes. Press down firmly to compress the wax ring and create a seal.
9. **Secure Toilet**: Tighten the nuts onto the bolts, alternating sides to ensure even pressure. Do not overtighten to avoid cracking the porcelain.
10. **Reconnect Water Supply**: Reattach the water line and turn on the water supply. Flush the toilet to check for leaks.
11. **Final Check**: Ensure the toilet is stable and there are no leaks around the base. Adjust as necessary.
What are the signs that a toilet needs repair?
1. **Constant Running Water**: If the toilet continues to run after flushing, it may indicate a faulty flapper, fill valve, or float.
2. **Weak Flush**: A weak or incomplete flush can suggest a clog, low water level in the tank, or issues with the flush valve.
3. **Leaking Water**: Water pooling around the base or dripping from the tank can indicate a cracked bowl, faulty wax ring, or loose connections.
4. **Unusual Noises**: Gurgling, hissing, or whistling sounds can point to issues with the fill valve or air trapped in the pipes.
5. **Frequent Clogs**: Regular clogs may suggest a blockage in the trap, drain line, or vent pipe.
6. **Wobbling or Unstable Base**: A toilet that rocks or moves can indicate loose bolts or a damaged flange.
7. **Cracks in the Porcelain**: Visible cracks in the tank or bowl can lead to leaks and structural failure.
8. **Slow Tank Refill**: If the tank takes too long to refill, it may be due to a malfunctioning fill valve or low water pressure.
9. **Stains or Rust**: Persistent stains or rust in the bowl or tank can indicate mineral buildup or corrosion.
10. **Water Level Fluctuations**: Inconsistent water levels in the bowl can suggest a problem with the fill valve or a partial clog.
11. **Sewer Odors**: Foul smells emanating from the toilet can indicate a broken seal or venting issue.
12. **Increased Water Bills**: A sudden spike in water bills can be a sign of a hidden leak or inefficient toilet operation.