Call +(254) 703 030 000 / 751 483 999 / 721 704 777
.....Read More

Frequently Asked Questions
What are the essential components needed for setting up an IV?
To set up an intravenous (IV) line, the essential components include:
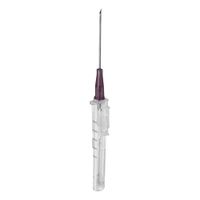
1. **IV Catheter**: A sterile, flexible tube inserted into a vein. It comes in various gauges, with the size chosen based on the patient's needs and the type of fluid or medication to be administered.
2. **Tourniquet**: A band used to constrict blood flow, making veins more prominent and easier to access.
3. **Antiseptic Wipes**: Used to clean the insertion site to prevent infection. Common antiseptics include alcohol swabs or chlorhexidine.
4. **IV Solution Bag**: Contains the fluid to be administered, such as saline, dextrose, or medication-infused solutions.
5. **IV Administration Set**: Includes tubing that connects the IV bag to the catheter. It often has a drip chamber, roller clamp, and injection ports.
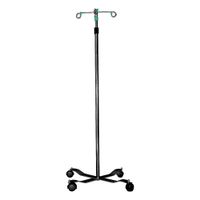
6. **IV Pole or Stand**: Holds the IV bag above the patient to allow gravity to assist in fluid flow.
7. **Saline Flush Syringe**: Used to clear the IV line of air and ensure patency before and after medication administration.
8. **Adhesive Tape or Tegaderm**: Secures the catheter and tubing to the patient's skin to prevent dislodgement.
9. **Gauze or Cotton Ball**: Applied to the insertion site post-procedure to manage any bleeding.
10. **Gloves**: Worn by the healthcare provider to maintain sterility and protect against infection.
11. **Sharps Container**: For safe disposal of needles and other sharp instruments.
12. **Labeling Materials**: To document the date, time, and type of fluid or medication administered.
These components ensure the IV setup is safe, effective, and minimizes the risk of complications.
How do you properly insert an IV catheter?
1. **Preparation**: Gather all necessary supplies: IV catheter, tourniquet, antiseptic wipes, gloves, tape, gauze, and a saline flush. Verify patient identity and explain the procedure.
2. **Site Selection**: Choose a suitable vein, typically in the forearm or hand. Avoid areas near joints or previously used sites.
3. **Hand Hygiene and Gloves**: Perform hand hygiene and wear gloves to maintain aseptic technique.
4. **Tourniquet Application**: Apply the tourniquet 4-6 inches above the selected site to engorge the vein. Ensure it is not too tight to avoid discomfort.
5. **Vein Palpation and Cleansing**: Palpate the vein to confirm its location and direction. Clean the site with antiseptic wipes in a circular motion, moving outward. Allow it to dry.
6. **Catheter Insertion**: Hold the catheter at a 15-30 degree angle with the bevel up. Stabilize the vein with your non-dominant hand. Insert the needle into the vein until a flashback of blood is seen in the catheter hub.
7. **Advancement and Needle Removal**: Lower the angle and advance the catheter slightly. Hold the needle steady and advance the catheter into the vein. Once in place, retract the needle while holding the catheter steady.
8. **Tourniquet Release and Securement**: Release the tourniquet. Secure the catheter with tape, ensuring it is not too tight to restrict blood flow.
9. **Flush and Check for Patency**: Attach the saline flush to the catheter hub and gently flush to ensure patency and check for infiltration or leakage.
10. **Final Securement and Documentation**: Secure the catheter with additional tape or a transparent dressing. Document the procedure, including the site, size of the catheter, and any patient reactions.
11. **Monitor**: Regularly check the site for signs of infection, infiltration, or phlebitis.
What are the different types of IV fluids and their uses?
Intravenous (IV) fluids are categorized into crystalloids and colloids, each serving distinct medical purposes.
**Crystalloids:**
1. **Normal Saline (0.9% NaCl):** Isotonic solution used for fluid resuscitation, dehydration, and as a vehicle for drug delivery.
2. **Lactated Ringer’s (LR):** Isotonic solution containing electrolytes, used for fluid resuscitation, especially in burn and trauma patients.
3. **Dextrose 5% in Water (D5W):** Initially isotonic, becomes hypotonic after metabolism. Used for providing free water and calories.
4. **Half Normal Saline (0.45% NaCl):** Hypotonic solution used for hypernatremia and as a maintenance fluid.
5. **Dextrose 5% in Normal Saline (D5NS):** Hypertonic solution used for providing calories and sodium chloride.
6. **Dextrose 5% in Half Normal Saline (D5 0.45% NaCl):** Hypertonic solution used for maintenance fluid and caloric supply.
**Colloids:**
1. **Albumin:** Used for volume expansion in hypoalbuminemia, liver cirrhosis, and nephrotic syndrome.
2. **Hydroxyethyl Starch (HES):** Used for volume expansion, though less favored due to potential renal complications.
3. **Dextran:** Used for volume expansion, but less common due to risk of anaphylaxis and bleeding.
4. **Gelatins:** Used for volume expansion, with fewer allergic reactions compared to dextran.
**Uses:**
- **Resuscitation:** Isotonic crystalloids like Normal Saline and LR are preferred.
- **Maintenance:** Hypotonic solutions like Half Normal Saline are used.
- **Nutritional Support:** Dextrose solutions provide calories.
- **Volume Expansion:** Colloids are used when rapid volume expansion is needed.
Each type of IV fluid is selected based on the patient's specific needs, underlying conditions, and the desired therapeutic effect.
How do you troubleshoot common IV setup issues?
To troubleshoot common IV setup issues, follow these steps:
1. **Check the Equipment**: Ensure all equipment is sterile and intact. Inspect the IV bag for leaks or cloudiness, and confirm the expiration date. Verify that the tubing is free of kinks or blockages.
2. **Assess the Site**: Examine the insertion site for signs of infiltration, phlebitis, or infection, such as redness, swelling, or pain. If any are present, discontinue the IV and select a new site.
3. **Verify Connections**: Ensure all connections between the IV bag, tubing, and catheter are secure. Loose connections can lead to leaks or air entering the line.
4. **Adjust the Flow Rate**: If the flow rate is incorrect, check the roller clamp or electronic infusion pump settings. Ensure the pump is programmed correctly and functioning.
5. **Remove Air Bubbles**: If air bubbles are present in the line, disconnect the tubing from the patient, and gently tap the line while priming it to remove air.
6. **Check for Occlusions**: If the IV is not flowing, check for occlusions in the line or catheter. Gently flush the line with saline to clear minor blockages.
7. **Monitor for Patient Reactions**: Observe the patient for adverse reactions, such as allergic responses or fluid overload. Adjust the IV setup as needed based on the patient's condition.
8. **Re-evaluate the Setup**: If issues persist, re-evaluate the entire setup, including the choice of catheter size and site selection, and consult with a colleague or supervisor if necessary.
9. **Documentation**: Record any issues and interventions in the patient's chart for future reference and continuity of care.
By systematically addressing these areas, most common IV setup issues can be resolved efficiently.
What are the best practices for maintaining IV site hygiene?
1. **Hand Hygiene**: Perform hand hygiene before and after handling the IV site using soap and water or an alcohol-based hand sanitizer.
2. **Site Selection and Preparation**: Choose an appropriate site, avoiding areas of flexion. Clean the site with an antiseptic solution like chlorhexidine, allowing it to dry completely before insertion.
3. **Aseptic Technique**: Use sterile gloves and equipment during insertion. Maintain a sterile field to prevent contamination.
4. **Securement and Dressing**: Use a sterile, transparent dressing to cover the IV site. Ensure the dressing is secure but not too tight, allowing for visibility and monitoring.
5. **Regular Inspection**: Inspect the IV site regularly for signs of infection, infiltration, or phlebitis. Look for redness, swelling, warmth, or pain.
6. **Dressing Changes**: Change the dressing according to hospital protocol or if it becomes damp, loose, or soiled. Use aseptic technique during dressing changes.
7. **Tubing and Connector Care**: Change IV tubing and connectors as per guidelines. Use aseptic technique when accessing the IV line.
8. **Patient Education**: Educate the patient on signs of infection and the importance of not touching the IV site.
9. **Documentation**: Document the condition of the IV site, dressing changes, and any complications in the patient’s medical record.
10. **Prompt Removal**: Remove the IV catheter as soon as it is no longer needed to reduce the risk of infection.
11. **Use of Antimicrobial Dressings**: Consider using antimicrobial dressings for patients at high risk of infection.
12. **Staff Training**: Regularly train healthcare staff on the latest IV site care protocols and infection control practices.
How do you calculate the correct IV drip rate?
To calculate the correct IV drip rate, follow these steps:
1. **Determine the Volume to be Infused (V):** This is the total amount of fluid that needs to be administered, usually measured in milliliters (mL).
2. **Determine the Time for Infusion (T):** This is the total time over which the fluid should be administered, typically measured in hours.
3. **Determine the Drop Factor (DF):** This is the number of drops per milliliter (gtt/mL) delivered by the IV tubing, which is usually provided on the IV set packaging. Common drop factors are 10, 15, 20, or 60 gtt/mL.
4. **Calculate the Drip Rate (R):** Use the formula:
\[
R = \left( \frac{V \times DF}{T \times 60} \right)
\]
Where:
- \( R \) is the drip rate in drops per minute (gtt/min).
- \( V \) is the volume in mL.
- \( DF \) is the drop factor in gtt/mL.
- \( T \) is the time in hours, converted to minutes by multiplying by 60.
5. **Example Calculation:**
- If you need to infuse 1000 mL over 8 hours with a drop factor of 20 gtt/mL:
\[
R = \left( \frac{1000 \times 20}{8 \times 60} \right) = \left( \frac{20000}{480} \right) \approx 41.67
\]
Round to the nearest whole number, so the drip rate is approximately 42 gtt/min.
6. **Adjust as Necessary:** Monitor the patient and adjust the rate as needed based on clinical response and physician orders.
This method ensures accurate delivery of IV fluids, crucial for patient safety and treatment efficacy.
What are the potential complications of IV therapy and how can they be prevented?
Potential complications of IV therapy include:
1. **Infiltration**: Occurs when IV fluid leaks into surrounding tissue. Prevention involves regular monitoring of the IV site for swelling, coolness, or discomfort, and ensuring proper catheter placement.
2. **Phlebitis**: Inflammation of the vein, often due to irritation from the catheter or medication. Prevention includes using the smallest gauge catheter possible, rotating IV sites regularly, and ensuring proper aseptic technique.
3. **Infection**: Can occur at the insertion site or systemically. Prevention requires strict adherence to aseptic techniques, regular site inspection, and timely replacement of IV equipment.
4. **Air Embolism**: Air entering the bloodstream can be life-threatening. Prevention involves ensuring all air is expelled from syringes and IV tubing before connection and using air detection devices in infusion pumps.
5. **Fluid Overload**: Excessive fluid administration can lead to heart failure or pulmonary edema. Prevention includes careful calculation of fluid needs, monitoring patient weight, and observing for signs of overload like edema or respiratory distress.
6. **Allergic Reactions**: Can occur with certain medications or IV materials. Prevention involves thorough patient history taking for allergies and close monitoring during initial administration.
7. **Thrombosis**: Formation of a blood clot in the vein. Prevention includes using the smallest catheter possible, ensuring proper catheter stabilization, and encouraging patient mobility.
8. **Extravasation**: Leakage of vesicant drugs into tissue causing damage. Prevention involves using central lines for vesicant drugs, frequent site monitoring, and immediate action if extravasation is suspected.
9. **Catheter Embolism**: A piece of catheter breaks off and enters the bloodstream. Prevention includes careful handling during insertion and removal, and using appropriate equipment.
Regular training and adherence to protocols are essential for preventing these complications.