Call +(254) 703 030 000 / 751 483 999 / 721 704 777
.....Read More


Frequently Asked Questions
What do different warning light colors mean?
Warning light colors on a vehicle's dashboard indicate the severity and type of issue that needs attention:
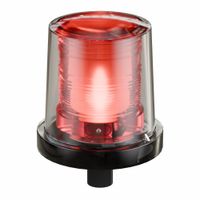
1. **Red Lights**: These signify a serious problem or safety issue that requires immediate attention. Common red lights include the brake warning light, engine temperature warning, and oil pressure warning. If a red light appears, it is advisable to stop the vehicle safely and address the issue promptly.
2. **Yellow/Amber Lights**: These indicate a cautionary issue that should be checked soon but is not immediately critical. Examples include the check engine light, ABS warning, and tire pressure monitoring system light. While the vehicle can still be driven, it is important to diagnose and fix the problem to prevent further damage.
3. **Green/Blue Lights**: These are informational and indicate that a system is active or functioning as intended. For instance, the green light might show that the cruise control is engaged, while a blue light often indicates high beam headlights are on. These lights do not require any action.
4. **Orange Lights**: Similar to yellow lights, orange lights suggest a system that needs attention but is not urgent. They often relate to emissions or other non-critical systems.
Understanding these colors helps prioritize vehicle maintenance and ensures safety on the road.
How do I install a wired warning light?
1. **Select Location**: Choose a visible and accessible spot for the warning light. Ensure it’s near a power source and away from obstructions.
2. **Gather Tools and Materials**: You’ll need the warning light, electrical wire, wire strippers, a screwdriver, a drill, mounting hardware, electrical tape, and a voltage tester.
3. **Turn Off Power**: Switch off the power supply at the circuit breaker to avoid electrical shock.
4. **Mount the Light**: Use a drill to make holes for the mounting bracket. Secure the bracket with screws, then attach the warning light to the bracket.
5. **Run the Wiring**: Measure and cut the electrical wire to the required length. Strip the ends of the wire using wire strippers.
6. **Connect the Wires**:
- **Light End**: Connect the stripped wire ends to the corresponding terminals on the warning light. Typically, black or red is for the live wire, white for neutral, and green or bare for ground.
- **Power Source**: Connect the other end of the wire to the power source. Match the wire colors to the corresponding terminals.
7. **Secure Connections**: Use electrical tape to cover the wire connections, ensuring they are insulated and secure.
8. **Test the Installation**: Turn the power back on at the circuit breaker. Use a voltage tester to ensure the light is receiving power.
9. **Final Check**: Activate the warning light to ensure it functions correctly. Make any necessary adjustments.
10. **Safety Check**: Ensure all wires are properly insulated and secured to prevent short circuits or electrical hazards.
11. **Clean Up**: Tidy up the installation area, ensuring no tools or debris are left behind.
What are the best warning lights for hazardous locations?
The best warning lights for hazardous locations are those specifically designed to withstand and operate safely in environments with explosive gases, dust, or other flammable materials. These lights must meet stringent safety standards and certifications, such as ATEX, IECEx, or UL, to ensure they do not ignite the hazardous atmosphere.
1. **Explosion-Proof Lights**: These are encased in robust housings that can contain any sparks or flames, preventing them from igniting the surrounding environment. They are ideal for areas with high concentrations of flammable gases or vapors.
2. **Intrinsically Safe Lights**: These lights are designed to operate on low power levels, ensuring that they do not produce enough energy to cause ignition. They are suitable for environments where even a small spark could be dangerous.
3. **LED Technology**: LED warning lights are preferred due to their low energy consumption, long lifespan, and ability to operate at lower temperatures, reducing the risk of ignition.
4. **Strobe and Flashing Lights**: These provide high visibility and are effective in alerting personnel to potential dangers. They are often used in conjunction with audible alarms for maximum impact.
5. **Color-Coded Lights**: Different colors can indicate various types of hazards or levels of urgency, helping workers quickly assess the situation.
6. **Durable Construction**: The lights should be made from materials resistant to corrosion, moisture, and extreme temperatures to ensure longevity and reliability in harsh conditions.
7. **Remote Monitoring and Control**: Advanced systems allow for remote operation and monitoring, providing real-time updates and control over the warning systems.
Selecting the right warning lights involves assessing the specific hazards of the location and ensuring compliance with relevant safety standards.
How do portable warning lights work without grid power?
Portable warning lights operate without grid power by utilizing alternative energy sources and efficient energy storage systems. These lights typically rely on batteries, solar panels, or a combination of both to function independently.
1. **Batteries**: Portable warning lights often use rechargeable batteries, such as lithium-ion or nickel-metal hydride, which store electrical energy. These batteries are charged beforehand and can power the lights for extended periods, depending on their capacity and the energy consumption of the lights.
2. **Solar Panels**: Many portable warning lights are equipped with solar panels that convert sunlight into electrical energy. These panels are made of photovoltaic cells that generate electricity when exposed to sunlight. The generated electricity is used to charge the internal batteries, ensuring the lights remain operational even in remote locations without access to grid power.
3. **Energy Efficiency**: Portable warning lights are designed to be energy-efficient, often using LED technology. LEDs consume less power compared to traditional incandescent bulbs, allowing the lights to run longer on the same amount of stored energy. Additionally, LEDs have a longer lifespan, reducing the need for frequent replacements.
4. **Control Systems**: These lights may include control systems that optimize energy usage. Features like automatic on/off switches, motion sensors, or timers help conserve energy by activating the lights only when necessary.
5. **Durability and Weather Resistance**: Portable warning lights are built to withstand various environmental conditions. They are often weatherproof and rugged, ensuring reliable operation in different settings.
By combining these technologies, portable warning lights provide a reliable and sustainable solution for signaling and safety applications without relying on grid power.
What accessories are available for warning lights and strobes?
Accessories for warning lights and strobes enhance their functionality, installation, and maintenance. Common accessories include:
1. **Mounting Brackets and Kits**: These are used to securely attach warning lights and strobes to various surfaces, ensuring stability and optimal visibility. They come in different designs to accommodate various mounting positions, such as roof, bumper, or grille mounts.
2. **Lenses and Covers**: Available in different colors and materials, lenses and covers can modify the light output and protect the internal components from environmental factors like dust, moisture, and UV rays.
3. **Power Supplies and Cables**: These include wiring harnesses, connectors, and adapters that facilitate the connection of warning lights to the vehicle's electrical system. They ensure proper voltage and current supply for optimal performance.
4. **Control Panels and Switches**: These allow users to easily operate and control the light patterns, intensity, and on/off functions. They can be simple toggle switches or more advanced digital control panels.
5. **Flash Patterns and Modules**: Some systems offer programmable modules that allow users to customize flash patterns and sequences, enhancing the visibility and effectiveness of the warning lights.
6. **Synchronization Modules**: These enable multiple lights to flash in a coordinated manner, improving the overall warning effect and ensuring consistent signaling.
7. **Protective Guards and Grilles**: Designed to shield the lights from physical damage, these accessories are particularly useful in rugged environments or where the lights are exposed to potential impacts.
8. **Replacement Bulbs and LEDs**: Essential for maintenance, these ensure that the lights remain functional and bright over time.
9. **Weatherproof Seals and Gaskets**: These accessories help protect the internal components from water ingress and other environmental factors, extending the lifespan of the lights.
10. **Remote Controls**: Allow for wireless operation of the lights, providing convenience and flexibility in controlling the warning systems.
How do I replace a damaged component in a warning light?
1. **Identify the Problem**: Determine which component of the warning light is damaged. Common components include the bulb, wiring, or the housing.
2. **Gather Tools and Replacement Parts**: Obtain the necessary tools such as screwdrivers, pliers, and possibly a multimeter. Purchase the correct replacement part, ensuring it matches the specifications of the damaged component.
3. **Safety First**: Disconnect the power supply to the warning light to prevent electrical shock. If the light is part of a vehicle, disconnect the battery.
4. **Access the Component**: Remove any covers or housings to access the damaged component. This may involve unscrewing or unclipping parts of the light assembly.
5. **Remove the Damaged Component**: Carefully detach the damaged component. For bulbs, this might involve unscrewing or pulling out the bulb. For wiring, you may need to cut or unsolder connections.
6. **Install the Replacement**: Insert or connect the new component. Ensure that bulbs are securely fitted and that wiring connections are properly insulated and secured.
7. **Reassemble the Light**: Replace any covers or housings that were removed. Ensure all screws and clips are tightened to prevent moisture ingress.
8. **Test the Light**: Reconnect the power supply and test the warning light to ensure it functions correctly. If it doesn’t work, recheck connections and installation.
9. **Dispose of Damaged Parts**: Properly dispose of the damaged component, especially if it contains hazardous materials like mercury in some bulbs.
10. **Regular Maintenance**: Periodically check the warning light to ensure it remains in good working condition, preventing future issues.
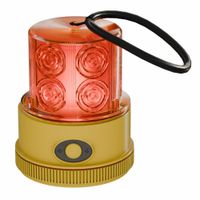
What are the mounting options for warning lights?
Warning lights can be mounted using several options, each suited to different applications and environments:
1. **Permanent Mounting**: This involves securely attaching the warning light to a surface using screws or bolts. It's ideal for long-term installations on vehicles, buildings, or machinery where the light needs to remain fixed.
2. **Magnetic Mounting**: Magnetic bases allow for temporary installation on metal surfaces. This option is popular for vehicles, as it enables easy removal and repositioning without drilling holes.
3. **Pipe Mounting**: Warning lights can be mounted on pipes or poles using brackets or clamps. This is common in industrial settings where lights need to be elevated for visibility.
4. **Surface Mounting**: Lights can be directly attached to flat surfaces using adhesive pads or screws. This method is suitable for both indoor and outdoor applications where a low-profile installation is desired.
5. **Bracket Mounting**: Adjustable brackets allow for flexible positioning and angling of the light. This is useful in situations where the direction of the light beam needs to be changed frequently.
6. **Flush Mounting**: The light is installed so that it sits flush with the mounting surface, providing a sleek appearance. This is often used in architectural applications or on vehicles for aerodynamic purposes.
7. **Suction Cup Mounting**: Suction cups provide a temporary mounting solution on smooth, non-porous surfaces like glass. This is useful for short-term applications or when frequent repositioning is required.
8. **Magnet and Suction Combination**: Some lights combine magnetic and suction cup mounts for added stability, especially on moving vehicles.
Each mounting option offers different advantages in terms of stability, ease of installation, and flexibility, making it important to choose the right one based on the specific requirements of the application.