Call +(254) 703 030 000 / 751 483 999 / 721 704 777
- Home
- Safety
- Signs Facility Identification Products
- Stamping Tools
.....Read More
Frequently Asked Questions
What are stamping tools used for?
Stamping tools are used in the manufacturing process to shape or cut materials, typically metal, into desired forms. These tools are essential in the stamping process, which involves placing flat sheet metal into a stamping press where a tool and die surface forms the metal into a new shape. The primary functions of stamping tools include cutting, bending, embossing, and flanging.
1. **Cutting**: Stamping tools are used to cut metal sheets into specific shapes. This is achieved through processes like blanking, where a piece is cut out of the sheet, and piercing, where holes are punched into the material.
2. **Bending**: These tools can bend metal sheets at specific angles to create components with precise geometries. This is crucial in industries like automotive and aerospace, where precision is paramount.
3. **Embossing**: Stamping tools can create raised or recessed designs on metal surfaces. This is often used for decorative purposes or to add functionality, such as creating textures that improve grip.
4. **Flanging**: This involves bending the edges of a metal sheet to add strength or to prepare it for joining with other components. Flanging is commonly used in the production of automotive parts and appliances.
Stamping tools are integral to mass production, allowing for high-speed, high-precision manufacturing of components. They are used across various industries, including automotive, electronics, aerospace, and consumer goods, to produce parts like car panels, electronic enclosures, and household appliances. The efficiency and accuracy of stamping tools make them indispensable in modern manufacturing, enabling the production of complex parts with minimal waste.
How do hand stamps work?
Hand stamps work by transferring ink from a stamp pad to a surface, typically skin, to create a temporary mark or design. The process involves several key components:
1. **Stamp Design**: The stamp itself is usually made of rubber or a similar material, with a raised design or text. This design is carved or molded in reverse so that it appears correctly when stamped.
2. **Ink Application**: The stamp is pressed onto an ink pad, which is a small, flat container filled with ink. The ink pad ensures an even distribution of ink across the raised design of the stamp.
3. **Stamping Process**: Once inked, the stamp is pressed firmly onto the skin. The pressure transfers the ink from the raised areas of the stamp onto the skin, leaving a clear impression of the design.
4. **Ink Composition**: The ink used in hand stamps is typically non-toxic and skin-safe, designed to adhere to the skin without causing irritation. It is also formulated to be temporary, fading or washing off after a short period.
5. **Usage**: Hand stamps are commonly used for entry control at events, as a fun activity for children, or for temporary body art. They provide a quick and efficient way to mark individuals without the need for more permanent solutions.
6. **Removal**: The ink from hand stamps can usually be removed with soap and water, though some may require additional scrubbing or the use of alcohol-based cleansers.
Overall, hand stamps are a simple yet effective tool for temporary marking, relying on the basic principles of ink transfer and pressure application.
What materials can be stamped with hand stamps?
Hand stamps can be used on a variety of materials, each offering unique characteristics for stamping:
1. **Paper**: The most common material for hand stamping, including cardstock, construction paper, and specialty papers like vellum. It absorbs ink well and provides a clear impression.
2. **Cardboard**: Similar to paper, cardboard is thicker and can handle more pressure, making it suitable for packaging and crafts.
3. **Fabric**: Natural fibers like cotton, linen, and canvas work well with fabric inks or paints. Pre-washing the fabric can improve ink adherence.
4. **Wood**: Smooth, unfinished wood surfaces can be stamped using pigment inks or acrylic paints. Sanding the wood beforehand can enhance the stamp's clarity.
5. **Leather**: Vegetable-tanned leather is ideal for stamping. Special leather inks or dyes are recommended for a lasting impression.
6. **Plastic**: Certain plastics, like shrink plastic or acetate, can be stamped using solvent-based inks that adhere to non-porous surfaces.
7. **Metal**: Metals like aluminum or brass can be stamped with permanent inks or paints, though the surface must be clean and dry.
8. **Glass**: Stamping on glass requires specialized inks that can adhere to smooth, non-porous surfaces. Heat-setting may be necessary for durability.
9. **Ceramics**: Unglazed ceramics can be stamped with underglazes or ceramic paints before firing. Glazed ceramics require permanent inks.
10. **Rubber**: Rubber surfaces can be stamped with permanent inks, often used for creating custom stamps.
11. **Foam**: Craft foam sheets can be stamped with water-based inks for educational or craft purposes.
12. **Clay**: Air-dry or polymer clay can be stamped before curing, allowing for texture and design incorporation.
Each material requires specific inks or paints to ensure the stamp adheres properly and remains durable.
How do you maintain and care for stamping tools?
To maintain and care for stamping tools, follow these steps:
1. **Regular Cleaning**: After each use, clean the tools to remove any debris, ink, or residue. Use a soft cloth or brush to gently wipe the surfaces. For intricate designs, use a toothbrush or compressed air to reach small crevices.
2. **Proper Storage**: Store stamping tools in a dry, cool place to prevent rust and corrosion. Use protective cases or covers to shield them from dust and moisture. Organize them in a way that prevents them from knocking against each other.
3. **Lubrication**: Periodically apply a light coat of oil or a rust-preventive spray to metal parts to prevent rust. Ensure that the oil does not come into contact with stamping surfaces that will touch the material.
4. **Inspection**: Regularly inspect tools for signs of wear, damage, or misalignment. Check for cracks, chips, or dull edges. Address any issues immediately to prevent further damage.
5. **Sharpening and Polishing**: Keep cutting edges sharp and polished. Use appropriate sharpening stones or machines to maintain the edge. Polishing can help reduce friction and improve the quality of the stamped product.
6. **Calibration and Alignment**: Ensure that tools are properly aligned and calibrated for accurate stamping. Misalignment can lead to uneven pressure and poor-quality results.
7. **Avoid Overuse**: Do not exceed the recommended pressure or use the tools on materials they are not designed for, as this can lead to premature wear or breakage.
8. **Training and Handling**: Ensure that all users are trained in the proper handling and operation of stamping tools to minimize the risk of damage.
By following these maintenance practices, you can extend the life of your stamping tools and ensure consistent, high-quality results.
What is the difference between hand stamps and steel type?
Hand stamps and steel type are both tools used for marking or imprinting, but they differ in their construction, usage, and applications.
Hand Stamps:
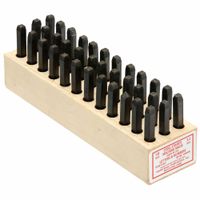
- Hand stamps are typically made from hardened steel and are used to manually imprint letters, numbers, or symbols onto a surface by striking them with a hammer.
- They are often used for marking metal, wood, leather, or plastic.
- Hand stamps are ideal for low-volume or custom work where flexibility and portability are important.
- They require manual alignment and force, which can lead to inconsistencies in depth and alignment if not carefully controlled.
- Commonly used in workshops, crafts, and small-scale manufacturing.
Steel Type:
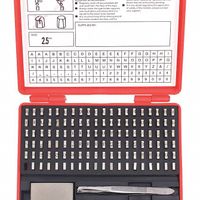
- Steel type refers to individual characters or symbols made from steel, used in conjunction with a holder or machine to create consistent and repeatable imprints.
- They are often used in type holders or presses, allowing for the arrangement of multiple characters to form words or codes.
- Steel type is ideal for high-volume or repetitive tasks where precision and uniformity are crucial.
- They are commonly used in industrial settings for marking parts, tools, or products with serial numbers, batch codes, or other identifiers.
- Steel type systems can be integrated into automated machinery for efficient and consistent marking.
In summary, hand stamps are more suited for manual, low-volume, and flexible applications, while steel type is designed for high-volume, consistent, and precise marking tasks.
How do you create custom impressions with stamping tools?
To create custom impressions with stamping tools, follow these steps:
1. **Design Selection**: Choose or create a design for your custom impression. This can be done using graphic design software or by sketching manually. Ensure the design is clear and suitable for stamping.
2. **Material Choice**: Select the appropriate material for your stamp. Common materials include rubber, metal, or polymer. Rubber is versatile and cost-effective, while metal is durable for repeated use.
3. **Stamp Creation**: Transfer your design onto the chosen material. For rubber stamps, this can be done using a laser engraver or by carving manually with precision tools. For metal stamps, CNC machines or etching processes are used.
4. **Mounting**: Attach the stamp to a handle or block for ease of use. Wooden or acrylic blocks are commonly used for rubber stamps, while metal stamps often have integrated handles.
5. **Ink Selection**: Choose the right ink for your project. Water-based inks are suitable for paper, while solvent-based inks work well on non-porous surfaces like metal or plastic.
6. **Surface Preparation**: Ensure the surface to be stamped is clean and dry. This ensures a clear and consistent impression.
7. **Stamping Technique**: Apply ink evenly to the stamp using an ink pad or roller. Press the stamp firmly and evenly onto the surface, applying consistent pressure to avoid smudging.
8. **Practice**: Test your stamp on scrap material to perfect your technique and ensure the design transfers correctly.
9. **Cleaning and Maintenance**: Clean the stamp after use to prevent ink build-up. Use appropriate cleaning solutions based on the ink type.
10. **Storage**: Store stamps in a cool, dry place to prevent damage and ensure longevity.
By following these steps, you can create precise and personalized impressions for various applications.
What safety precautions should be taken when using stamping tools?
When using stamping tools, several safety precautions are essential to prevent accidents and ensure a safe working environment:
1. **Personal Protective Equipment (PPE):** Always wear appropriate PPE, including safety goggles to protect eyes from flying debris, gloves to prevent cuts, and steel-toed boots to protect feet from heavy objects.
2. **Training and Supervision:** Ensure that all operators are adequately trained in the use of stamping tools and understand the specific risks involved. Supervision by experienced personnel is recommended, especially for new operators.
3. **Machine Guarding:** Ensure that all machines are equipped with proper guards to prevent accidental contact with moving parts. Regularly inspect and maintain these guards to ensure they are in good working condition.
4. **Emergency Stops and Controls:** Familiarize yourself with the location and operation of emergency stop buttons and controls. Ensure they are easily accessible and functional.
5. **Work Area Organization:** Keep the work area clean and free of clutter to prevent tripping hazards. Ensure that all tools and materials are organized and stored properly when not in use.
6. **Proper Tool Maintenance:** Regularly inspect and maintain stamping tools to ensure they are in good working condition. Replace any worn or damaged parts immediately.
7. **Safe Handling of Materials:** Use appropriate lifting techniques and equipment to handle heavy materials. Avoid overloading the stamping machine beyond its capacity.
8. **Lockout/Tagout Procedures:** Implement lockout/tagout procedures to ensure machines are properly shut down and cannot be accidentally started during maintenance or repair.
9. **Awareness of Surroundings:** Stay alert and aware of your surroundings, including the actions of coworkers and the operation of nearby machinery.
10. **Follow Manufacturer’s Instructions:** Adhere to the manufacturer’s guidelines and instructions for the safe operation and maintenance of stamping tools.
By following these precautions, the risk of accidents and injuries can be significantly reduced.

