Call +(254) 703 030 000 / 751 483 999 / 721 704 777
.....Read More


Frequently Asked Questions
What materials are stencils typically made from?
Stencils are typically made from a variety of materials, each chosen for its specific properties that suit different applications. Common materials include:
1. **Plastic**: Often used for its durability and flexibility, plastic stencils are typically made from materials like Mylar, acetate, or polypropylene. Mylar is particularly popular due to its resistance to tearing and ease of cleaning, making it reusable and ideal for both amateur and professional use.
2. **Paper**: Paper stencils are inexpensive and easy to produce, making them suitable for single-use applications. They are often used in educational settings or for simple craft projects. However, they are less durable and can be easily damaged by moisture or repeated use.
3. **Cardboard**: Similar to paper, cardboard stencils are more robust and can be used multiple times if handled carefully. They are often used for larger projects or where a more rigid stencil is required.
4. **Metal**: Metal stencils, typically made from materials like stainless steel or brass, are extremely durable and can withstand heavy use. They are often used in industrial applications, such as marking parts or creating precise designs on various surfaces.
5. **Vinyl**: Vinyl stencils are flexible and adhesive, making them ideal for projects that require the stencil to stay in place on curved or uneven surfaces. They are often used in sign-making and for applying paint or etching designs on glass.
6. **Rubber**: Rubber stencils are flexible and durable, often used for applications involving curved surfaces or where a non-slip stencil is beneficial. They are commonly used in pottery and ceramics.
Each material offers unique advantages, and the choice depends on factors like the complexity of the design, the surface being stenciled, and the intended use of the stencil.
How do you clean and maintain stencils for repeated use?
To clean and maintain stencils for repeated use, follow these steps:
1. **Immediate Cleaning**: After using the stencil, clean it immediately to prevent paint or ink from drying. This makes removal easier and prevents buildup.
2. **Use Appropriate Solvent**: Depending on the medium used (acrylic, oil, ink), select a suitable solvent. For water-based paints, warm soapy water is effective. For oil-based paints, use mineral spirits or a specific stencil cleaner.
3. **Gentle Scrubbing**: Use a soft brush or sponge to gently scrub the stencil. Avoid abrasive materials that can damage the stencil's edges or intricate designs.
4. **Rinse Thoroughly**: Rinse the stencil under lukewarm water to remove any remaining solvent or paint residue. Ensure all cleaning agents are washed off to prevent any reaction with future paints.
5. **Drying**: Pat the stencil dry with a lint-free cloth or paper towel. Ensure it is completely dry before storing to prevent mold or mildew.
6. **Storage**: Store stencils flat or hang them to prevent bending or warping. If storing multiple stencils, place a sheet of wax paper or parchment between them to avoid sticking.
7. **Regular Inspection**: Periodically inspect stencils for any damage or wear. Replace any that have become too worn to ensure clean, precise designs.
8. **Avoid Excessive Force**: When using or cleaning, handle stencils with care to maintain their shape and detail.
9. **Labeling**: If using multiple stencils, label them for easy identification and organization.
By following these steps, stencils can be kept in good condition for repeated use, ensuring consistent and high-quality results in your projects.
What are the best practices for applying paint or ink using stencils?
1. **Surface Preparation**: Ensure the surface is clean, dry, and smooth. Sand any rough areas and remove dust or debris.
2. **Stencil Placement**: Secure the stencil firmly using painter’s tape or adhesive spray to prevent movement. Ensure it is flat against the surface to avoid paint bleeding.
3. **Paint Selection**: Choose the right type of paint or ink for the surface. Acrylics work well on most surfaces, while fabric paint is best for textiles.
4. **Application Tools**: Use a stencil brush, sponge, or roller. For intricate designs, a brush offers more control, while a roller covers larger areas quickly.
5. **Paint Loading**: Dip the brush or sponge lightly into the paint, then offload excess onto a paper towel. This prevents over-saturation and bleeding under the stencil.
6. **Technique**: Apply paint using a dabbing or stippling motion rather than brushing. This minimizes the risk of paint seeping under the stencil edges.
7. **Layering**: Apply multiple thin layers rather than one thick coat. Allow each layer to dry before applying the next to achieve even coverage.
8. **Drying Time**: Allow the paint to dry completely before removing the stencil to avoid smudging. Follow the paint manufacturer’s drying time recommendations.
9. **Stencil Removal**: Carefully peel off the stencil starting from one corner. Do this slowly to prevent tearing or smudging.
10. **Clean-Up**: Clean the stencil immediately after use with warm soapy water or appropriate solvent to prevent paint from drying on it.
11. **Sealing**: Once the paint is dry, apply a clear sealant if needed to protect the design, especially on surfaces exposed to wear or weather.
12. **Practice**: Test on a scrap piece before applying to the final surface to perfect your technique and ensure desired results.
How do you prevent paint from bleeding under the stencil?
To prevent paint from bleeding under a stencil, follow these steps:
1. **Surface Preparation**: Ensure the surface is clean, dry, and smooth. Any dust or debris can cause the stencil to lift, allowing paint to seep underneath.
2. **Stencil Material**: Use a high-quality stencil made from durable materials like mylar. Thicker stencils are less likely to lift during painting.
3. **Adhesive**: Apply a stencil adhesive spray to the back of the stencil. This temporary adhesive helps the stencil stick firmly to the surface, minimizing gaps.
4. **Positioning**: Carefully position the stencil on the surface. Use painter’s tape to secure the edges if additional support is needed.
5. **Paint Consistency**: Use thick, high-quality paint. Thin or watery paint is more likely to bleed. Acrylic or stencil-specific paints are recommended.
6. **Application Technique**: Use a stencil brush, sponge, or roller. Offload excess paint onto a paper towel before applying. This prevents over-saturation, which can cause bleeding.
7. **Dabbing Method**: Apply paint using a dabbing or stippling motion rather than brushing. This reduces the risk of pushing paint under the stencil edges.
8. **Multiple Light Coats**: Apply several light coats of paint instead of one heavy coat. Allow each layer to dry before applying the next.
9. **Remove Stencil Carefully**: Once the paint is dry to the touch, gently peel off the stencil. Pull it back on itself rather than straight up to avoid smudging.
10. **Seal the Edges**: For extra protection, apply a clear sealant over the stencil edges before painting. This creates a barrier to prevent bleeding.
By following these steps, you can achieve crisp, clean lines with minimal paint bleed under your stencil.
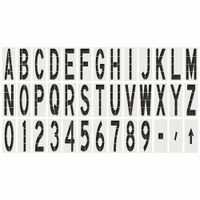
What are the common sizes available for letter and number stencil sets?
Common sizes for letter and number stencil sets typically range from small to large, catering to various applications such as crafts, signage, and industrial use. Here are the most common sizes:
1. **Small Stencils**: These usually range from 0.5 inches to 2 inches in height. They are ideal for detailed work, such as scrapbooking, card making, and other small-scale projects.
2. **Medium Stencils**: Medium-sized stencils typically range from 3 inches to 6 inches. These are versatile and often used for creating signs, labeling, and home decor projects.
3. **Large Stencils**: Large stencils range from 8 inches to 12 inches or more. They are suitable for creating large signs, banners, and wall art, providing visibility from a distance.
4. **Extra-Large Stencils**: These can be 15 inches or larger, often used for industrial purposes, large-scale murals, or outdoor signage where maximum visibility is required.
Stencil sets may also include a variety of font styles and thicknesses, allowing for different artistic expressions and functional uses. The choice of size depends on the specific needs of the project, such as the viewing distance, the surface area to be covered, and the level of detail required.
How do you secure a stencil in place while painting?
To secure a stencil in place while painting, follow these steps:
1. **Clean Surface**: Ensure the surface where the stencil will be applied is clean and dry to promote better adhesion.
2. **Position the Stencil**: Align the stencil in the desired location. Use a level or measuring tape if precision is required.
3. **Adhesive Spray**: Lightly spray the back of the stencil with a repositionable adhesive spray. This provides a temporary bond that holds the stencil in place without leaving residue.
4. **Painter’s Tape**: Use painter’s tape to secure the edges of the stencil. This prevents paint from seeping under the edges and keeps the stencil from shifting.
5. **Stencil Brushes or Rollers**: Use stencil brushes or foam rollers to apply paint. These tools apply paint evenly and reduce the risk of paint bleeding under the stencil.
6. **Minimal Paint**: Dab excess paint off the brush or roller onto a paper towel before applying. This prevents paint from seeping under the stencil.
7. **Work from the Edges Inward**: Start painting from the edges of the stencil and work inward. This technique helps keep the stencil in place and reduces the risk of paint bleeding.
8. **Check for Movement**: Periodically check that the stencil hasn’t shifted. Reapply adhesive or tape if necessary.
9. **Remove Carefully**: Once painting is complete, carefully remove the stencil while the paint is still wet to avoid peeling or smudging.
10. **Clean Stencil**: Clean the stencil immediately after use to remove any paint residue, ensuring it’s ready for future use.
By following these steps, you can effectively secure a stencil in place and achieve clean, precise designs.
Can stencils be customized for specific designs or messages?
Yes, stencils can be customized for specific designs or messages. Custom stencils are created to meet individual needs, allowing for unique patterns, logos, text, or images to be replicated consistently across various surfaces. The customization process typically involves the following steps:
1. **Design Creation**: The desired design or message is created using graphic design software. This can include logos, intricate patterns, or specific text. The design is then converted into a stencil-friendly format, often a vector file, which ensures precision and scalability.
2. **Material Selection**: Depending on the application, different materials can be used for stencils. Common materials include plastic, mylar, metal, or cardboard. The choice of material depends on factors like durability, flexibility, and the type of surface being stenciled.
3. **Cutting Process**: Advanced cutting technologies such as laser cutting or die-cutting are used to produce the stencil. These methods ensure high accuracy and clean edges, which are crucial for detailed designs.
4. **Size and Scale**: Custom stencils can be made in various sizes to suit different projects, from small-scale crafts to large wall murals or signage.
5. **Reusability and Application**: Custom stencils are often designed for multiple uses, making them cost-effective for repeated applications. They can be used with various mediums, including paint, ink, or spray, on surfaces like walls, fabric, wood, or metal.
6. **Personalization**: Businesses, artists, and hobbyists use custom stencils to add a personal touch to their work, ensuring that the final product aligns with their vision and branding.
Overall, custom stencils offer flexibility and creativity, enabling precise and repeatable application of specific designs or messages across different projects.