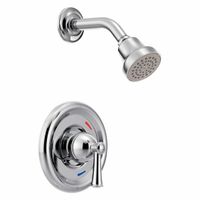
Bathtubs, Showers & Repair Parts

Bathtubs and showers are generally designed based on the existing locations of plumbing connections and drains in residential, commercial, and institutional bathrooms. Bathtub and shower doors and shower pans help trap and drain water and protect against damage to walls and floor. Faucet systems and .....Read More

Frequently Asked Questions

What are the standard dimensions for a bathtub?

The standard dimensions for a bathtub can vary based on the type and style, but generally, they fall within certain ranges. The most common type, the alcove bathtub, typically measures 60 inches in length, 30 inches in width, and 14 to 16 inches in height. This size is designed to fit into a three-wall enclosure, making it a popular choice for standard bathrooms. Freestanding bathtubs, which are not enclosed by walls, offer more flexibility in size. They usually range from 55 to 72 inches in length, 27 to 32 inches in width, and 15 to 20 inches in height. These tubs are often chosen for their aesthetic appeal and can serve as a focal point in larger bathrooms. Corner bathtubs, designed to fit into a corner of the bathroom, typically measure 60 inches on each side, with a height of 18 to 22 inches. These are ideal for maximizing space in smaller bathrooms while still providing a comfortable bathing experience. Drop-in bathtubs, which are installed within a constructed deck or platform, can vary widely in size. However, a common size is 60 inches in length, 32 inches in width, and 18 inches in height. These tubs offer a seamless look and can be customized to fit specific bathroom layouts. Lastly, soaking tubs, designed for relaxation, are deeper than standard tubs. They often measure 60 to 72 inches in length, 32 to 36 inches in width, and 20 to 24 inches in height, allowing for a more immersive bathing experience. Overall, while these dimensions are standard, custom sizes are available to accommodate unique bathroom designs and personal preferences.

How do I choose the right showerhead for my bathroom?

To choose the right showerhead for your bathroom, consider the following factors: 1. **Type of Showerhead**: Decide between fixed, handheld, rain, dual, or body spray showerheads. Fixed showerheads are mounted to the wall, while handheld ones offer flexibility. Rain showerheads provide a drenching experience, dual showerheads combine fixed and handheld features, and body sprays are installed in the wall for a spa-like experience. 2. **Water Pressure**: Check your home’s water pressure. Some showerheads are designed for low pressure, while others require high pressure to function optimally. Look for models that are specifically designed to enhance water flow if you have low pressure. 3. **Spray Patterns**: Consider the spray patterns available, such as massage, mist, or full spray. Some showerheads offer adjustable settings, allowing you to switch between different patterns based on your preference. 4. **Material and Finish**: Choose a material and finish that complements your bathroom decor. Common materials include chrome, stainless steel, and brushed nickel. Ensure the material is durable and resistant to corrosion. 5. **Water Efficiency**: Look for WaterSense labeled showerheads, which use less water without compromising performance. This can help reduce water bills and conserve water. 6. **Installation**: Consider the ease of installation. Some showerheads can be installed without professional help, while others may require a plumber. 7. **Budget**: Determine your budget. Showerheads range from affordable to high-end models with advanced features. Balance cost with the features you desire. 8. **Brand and Reviews**: Research brands known for quality and reliability. Read customer reviews to gauge performance and satisfaction. By evaluating these factors, you can select a showerhead that meets your needs and enhances your showering experience.

What is the difference between a shower pan and a shower base?

A shower pan and a shower base are terms often used interchangeably, but they have distinct differences. A shower pan is the finished, visible floor of the shower that you step on. It is designed to direct water to the drain and is typically made from materials like acrylic, fiberglass, or tile. Shower pans are pre-formed and come in various shapes and sizes to fit different shower enclosures. They often include a built-in slope to ensure proper drainage and may have a textured surface to prevent slipping. A shower base, on the other hand, refers to the underlying structure beneath the shower pan. It is the foundational layer that supports the shower pan and ensures stability and proper drainage. The shower base is usually constructed from materials like mortar or concrete and is installed during the initial stages of shower construction. It provides a solid, waterproof foundation and is crucial for preventing leaks and water damage. In summary, the shower pan is the top layer that you see and interact with, while the shower base is the structural component beneath it that provides support and ensures water is directed to the drain effectively.

How do I install a bathtub faucet?

1. **Turn Off Water Supply**: Locate and turn off the water supply to the bathtub. This is usually found in the bathroom or basement. 2. **Remove Old Faucet**: Use a wrench to unscrew the old faucet. If it’s a screw-on type, twist counterclockwise. For a slip-on type, loosen the set screw underneath with an Allen wrench. 3. **Clean the Pipe**: Once the old faucet is removed, clean the pipe of any debris or old plumber’s tape. 4. **Prepare New Faucet**: If the new faucet is a screw-on type, wrap the pipe threads with plumber’s tape to ensure a tight seal. For a slip-on type, ensure the set screw is loosened. 5. **Install New Faucet**: - **Screw-On Type**: Align the new faucet with the pipe and twist clockwise until tight. Use a wrench for the final turns, but avoid over-tightening. - **Slip-On Type**: Slide the faucet onto the pipe until it’s flush with the wall, then tighten the set screw with an Allen wrench. 6. **Check for Leaks**: Turn the water supply back on and test the faucet. Check for leaks around the connection. If leaks are present, tighten the faucet or reapply plumber’s tape. 7. **Seal the Edges**: Apply a bead of silicone caulk around the edge where the faucet meets the wall to prevent water from seeping behind the wall. 8. **Final Check**: Ensure the faucet operates smoothly and there are no leaks. Adjust as necessary. 9. **Clean Up**: Wipe away any excess caulk and clean the area. By following these steps, you can successfully install a bathtub faucet.

What materials are best for bathtub construction?

The best materials for bathtub construction are: 1. **Acrylic**: Lightweight and versatile, acrylic bathtubs are made from vacuum-formed sheets of acrylic reinforced with fiberglass. They are affordable, retain heat well, and are available in various shapes and colors. However, they can scratch easily and may require more support due to their flexibility. 2. **Cast Iron**: Known for durability and classic appeal, cast iron tubs are coated with enamel. They are resistant to chipping and scratching, retain heat excellently, and offer a timeless look. However, they are very heavy, requiring reinforced flooring and professional installation. 3. **Fiberglass (FRP)**: Made from layers of fiberglass reinforced with plastic, these tubs are lightweight and cost-effective. They are easy to install and repair but are less durable, prone to scratching, and may fade over time. 4. **Porcelain-Enameled Steel**: These tubs have a steel base coated with porcelain enamel. They are durable, affordable, and easy to clean. However, they can chip easily, are heavier than acrylic or fiberglass, and do not retain heat as well. 5. **Stone Resin**: Composed of crushed stone and resin, these tubs mimic the look of natural stone at a lower cost. They are durable, retain heat well, and offer a luxurious appearance. They are heavy and can be expensive. 6. **Copper**: Offering a unique aesthetic, copper tubs are naturally antibacterial and retain heat well. They develop a patina over time, adding character. They are expensive and require specific maintenance to prevent tarnishing. 7. **Solid Surface**: Made from a blend of minerals and resins, these tubs are durable, non-porous, and available in various finishes. They are resistant to stains and scratches but can be costly. Each material has its pros and cons, and the best choice depends on budget, aesthetic preference, and practical considerations like weight and maintenance.
How do I fix a leaking showerhead?

1. **Turn Off Water Supply**: Shut off the water supply to the shower to prevent any water flow while you work. 2. **Remove the Showerhead**: Use a wrench or pliers to unscrew the showerhead from the shower arm. Protect the finish by wrapping the tool with a cloth. 3. **Inspect and Clean**: Check for mineral deposits or debris inside the showerhead. Soak it in a vinegar solution for a few hours to dissolve any buildup, then rinse thoroughly. 4. **Check the Washer and O-Ring**: Examine the rubber washer or O-ring inside the showerhead. If worn or damaged, replace it with a new one of the same size. 5. **Inspect the Shower Arm**: Look for any damage or debris on the shower arm threads. Clean them with a brush if necessary. 6. **Apply Plumber’s Tape**: Wrap Teflon tape (plumber’s tape) around the threads of the shower arm to ensure a tight seal. Wrap it clockwise 2-3 times. 7. **Reattach the Showerhead**: Screw the showerhead back onto the shower arm by hand, then tighten it slightly with a wrench or pliers. Avoid over-tightening to prevent damage. 8. **Turn On Water Supply**: Restore the water supply and check for leaks. If leaking persists, ensure all components are properly aligned and tightened. 9. **Test the Showerhead**: Run the shower to ensure the leak is fixed. If the problem continues, consider replacing the showerhead or consulting a professional plumber. 10. **Regular Maintenance**: Periodically clean the showerhead and check for wear to prevent future leaks.

What are the benefits of a handheld showerhead?

A handheld showerhead offers several benefits that enhance the showering experience. Firstly, it provides flexibility and convenience, allowing users to direct the water flow exactly where needed. This is particularly useful for rinsing hard-to-reach areas, making it ideal for individuals with limited mobility or those recovering from injuries. Secondly, handheld showerheads are excellent for bathing children and pets. The ability to control the water stream helps in gently washing them without causing discomfort or fear. It also minimizes water wastage by targeting specific areas rather than soaking the entire body or shower space. Additionally, handheld showerheads often come with multiple spray settings, such as massage, mist, or pulse, offering a customizable shower experience. This feature can be therapeutic, helping to relieve muscle tension and stress. Cleaning the shower area is also easier with a handheld showerhead. It can be used to rinse down soap scum and residue from walls and floors, maintaining hygiene and reducing cleaning time. Moreover, many handheld showerheads are designed to be water-efficient, helping to conserve water and reduce utility bills. They can be installed with ease, often without professional help, making them a cost-effective upgrade to any bathroom. Finally, they add versatility to the bathroom, as they can be used as a fixed showerhead when mounted on a bracket or as a handheld device when detached. This dual functionality caters to different preferences and needs within a household. In summary, a handheld showerhead enhances convenience, efficiency, and versatility, making it a valuable addition to any bathroom.

How do I clean and maintain a shower door?

To clean and maintain a shower door, follow these steps: 1. **Gather Supplies**: You will need white vinegar, baking soda, a spray bottle, a non-abrasive sponge or cloth, a squeegee, and a microfiber cloth. 2. **Daily Maintenance**: After each shower, use a squeegee to remove water droplets from the door. This prevents water spots and soap scum buildup. 3. **Weekly Cleaning**: - **Vinegar Solution**: Fill a spray bottle with equal parts white vinegar and water. Spray the solution generously on the shower door. - **Let it Sit**: Allow the vinegar solution to sit for 5-10 minutes to break down soap scum and mineral deposits. - **Scrub**: Use a non-abrasive sponge or cloth to scrub the door gently, focusing on areas with visible buildup. - **Rinse**: Rinse the door with warm water to remove the vinegar solution and loosened grime. 4. **Tough Stains**: - **Baking Soda Paste**: For stubborn stains, make a paste with baking soda and water. Apply the paste to the stains and let it sit for 15 minutes. - **Scrub and Rinse**: Gently scrub with a sponge, then rinse thoroughly with water. 5. **Drying**: Use a microfiber cloth to dry the door completely, preventing water spots. 6. **Monthly Deep Clean**: - **Track and Frame**: Clean the door tracks and frame using a toothbrush dipped in vinegar to remove grime and mildew. - **Sealant Check**: Inspect the door sealant for any damage or mold. Replace if necessary. 7. **Preventive Measures**: - **Ventilation**: Ensure proper bathroom ventilation to reduce humidity and prevent mold growth. - **Water Repellent**: Consider applying a water-repellent product to the glass to minimize future buildup. Regular cleaning and maintenance will keep your shower door sparkling and extend its lifespan.

What is the average cost of installing a new bathtub?

The average cost of installing a new bathtub typically ranges from $1,000 to $5,000. This cost can vary significantly based on several factors, including the type of bathtub, the complexity of the installation, and regional labor rates. 1. **Type of Bathtub**: - **Standard Bathtubs**: These are the most affordable, with prices ranging from $200 to $1,000. - **Freestanding Bathtubs**: These can cost between $600 and $3,000. - **Whirlpool or Jetted Tubs**: These are more expensive, ranging from $1,000 to $5,000 or more. - **Walk-in Tubs**: These can range from $2,000 to $10,000 due to their specialized features. 2. **Installation Costs**: - **Basic Installation**: For a straightforward replacement, labor costs can range from $500 to $1,500. - **Complex Installations**: If plumbing needs to be reconfigured or if additional work like tiling or structural changes is required, costs can increase significantly, sometimes reaching $2,000 to $4,000. 3. **Additional Costs**: - **Plumbing Adjustments**: If the plumbing needs significant changes, this can add $500 to $1,500. - **Removal of Old Tub**: Disposing of the old tub can cost $100 to $300. - **Bathroom Modifications**: Any additional modifications, such as tiling or waterproofing, can add $500 to $2,000. 4. **Regional Variations**: Labor costs can vary based on location, with urban areas typically having higher rates than rural areas. Overall, while the base cost of a bathtub might be low, installation and additional modifications can significantly increase the total expense. It's advisable to get multiple quotes from contractors to ensure a competitive price.

How do I replace a damaged bathtub spout?

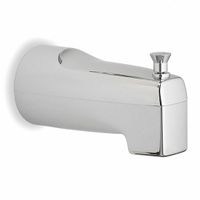
1. **Gather Tools and Materials**: You'll need a new spout, an adjustable wrench, a screwdriver, plumber's tape, and possibly a pipe wrench or Allen wrench. 2. **Turn Off Water Supply**: Ensure the water supply to the bathtub is turned off to prevent any leaks or water damage. 3. **Remove the Old Spout**: - **Threaded Spout**: If the spout is threaded, use an adjustable wrench to turn it counterclockwise. If it’s tight, apply penetrating oil and wait a few minutes before trying again. - **Slip-On Spout**: If the spout has a set screw, locate it underneath the spout near the wall. Use an Allen wrench to loosen the screw, then pull the spout off the pipe. 4. **Clean the Pipe**: Once the old spout is removed, clean the pipe threads or the pipe itself to remove any debris or old plumber’s tape. 5. **Prepare the New Spout**: - **Threaded Spout**: Wrap the pipe threads with plumber’s tape to ensure a tight seal. - **Slip-On Spout**: Ensure the set screw is loosened enough to slide over the pipe. 6. **Install the New Spout**: - **Threaded Spout**: Screw the new spout onto the pipe by hand, then tighten with a wrench. Be careful not to overtighten. - **Slip-On Spout**: Slide the spout onto the pipe, ensuring it’s flush with the wall. Tighten the set screw with an Allen wrench. 7. **Test the Installation**: Turn the water supply back on and test the spout for leaks. If there are leaks, tighten the spout further or reapply plumber’s tape. 8. **Final Adjustments**: Ensure the spout is aligned correctly and make any necessary adjustments.