Call +(254) 703 030 000 / 751 483 999 / 721 704 777
Frequently Asked Questions
What are the different types of shower doors available?
There are several types of shower doors available, each offering unique features and benefits:
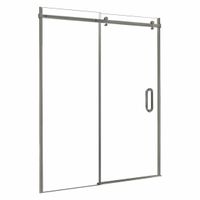
1. **Sliding Doors**: Also known as bypass doors, these consist of two or more glass panels that slide past each other on tracks. Ideal for bathrooms with limited space, they don’t require additional room for door swing.
2. **Hinged Doors**: These doors swing open like a traditional door, usually mounted on one side. They require more space to open but offer a wide entryway, making them suitable for larger bathrooms.
3. **Pivot Doors**: Similar to hinged doors, pivot doors rotate on a central hinge, allowing them to open both inward and outward. They are versatile and can be installed in various bathroom layouts.
4. **Bi-Fold Doors**: These doors fold in on themselves, making them a great option for small bathrooms. They provide a wide opening without requiring much space for door swing.
5. **Curved Doors**: Designed for corner shower enclosures, curved doors slide along a curved track. They maximize space and are often used in quadrant shower enclosures.
6. **Frameless Doors**: Made of thick tempered glass, frameless doors offer a sleek, modern look with minimal hardware. They are easy to clean and maintain but can be more expensive.
7. **Framed Doors**: These have a metal frame around the glass panels, providing additional support and stability. They are generally more affordable and come in various finishes.
8. **Semi-Frameless Doors**: Combining elements of both framed and frameless designs, these doors have minimal framing, offering a balance between style and cost.
9. **Neo-Angle Doors**: Designed for corner showers, these doors have three glass panels that form a diamond shape, saving space and adding a unique aesthetic.
Each type of shower door offers different advantages, making it important to consider bathroom size, style preferences, and budget when choosing the right one.
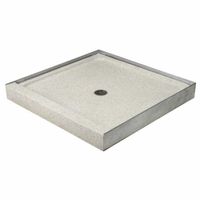
How do I choose the right shower base or pan for my bathroom?
To choose the right shower base or pan for your bathroom, consider the following factors:
1. **Size and Space**: Measure your bathroom to determine the available space for the shower base. Consider standard sizes or custom options if your space is unique.
2. **Shape**: Choose a shape that fits your bathroom layout. Common shapes include square, rectangular, neo-angle, and round. The shape should complement the bathroom design and maximize space.
3. **Material**: Select a material based on durability, maintenance, and aesthetics. Options include:
- **Acrylic**: Lightweight, affordable, and easy to clean.
- **Fiberglass**: Cost-effective but less durable.
- **Ceramic/Porcelain**: Durable and stylish but can be slippery.
- **Stone/Marble**: Luxurious and durable but expensive and heavy.
- **Cast Iron**: Extremely durable but heavy and costly.
4. **Drain Location**: Ensure the drain location on the base matches your plumbing setup. Common positions are center, off-center, or corner.
5. **Installation Type**: Decide between a pre-fabricated base or a custom-built one. Pre-fabricated bases are easier to install, while custom bases offer more flexibility in design.
6. **Slip Resistance**: Look for a base with a textured surface to prevent slipping, especially important for safety.
7. **Budget**: Determine your budget, balancing cost with quality and features. Consider long-term maintenance costs as well.
8. **Style and Aesthetics**: Choose a base that complements your bathroom’s style and color scheme.
9. **Warranty and Brand Reputation**: Opt for reputable brands that offer warranties, ensuring quality and support.
10. **Code Compliance**: Ensure the shower base complies with local building codes and regulations.
By considering these factors, you can select a shower base that meets your functional needs and enhances your bathroom’s design.
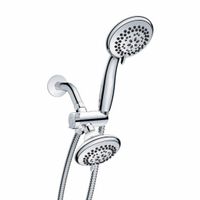
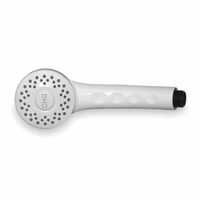
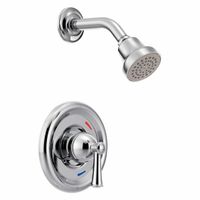
What are the benefits of a handheld showerhead compared to a fixed one?
A handheld showerhead offers several advantages over a fixed showerhead, enhancing both functionality and convenience.
Firstly, flexibility and maneuverability are key benefits. A handheld showerhead can be detached from its mount, allowing users to direct the water flow precisely where needed. This is particularly useful for rinsing hard-to-reach areas, making it ideal for individuals with limited mobility or those recovering from injuries.
Secondly, it provides ease of cleaning. The ability to move the showerhead around makes it simpler to clean the shower area, as you can easily rinse soap and grime from walls and corners.
Thirdly, handheld showerheads are versatile for different household needs. They are excellent for washing pets, as you can control the water direction and pressure, ensuring a thorough rinse without causing discomfort. Additionally, they are beneficial for bathing children, allowing parents to wash them more effectively and safely.
Moreover, many handheld models come with adjustable settings, offering various spray patterns and intensities. This customization enhances the shower experience, catering to personal preferences for massage-like sprays or gentle rinses.
Handheld showerheads also contribute to water conservation. Users can turn off the water while lathering or shampooing and easily resume rinsing, reducing water wastage.
Lastly, installation is typically straightforward, often requiring minimal tools and effort. This makes them an accessible upgrade for most bathrooms without the need for professional plumbing services.
In summary, the benefits of a handheld showerhead include enhanced flexibility, ease of cleaning, versatility for various tasks, customizable spray settings, water conservation, and simple installation, making it a practical choice for many households.
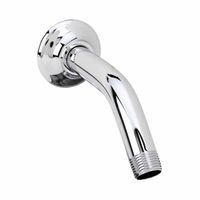
How do I install a shower faucet and panel?
1. **Turn Off Water Supply**: Shut off the main water supply to prevent leaks.
2. **Remove Old Fixtures**: Detach the old showerhead, faucet, and any existing panel. Use a wrench for stubborn parts.
3. **Prepare the Wall**: If necessary, cut an opening in the wall to access plumbing. Ensure the area is clean and free of debris.
4. **Install Valve**: Position the new valve according to the manufacturer's instructions. Secure it with screws and connect it to the existing plumbing using a wrench and plumber’s tape to prevent leaks.
5. **Attach Shower Panel**: Mark the mounting points on the wall. Drill holes and insert anchors. Secure the panel using screws. Connect the panel’s water inlets to the valve outlets.
6. **Install Shower Faucet**: Attach the faucet to the valve. Ensure it is aligned correctly and secure it with screws.
7. **Connect Showerhead**: Attach the showerhead to the panel or arm. Use plumber’s tape on threads to ensure a tight seal.
8. **Seal Joints**: Apply silicone sealant around the edges of the panel and faucet to prevent water seepage.
9. **Test for Leaks**: Turn on the water supply. Check all connections for leaks. Tighten any loose fittings if necessary.
10. **Finish Up**: Clean the area and remove any debris. Ensure all components are securely fastened and functioning properly.
11. **Final Check**: Test the water flow and temperature control to ensure everything is working as expected. Adjust as needed.
What materials are best for shower wall panels?
The best materials for shower wall panels include:
1. **Acrylic**: Lightweight, durable, and easy to install, acrylic panels are resistant to mold and mildew. They come in various colors and patterns, offering a sleek, modern look.
2. **Fiberglass**: Cost-effective and easy to maintain, fiberglass panels are lightweight and resistant to chipping and cracking. They are available in a range of finishes and are easy to clean.
3. **PVC (Polyvinyl Chloride)**: Waterproof and affordable, PVC panels are easy to install and maintain. They are available in various designs and can mimic the appearance of more expensive materials.
4. **Solid Surface**: Made from a blend of acrylic and natural minerals, solid surface panels are non-porous, making them resistant to mold and bacteria. They offer a seamless look and can be custom-fabricated to fit any space.
5. **Glass**: Glass panels provide a sleek, modern aesthetic and are easy to clean. They can be frosted, textured, or clear, offering various levels of privacy and style.
6. **Ceramic or Porcelain Tile**: Classic and versatile, tiles offer a wide range of colors, patterns, and textures. They are durable and water-resistant but require regular maintenance to keep grout lines clean.
7. **Natural Stone**: Materials like marble, granite, or slate provide a luxurious look. They are durable and unique but require sealing to prevent water damage and staining.
8. **Laminate**: Made from layers of paper and resin, laminate panels are affordable and come in various designs. They are easy to install and maintain but may not be as durable as other options.
Each material has its advantages, and the choice depends on budget, style preference, and maintenance considerations.
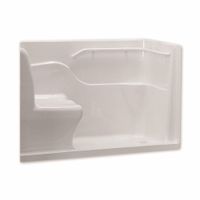
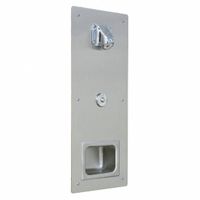
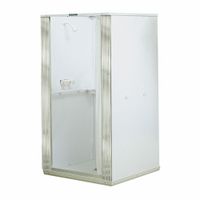
How do seated safety showers work and who should use them?
Seated safety showers are designed to provide immediate decontamination for individuals who are unable to stand or have limited mobility. These showers are typically used in environments where hazardous materials are present, such as laboratories, chemical plants, or industrial settings.
The design of a seated safety shower includes a bench or seat, allowing the user to sit while being thoroughly rinsed with water. The shower is equipped with a high-flow showerhead that delivers a large volume of water to quickly wash away contaminants from the skin and clothing. The water is usually tepid, as recommended by safety standards, to ensure comfort and effectiveness in removing hazardous substances.
Activation of the shower is typically done through a pull handle or lever, which can be easily operated by the user or a nearby colleague. Once activated, the water flow continues until manually turned off, ensuring that the user receives adequate rinsing time.
Seated safety showers are particularly beneficial for individuals with disabilities, injuries, or those who may be weakened by exposure to hazardous materials. They are also suitable for elderly workers or anyone who may have difficulty standing for extended periods. Additionally, these showers can be used in medical facilities or care homes where patients may need decontamination due to exposure to infectious agents or other contaminants.
In summary, seated safety showers provide an accessible and effective means of decontamination for individuals with mobility challenges, ensuring safety and compliance with health and safety regulations in environments where hazardous exposure is a risk.
What are the maintenance tips for keeping shower fixtures in good condition?
To maintain shower fixtures in good condition, follow these tips:
1. **Regular Cleaning**: Clean fixtures weekly using a mild soap or a mixture of vinegar and water to remove soap scum and mineral deposits. Avoid harsh chemicals that can damage finishes.
2. **Descale**: For hard water areas, descale fixtures monthly. Soak a cloth in vinegar, wrap it around the fixture, and leave it for an hour before rinsing.
3. **Check for Leaks**: Regularly inspect for leaks or drips. Tighten connections or replace washers and seals as needed to prevent water damage and wastage.
4. **Polish**: Use a non-abrasive polish to maintain the shine of metal fixtures. This also helps in protecting the surface from tarnishing.
5. **Avoid Scratches**: Use soft cloths or sponges for cleaning. Avoid abrasive pads or brushes that can scratch the surface.
6. **Inspect Seals and Grout**: Check the seals and grout around fixtures for cracks or mold. Re-seal or re-grout if necessary to prevent water seepage.
7. **Maintain Showerhead**: Remove and soak the showerhead in vinegar to unclog mineral deposits. Use a toothbrush to clean nozzles.
8. **Use Water Softeners**: If you have hard water, consider installing a water softener to reduce mineral buildup on fixtures.
9. **Ventilation**: Ensure proper bathroom ventilation to reduce humidity, which can cause corrosion and mold growth.
10. **Replace Worn Parts**: Replace any worn or damaged parts promptly to prevent further damage and maintain functionality.
11. **Avoid Excessive Force**: Handle fixtures gently to avoid loosening or damaging them.
By following these maintenance tips, you can extend the life and appearance of your shower fixtures.