Call +(254) 703 030 000 / 751 483 999 / 721 704 777
Frequently Asked Questions
What are the common components needed for faucet replacement?
For faucet replacement, the common components needed include:
1. **New Faucet**: The primary component, available in various styles and finishes to match your sink and decor.
2. **Supply Lines**: Flexible hoses that connect the faucet to the water supply valves. Ensure they are the correct length and compatible with your faucet and valves.
3. **Mounting Hardware**: Includes nuts, washers, and gaskets necessary to secure the faucet to the sink or countertop.
4. **Plumber’s Tape (Teflon Tape)**: Used to seal threaded connections and prevent leaks.
5. **Basin Wrench**: A specialized tool for reaching and tightening nuts under the sink.
6. **Adjustable Wrench**: For tightening and loosening nuts and bolts.
7. **Bucket or Towel**: To catch any water that may spill during the replacement process.
8. **Sealant or Plumber’s Putty**: Used to create a watertight seal between the faucet and sink.
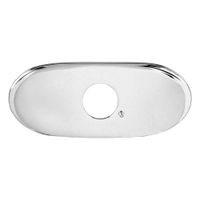
9. **Escutcheon Plate**: Covers unused holes in the sink if the new faucet has a different configuration than the old one.
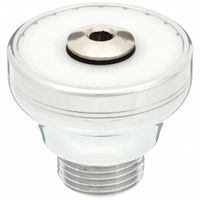
10. **Aerator**: Often included with the faucet, it mixes air with water to reduce splashing and conserve water.
11. **Valve Adapters**: If the new faucet has different-sized connections than the existing supply lines.
12. **Allen Wrench**: Sometimes needed for tightening set screws on handles or other components.
13. **Cleaning Supplies**: To clean the area around the sink and remove any old sealant or debris.
These components ensure a successful faucet replacement, providing a secure and leak-free installation.
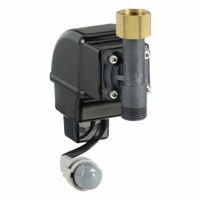
How do I replace a faucet sensor?
1. **Turn Off Water Supply**: Locate the shut-off valves under the sink and turn them off by rotating them clockwise.
2. **Disconnect Power**: If the sensor is battery-operated, remove the batteries. If it’s hardwired, unplug it from the power source.
3. **Remove the Faucet Handle**: Use an Allen wrench or screwdriver to remove the handle, exposing the sensor and other components.
4. **Detach the Sensor**: Locate the sensor, usually found near the spout or under the sink. Unscrew or unclip it from its position. Note the wiring or connections for reassembly.
5. **Install the New Sensor**: Position the new sensor in place of the old one. Secure it with screws or clips. Ensure the wiring or connections match the previous setup.
6. **Reconnect Power**: Insert new batteries or reconnect the power supply. Ensure the sensor is receiving power.
7. **Reattach the Faucet Handle**: Secure the handle back onto the faucet using the Allen wrench or screwdriver.
8. **Turn On Water Supply**: Open the shut-off valves by turning them counterclockwise.
9. **Test the Sensor**: Wave your hand in front of the sensor to ensure it activates the water flow. Adjust the sensor settings if necessary, following the manufacturer’s instructions.
10. **Check for Leaks**: Inspect all connections for any leaks. Tighten any loose fittings if needed.
11. **Final Adjustments**: Make any final adjustments to the sensor’s range or sensitivity as per your preference.
12. **Clean Up**: Dispose of the old sensor and any packaging materials properly.
Ensure you follow the specific instructions provided by the manufacturer of your faucet model for best results.
What is the function of a faucet cartridge?
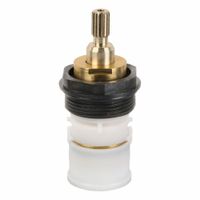
A faucet cartridge is a crucial component within a faucet that regulates the flow and temperature of water. It serves as the valve mechanism that controls the mixing of hot and cold water, allowing users to adjust the water temperature to their preference. The cartridge is typically housed within the faucet body and is operated by turning or lifting the faucet handle.
The primary function of a faucet cartridge is to provide a smooth and efficient control over water flow and temperature. It achieves this by using a series of seals and openings that align differently as the handle is moved. When the handle is turned or lifted, the cartridge adjusts the alignment of these seals and openings, allowing water to flow through at the desired temperature and pressure.
Cartridges are designed to be durable and long-lasting, but they can wear out over time due to constant use, mineral buildup, or water impurities. When a cartridge becomes faulty, it can lead to issues such as leaks, drips, or difficulty in adjusting water temperature. Replacing a worn-out cartridge is often a straightforward process and can restore the faucet's functionality without the need to replace the entire fixture.
There are different types of faucet cartridges, including ceramic disc cartridges, ball cartridges, and compression cartridges, each with its own mechanism and design. Ceramic disc cartridges are known for their durability and smooth operation, while ball cartridges use a ball with holes to control water flow. Compression cartridges rely on rubber washers to seal the water flow.
In summary, the faucet cartridge is essential for the proper operation of a faucet, providing control over water flow and temperature, and ensuring a reliable and user-friendly experience.
How do mixing valves work in a faucet system?
Mixing valves in a faucet system regulate water temperature by blending hot and cold water to achieve a desired temperature. They are crucial for ensuring comfort and safety, preventing scalding, and maintaining consistent water temperature.
The mixing valve typically consists of a control mechanism, which can be a single handle or dual handles, and an internal cartridge or disc system. When the user adjusts the handle(s), the valve opens or closes the pathways for hot and cold water. This adjustment changes the proportion of hot and cold water flowing through the valve, thus altering the water temperature.
In a single-handle faucet, the handle's position determines the mix of hot and cold water. Moving the handle left or right adjusts the temperature, while moving it up or down controls the flow rate. Inside, a ceramic disc or ball valve mechanism precisely controls the water mix.
In dual-handle systems, each handle independently controls either hot or cold water flow. The user manually adjusts both handles to achieve the desired temperature mix.
Some advanced mixing valves include thermostatic controls, which automatically adjust the water mix to maintain a set temperature, even if water pressure or temperature fluctuates. These valves use a thermostatic element that expands or contracts with temperature changes, adjusting the flow of hot and cold water accordingly.
Mixing valves also often incorporate anti-scald features, which limit the maximum temperature to prevent burns. This is particularly important in households with children or elderly individuals.
Overall, mixing valves are essential components in faucet systems, providing precise control over water temperature and ensuring user safety and comfort.
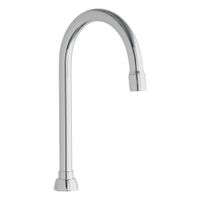
How can I replace a faucet spout or spout extension?
1. **Turn Off Water Supply**: Locate the water shut-off valves under the sink and turn them off. Open the faucet to release any remaining water pressure.
2. **Remove the Old Spout**:
- For a threaded spout, use a wrench to unscrew it counterclockwise.
- For a slip-on spout, locate the set screw underneath, loosen it with an Allen wrench, and pull the spout off.
3. **Clean the Area**: Once the old spout is removed, clean the area around the faucet body to remove any debris or mineral deposits.
4. **Prepare the New Spout**:
- If the new spout requires an adapter, install it according to the manufacturer's instructions.
- Apply plumber’s tape to the threads if it’s a threaded spout to ensure a watertight seal.
5. **Install the New Spout**:
- For a threaded spout, screw it onto the faucet body clockwise until it is snug. Use a wrench for the final tightening, but avoid over-tightening.
- For a slip-on spout, slide it onto the pipe and tighten the set screw with an Allen wrench.
6. **Check for Leaks**: Turn the water supply back on and check for leaks by running the faucet. If there are leaks, tighten the connections as needed.
7. **Final Adjustments**: Ensure the spout is aligned properly and make any necessary adjustments.
8. **Clean Up**: Wipe down the area to remove any fingerprints or smudges.
By following these steps, you can successfully replace a faucet spout or spout extension.
What is the purpose of a faucet aerator?
A faucet aerator is a small device attached to the end of a faucet. Its primary purpose is to mix air with the water stream, which serves several functions. Firstly, it reduces water flow, leading to water conservation without compromising the perceived water pressure. By introducing air, the aerator maintains a steady, splash-free stream, enhancing user comfort and efficiency in tasks like washing hands or dishes.
Additionally, aerators help in filtering out debris and sediment, improving water quality. They also contribute to energy savings by reducing the amount of hot water used, which in turn lowers energy bills. The aerated stream is softer and less forceful, minimizing splashing and making it more suitable for various household tasks.
Moreover, aerators can improve the overall performance of a faucet by maintaining a consistent flow rate, even in areas with low water pressure. They are easy to install and replace, making them a cost-effective solution for enhancing faucet functionality. Overall, faucet aerators are essential for water conservation, energy efficiency, and improved user experience.
How do I fix a leaking faucet with washers and O-rings?
To fix a leaking faucet with washers and O-rings, follow these steps:
1. **Turn Off Water Supply**: Locate the shut-off valves under the sink and turn them off. Open the faucet to drain any remaining water.
2. **Plug the Drain**: Use a sink plug or cloth to prevent small parts from falling down the drain.
3. **Remove Faucet Handle**: Use a screwdriver to remove the handle. You may need to pry off a decorative cap to access the screw.
4. **Disassemble the Faucet**: Use a wrench to unscrew the packing nut. Carefully remove the stem or cartridge, depending on your faucet type.
5. **Inspect and Replace Washer**: At the bottom of the stem, you'll find a rubber washer. Remove the screw holding it in place, replace the washer with a new one of the same size, and reattach it.
6. **Inspect and Replace O-Rings**: Check for worn O-rings on the stem. Remove them using a small screwdriver or a similar tool. Replace with new O-rings of the same size, applying a thin layer of plumber’s grease to ensure a good seal.
7. **Reassemble the Faucet**: Reinsert the stem or cartridge, tighten the packing nut, and reattach the handle.
8. **Turn On Water Supply**: Slowly turn on the water supply and check for leaks. If the leak persists, ensure all parts are correctly installed and tightened.
9. **Test the Faucet**: Open and close the faucet several times to ensure smooth operation and no leaks.
By following these steps, you should be able to fix a leaking faucet caused by worn washers and O-rings.
