Faucets

Faucets control water flow to sinks and include spouts and hardware for installation. Bathroom faucets install in commercial and residential bathrooms for handwashing and grooming tasks. Kitchen faucets install in areas where food is handled or prepared and provide running water for dishwashing, coo .....Read More

Frequently Asked Questions

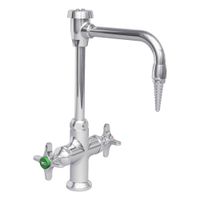
What are the different types of faucets and their uses?

Faucets come in various types, each designed for specific uses and settings. Here are the main types: 1. **Ball Faucets**: Common in kitchens, these faucets have a single handle that controls a ball inside the faucet body to regulate water flow and temperature. They are durable and easy to use but may require more maintenance due to multiple moving parts. 2. **Disc Faucets**: Known for their reliability, disc faucets feature a single lever over a wide cylindrical body. They use ceramic discs to control water flow and temperature, offering a long-lasting, low-maintenance option suitable for both kitchens and bathrooms. 3. **Cartridge Faucets**: Available in single or double-handle designs, cartridge faucets use a movable stem cartridge to control water flow. They provide a smooth operation and are easy to repair, making them versatile for various settings. 4. **Compression Faucets**: These traditional faucets have separate hot and cold handles that require tightening to stop water flow. They are cost-effective but prone to leaks and require more maintenance, often used in older homes or utility sinks. 5. **Touchless Faucets**: Equipped with motion sensors, these faucets activate water flow without physical contact, promoting hygiene and water conservation. Ideal for public restrooms and modern kitchens, they require a power source and are generally more expensive. 6. **Bridge Faucets**: Featuring a classic design with two handles connected by a horizontal bridge, these faucets are often used in traditional or farmhouse-style kitchens for their aesthetic appeal. 7. **Wall-Mounted Faucets**: Installed on the wall above the sink, these faucets save counter space and are popular in modern bathrooms and kitchens. They require precise plumbing and are more challenging to install. 8. **Pot Filler Faucets**: Installed near the stove, these extendable faucets are designed to fill large pots directly on the cooktop, offering convenience for avid cooks. Each type of faucet serves specific functional and aesthetic needs, catering to different preferences and settings.

How do I choose the right faucet for my kitchen or bathroom?

To choose the right faucet for your kitchen or bathroom, consider the following factors: 1. **Style and Design**: Match the faucet style with your kitchen or bathroom decor. Options include modern, traditional, or transitional designs. Consider finishes like chrome, brushed nickel, or oil-rubbed bronze to complement your space. 2. **Mounting Type**: Determine if you need a deck-mounted or wall-mounted faucet. Ensure compatibility with your sink or countertop, considering the number of holes available. 3. **Spout Height and Reach**: Choose a spout height and reach that fits your sink size and usage needs. High-arc spouts offer more space for washing large items, while low-arc spouts are more compact. 4. **Handle Type**: Decide between single-handle or double-handle faucets. Single-handle faucets offer ease of use and a sleek look, while double-handle faucets provide precise temperature control. 5. **Material and Finish**: Opt for durable materials like brass or stainless steel. Ensure the finish is resistant to tarnishing and corrosion for longevity. 6. **Functionality**: Consider features like pull-down or pull-out sprayers for added convenience in the kitchen. For bathrooms, look for faucets with water-saving technology. 7. **Installation and Maintenance**: Choose a faucet that is easy to install and maintain. Some models offer quick-connect systems for DIY installation. 8. **Budget**: Set a budget and find a faucet that offers the best features within your price range. Remember that higher-quality faucets may have a higher upfront cost but offer better durability. 9. **Brand and Warranty**: Opt for reputable brands known for quality and customer service. Check the warranty for coverage on parts and finishes. 10. **User Reviews**: Read reviews to gauge performance and reliability from other users’ experiences.

What are the best brands for durable and reliable faucets?

Some of the best brands known for durable and reliable faucets include: 1. **Kohler**: Renowned for their innovative designs and high-quality materials, Kohler faucets are built to last. They offer a wide range of styles and finishes, ensuring both functionality and aesthetic appeal. 2. **Moen**: Known for their ease of use and installation, Moen faucets are highly durable and come with advanced features like MotionSense technology. Their lifetime warranty on many products underscores their reliability. 3. **Delta**: Delta faucets are celebrated for their technological innovations, such as Touch2O and MagnaTite Docking. They offer a variety of styles and finishes, ensuring long-lasting performance and style. 4. **Grohe**: A German brand, Grohe is synonymous with precision engineering and high-quality materials. Their faucets are designed for durability and often feature advanced water-saving technologies. 5. **Hansgrohe**: Known for their sleek designs and robust construction, Hansgrohe faucets offer both style and durability. They focus on eco-friendly technologies and ergonomic designs. 6. **American Standard**: With a long history of producing reliable plumbing products, American Standard faucets are known for their durability and affordability. They offer a wide range of styles suitable for any home. 7. **Pfister**: Pfister faucets are known for their innovative designs and reliable performance. They offer a variety of styles and finishes, often at a more affordable price point. 8. **TOTO**: TOTO faucets are known for their high-quality construction and innovative features. They focus on water efficiency and sustainability, making them a reliable choice. These brands are recognized for their commitment to quality, innovation, and customer satisfaction, making them top choices for durable and reliable faucets.

How do I install a new faucet?

1. **Gather Tools and Materials**: Adjustable wrench, basin wrench, plumber's tape, bucket, and the new faucet. 2. **Turn Off Water Supply**: Locate the shut-off valves under the sink and turn them off. Open the faucet to release any remaining water. 3. **Remove Old Faucet**: - Disconnect the water supply lines using an adjustable wrench. - Use a basin wrench to loosen and remove the nuts securing the faucet to the sink. - Lift the old faucet out. 4. **Clean the Area**: Remove any old plumber's putty or debris from the sink surface. 5. **Install New Faucet**: - Place the gasket or putty on the sink deck if required. - Insert the faucet through the mounting holes. - Secure it underneath with the provided nuts, using a basin wrench. 6. **Connect Water Supply Lines**: - Attach the hot and cold water supply lines to the corresponding valves. - Use plumber's tape on the threads to ensure a tight seal. - Tighten with an adjustable wrench. 7. **Check for Leaks**: - Turn on the water supply valves. - Open the faucet and check for leaks around connections. - Tighten connections if necessary. 8. **Finalize Installation**: - Ensure the faucet is aligned and secure. - Clean the area and remove any excess putty. 9. **Test the Faucet**: - Run both hot and cold water to ensure proper flow and temperature. - Check for any leaks again. 10. **Dispose of Old Faucet**: Properly dispose of or recycle the old faucet and any packaging materials.

What are the common problems with faucets and how can they be fixed?

Common problems with faucets include: 1. **Leaking Faucet**: Often caused by worn-out washers, O-rings, or seals. Fix by turning off the water supply, disassembling the faucet, and replacing the damaged parts. 2. **Low Water Pressure**: Usually due to clogged aerators or mineral buildup. Remove the aerator, clean it with vinegar, and reattach. Check for any blockages in the supply lines. 3. **Dripping Faucet**: Caused by worn-out washers or valve seats. Turn off the water, disassemble the faucet, and replace the washer or valve seat. 4. **Noisy Faucet**: Often due to loose parts or high water pressure. Tighten any loose components and check the water pressure. Install a pressure-reducing valve if necessary. 5. **Rust and Corrosion**: Caused by prolonged exposure to water and air. Clean with a vinegar solution and replace severely corroded parts. 6. **Stiff Handle**: Due to mineral buildup or worn-out cartridge. Remove the handle, clean the internal parts, and replace the cartridge if needed. 7. **Water Hammer**: A banging noise when the faucet is turned off, caused by high water pressure or loose pipes. Install water hammer arrestors or secure loose pipes. 8. **Faucet Sprayer Problems**: Often due to a clogged diverter or hose. Clean or replace the diverter and check the hose for blockages. 9. **Hot Water Issues**: Caused by a faulty mixing valve or water heater problems. Check and replace the mixing valve or inspect the water heater. 10. **Loose Faucet Base**: Tighten the mounting nuts under the sink to secure the faucet base. Regular maintenance and timely repairs can prevent these issues from escalating.

How do I maintain and clean my faucet to ensure longevity?

To maintain and clean your faucet for longevity, follow these steps: 1. **Regular Cleaning**: Wipe the faucet with a soft cloth and mild soap solution weekly to prevent mineral buildup and water spots. Avoid abrasive cleaners that can scratch the finish. 2. **Vinegar Soak**: For mineral deposits, soak a cloth in white vinegar and wrap it around the faucet. Leave it for 15-30 minutes, then scrub gently with a toothbrush. 3. **Aerator Cleaning**: Unscrew the aerator from the faucet tip every few months. Soak it in vinegar to dissolve mineral deposits, then rinse and reattach. 4. **Check for Leaks**: Regularly inspect for leaks or drips. Replace worn-out washers or O-rings promptly to prevent water wastage and further damage. 5. **Handle Care**: Tighten loose handles with a screwdriver. If the handle is stiff, apply a small amount of plumber’s grease to the stem. 6. **Avoid Harsh Chemicals**: Do not use bleach or ammonia-based cleaners, as they can damage the faucet’s finish. 7. **Polishing**: Use a non-abrasive polish or a mixture of baking soda and water to maintain shine. Buff with a soft cloth. 8. **Water Softener**: If you have hard water, consider installing a water softener to reduce mineral deposits. 9. **Professional Inspection**: Have a plumber inspect your plumbing system annually to catch potential issues early. 10. **Protect the Finish**: Avoid hanging wet towels or sponges on the faucet, as moisture can damage the finish over time. By following these steps, you can ensure your faucet remains functional and aesthetically pleasing for years.

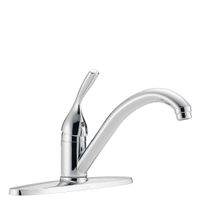
What is the difference between single-handle and double-handle faucets?

Single-handle faucets and double-handle faucets differ primarily in design, functionality, and user experience. Single-handle faucets feature one lever or knob that controls both the water temperature and flow. By moving the handle side to side, you adjust the temperature, while moving it up and down controls the flow rate. This design offers simplicity and ease of use, making it convenient for quick adjustments. It is also space-efficient, often requiring only one hole in the sink or countertop, which can be advantageous in smaller spaces or for a minimalist aesthetic. Installation and maintenance tend to be straightforward due to fewer components. Double-handle faucets, on the other hand, have two separate handles—one for hot water and one for cold. This design allows for more precise control over water temperature, as each handle can be adjusted independently. Double-handle faucets often require three holes for installation: one for each handle and one for the spout. They can be more traditional in appearance, appealing to those who prefer a classic or vintage look. However, they may require more effort to achieve the desired temperature and flow, as both handles need to be adjusted. In terms of maintenance, single-handle faucets might be easier to repair due to fewer parts, but if the internal cartridge fails, it can affect both temperature and flow. Double-handle faucets might require more frequent maintenance due to the additional components, but issues with one handle typically do not affect the other. Ultimately, the choice between single-handle and double-handle faucets depends on personal preference, the desired aesthetic, and specific functional needs.

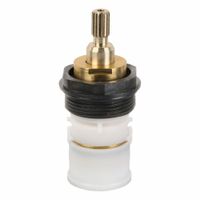
How do I replace a faucet cartridge or other parts?

1. **Turn Off Water Supply**: Locate the shut-off valves under the sink and turn them off. Open the faucet to release any remaining water pressure. 2. **Cover Drain**: Use a cloth or stopper to cover the drain to prevent any small parts from falling in. 3. **Remove Handle**: Depending on the faucet type, you may need to remove a decorative cap to access the screw. Use an Allen wrench or screwdriver to remove the handle. 4. **Detach Retaining Nut**: Use a wrench to unscrew the retaining nut or clip that holds the cartridge in place. 5. **Remove Cartridge**: Gently pull out the cartridge using pliers. Note the orientation for proper reinstallation. 6. **Inspect and Clean**: Check for any debris or mineral buildup inside the faucet body. Clean with vinegar or a suitable cleaner. 7. **Install New Cartridge**: Insert the new cartridge in the same orientation as the old one. Ensure it is seated properly. 8. **Reattach Retaining Nut**: Secure the cartridge with the retaining nut or clip. Tighten with a wrench, but avoid over-tightening. 9. **Reinstall Handle**: Place the handle back on and secure it with the screw. Replace any decorative caps. 10. **Turn On Water Supply**: Slowly turn on the shut-off valves. Check for leaks by running the faucet. 11. **Test Functionality**: Ensure the faucet operates smoothly and there are no leaks. 12. **Final Adjustments**: If necessary, make minor adjustments to the handle or cartridge alignment for optimal performance.

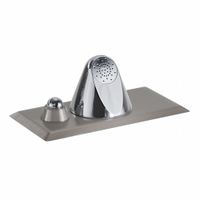
What are ligature-resistant faucets and where are they used?

Ligature-resistant faucets are specially designed plumbing fixtures intended to minimize the risk of self-harm or suicide by preventing the attachment of ligatures, such as ropes or cords. These faucets are engineered with smooth, rounded surfaces and lack protruding parts that could be used to tie or secure a ligature. The design often includes tamper-proof features and is made from durable materials to withstand misuse or vandalism. These faucets are primarily used in environments where individuals may be at risk of self-harm, such as psychiatric hospitals, mental health facilities, correctional institutions, and rehabilitation centers. They are also found in some schools, hospitals, and other public buildings where safety is a concern. The goal is to create a safer environment for vulnerable populations by reducing the means available for self-injury. In addition to their safety features, ligature-resistant faucets are designed to be functional and hygienic, often incorporating touchless technology to reduce the spread of germs. They may also include water-saving features to promote environmental sustainability. The use of ligature-resistant fixtures is part of a broader strategy to create ligature-resistant environments, which may also include specially designed door handles, shower heads, and furniture. These measures are critical in reducing the risk of suicide and self-harm in high-risk settings, aligning with best practices and regulatory standards for patient safety.

How do I increase water flow in a low-pressure faucet?

To increase water flow in a low-pressure faucet, follow these steps: 1. **Check for Blockages**: Remove the aerator at the tip of the faucet. Clean any debris or mineral deposits that may be obstructing water flow. Soak it in vinegar to dissolve hard water deposits. 2. **Inspect Supply Valves**: Ensure the water supply valves under the sink are fully open. Partially closed valves can restrict water flow. 3. **Clean the Faucet**: Disassemble the faucet to check for internal blockages. Clean any components that may have accumulated debris or mineral buildup. 4. **Check Water Pressure**: Measure the water pressure using a pressure gauge. If the pressure is below 40 psi, consider contacting your water supplier to address potential issues with the main supply. 5. **Replace Washer or Cartridge**: Worn-out washers or cartridges can reduce water flow. Replace them to restore proper function. 6. **Install a Booster Pump**: If the water pressure is consistently low, consider installing a water pressure booster pump to increase flow. 7. **Upgrade Plumbing**: If the plumbing is old or corroded, replacing it with larger diameter pipes can improve water flow. 8. **Check for Leaks**: Inspect for leaks in the plumbing system, as they can reduce water pressure. Repair any leaks found. 9. **Adjust Pressure Regulator**: If your home has a pressure regulator, adjust it to increase water pressure. Ensure it is set within safe limits (usually between 40-60 psi). 10. **Consult a Professional**: If the issue persists, consult a plumber to diagnose and resolve complex plumbing issues. By following these steps, you can effectively increase water flow in a low-pressure faucet.