Call +(254) 703 030 000 / 751 483 999 / 721 704 777

Frequently Asked Questions
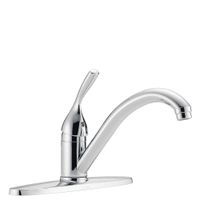
How do I install a kitchen faucet?
1. **Gather Tools and Materials**: Adjustable wrench, basin wrench, plumber's tape, bucket, towel, and the new faucet.
2. **Turn Off Water Supply**: Locate the shut-off valves under the sink and turn them off. Open the faucet to release any remaining water.
3. **Remove Old Faucet**:
- Disconnect the water supply lines using an adjustable wrench.
- Use a basin wrench to loosen and remove the nuts securing the faucet to the sink.
- Lift the old faucet out.
4. **Clean the Area**: Wipe the sink surface clean where the old faucet was installed.
5. **Install New Faucet**:
- Place the gasket or putty ring on the sink deck.
- Insert the faucet through the mounting holes.
- Secure the faucet underneath the sink with mounting nuts. Tighten with a basin wrench.
6. **Connect Water Supply Lines**:
- Attach the supply lines to the faucet’s tailpieces.
- Use plumber’s tape on the threads for a secure fit.
- Connect the other end to the shut-off valves.
7. **Check for Leaks**:
- Turn on the water supply.
- Open the faucet and check for leaks at all connections.
- Tighten connections if necessary.
8. **Test the Faucet**: Ensure both hot and cold water flow properly and the faucet operates smoothly.
9. **Final Adjustments**: Align the faucet and handles as needed.
10. **Clean Up**: Remove any tools and materials, and wipe down the area.
Your new kitchen faucet is now installed and ready for use.
What tools are needed for kitchen faucet installation?
For kitchen faucet installation, you will need the following tools:
1. **Adjustable Wrench**: To tighten or loosen nuts and bolts, especially those connecting the water supply lines.
2. **Basin Wrench**: Specifically designed for reaching and tightening nuts located in hard-to-reach areas under the sink.
3. **Plumber’s Putty**: Used to create a watertight seal around the base of the faucet.
4. **Teflon Tape**: Also known as plumber's tape, it is used to wrap around threaded connections to prevent leaks.
5. **Screwdriver**: Depending on the faucet model, you may need a flathead or Phillips screwdriver to remove or install screws.
6. **Bucket or Pan**: To catch any water that may spill when disconnecting the old faucet or water lines.
7. **Tape Measure**: To ensure the new faucet fits the existing sink configuration and to measure the distance for water supply lines.
8. **Flashlight**: Useful for illuminating the dark areas under the sink.
9. **Cleaning Supplies**: Such as a sponge or cloth to clean the area around the sink and remove any old putty or debris.
10. **Allen Wrench**: Some faucets require an Allen wrench to tighten set screws.
11. **Hacksaw or Pipe Cutter**: If you need to cut pipes to fit the new faucet.
12. **Channel Lock Pliers**: For gripping and turning pipes or fittings that are difficult to reach with a wrench.
13. **Safety Glasses**: To protect your eyes from debris or splashes.
Having these tools on hand will help ensure a smooth and efficient kitchen faucet installation process.
How do I choose the right kitchen faucet for my needs?
To choose the right kitchen faucet, consider the following factors:
1. **Mounting Style**: Determine if you need a deck-mounted or wall-mounted faucet based on your sink and countertop configuration.
2. **Number of Holes**: Check your sink for the number of pre-drilled holes to ensure compatibility with the faucet you choose.
3. **Handle Type**: Decide between single-handle or double-handle faucets. Single-handle faucets offer convenience and ease of use, while double-handle faucets provide precise temperature control.
4. **Spout Height and Reach**: Consider the height and reach of the spout to ensure it fits your sink and meets your needs, especially if you have large pots or a deep sink.
5. **Spray Features**: Look for faucets with pull-down or pull-out sprayers for added flexibility and ease in cleaning dishes and the sink area.
6. **Material and Finish**: Choose a durable material like stainless steel or brass, and select a finish that complements your kitchen decor, such as chrome, brushed nickel, or matte black.
7. **Water Efficiency**: Opt for a faucet with a WaterSense label or low-flow aerators to conserve water without sacrificing performance.
8. **Installation and Maintenance**: Consider ease of installation and maintenance. Some faucets come with quick-connect systems and easy-to-clean designs.
9. **Budget**: Set a budget and find a faucet that offers the best features and quality within your price range.
10. **Brand and Warranty**: Choose reputable brands known for quality and reliability, and check for warranties that offer protection against defects.
By evaluating these factors, you can select a kitchen faucet that meets your functional needs, complements your kitchen style, and fits your budget.
What are the common problems during kitchen faucet installation?
Common problems during kitchen faucet installation include:
1. **Incorrect Measurements**: Failing to measure the sink and faucet dimensions accurately can lead to purchasing a faucet that doesn't fit.
2. **Incompatible Parts**: Mismatched connections between the faucet and existing plumbing can cause leaks or require additional adapters.
3. **Old Plumbing**: Corroded or outdated plumbing may not support new installations, necessitating additional repairs or replacements.
4. **Improper Sealing**: Inadequate sealing with plumber’s putty or gaskets can result in water leaks around the base of the faucet.
5. **Tight Spaces**: Limited space under the sink can make it difficult to maneuver tools and parts, complicating the installation process.
6. **Cross-Threading**: Incorrectly threading connections can damage threads, leading to leaks or the need for replacement parts.
7. **Water Supply Issues**: Failing to turn off the water supply completely can cause flooding or water damage during installation.
8. **Loose Connections**: Not tightening connections sufficiently can result in leaks or unstable faucet operation.
9. **Improper Alignment**: Misaligning the faucet can affect its functionality and aesthetic appeal.
10. **Tool Misuse**: Using the wrong tools can damage parts or make installation more difficult.
11. **Ignoring Instructions**: Not following manufacturer instructions can lead to improper installation and void warranties.
12. **Lack of Experience**: Inexperience can lead to mistakes, such as over-tightening or under-tightening connections.
13. **Debris in Lines**: Failing to flush out debris from water lines before installation can clog the faucet.
14. **Inadequate Support**: Not securing the faucet properly can cause it to wobble or become loose over time.
15. **Overlooking Accessories**: Forgetting to install or improperly installing accessories like sprayers can affect functionality.
How do I replace an old kitchen faucet with a new one?
1. **Gather Tools and Materials**: Adjustable wrench, basin wrench, plumber’s tape, bucket, towel, and the new faucet.
2. **Turn Off Water Supply**: Locate the shut-off valves under the sink and turn them off. Open the faucet to release any remaining water.
3. **Disconnect Water Lines**: Place a bucket under the sink to catch any water. Use an adjustable wrench to disconnect the water supply lines from the faucet.
4. **Remove Old Faucet**: Use a basin wrench to loosen and remove the nuts securing the faucet to the sink. Lift the old faucet out.
5. **Clean the Area**: Clean the sink surface where the old faucet was installed to ensure a good seal for the new faucet.
6. **Install New Faucet**: Follow the manufacturer’s instructions. Insert the new faucet through the mounting holes. Secure it with the provided nuts and washers using a basin wrench.
7. **Connect Water Supply Lines**: Attach the water supply lines to the new faucet. Use plumber’s tape on the threads to ensure a tight seal. Tighten with an adjustable wrench.
8. **Check for Leaks**: Turn on the water supply valves. Check for leaks around the connections. Tighten if necessary.
9. **Test the Faucet**: Turn on the faucet to ensure it works properly and that both hot and cold water flow correctly.
10. **Final Adjustments**: Make any necessary adjustments to the faucet’s position or connections to ensure everything is secure and functioning.
11. **Clean Up**: Remove any tools and materials, and wipe down the area.
Your new kitchen faucet is now installed and ready for use.
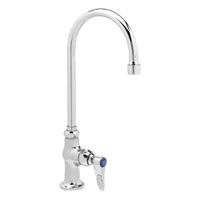
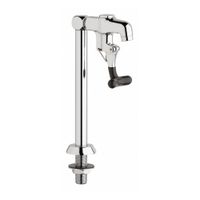
What is the difference between a kitchen faucet and a bar sink faucet?
A kitchen faucet and a bar sink faucet differ primarily in size, design, and functionality, tailored to their specific uses.
1. **Size and Scale**: Kitchen faucets are generally larger, designed to accommodate the larger sinks and more extensive tasks typical in a kitchen, such as washing large pots and pans. Bar sink faucets are smaller, fitting the compact size of bar sinks, which are often used for lighter tasks like rinsing glasses or preparing drinks.
2. **Design and Style**: Kitchen faucets come in a wide variety of styles and finishes, often featuring high-arc spouts to provide ample clearance for large cookware. They may also include additional features like pull-down or pull-out sprayers for versatility. Bar sink faucets, while also available in various styles, tend to have a simpler design due to their limited use and space constraints.
3. **Functionality**: Kitchen faucets are built for heavy-duty use, often equipped with multiple spray settings and higher flow rates to handle diverse kitchen tasks. Bar sink faucets, on the other hand, have lower flow rates and fewer features, as they are primarily used for quick, light tasks.
4. **Installation and Configuration**: Kitchen faucets typically require more complex installation due to their size and additional features. They may have multiple holes for accessories like soap dispensers or side sprayers. Bar sink faucets usually have a simpler installation process, often requiring just a single hole.
5. **Purpose and Use**: The primary purpose of a kitchen faucet is to facilitate cooking and cleaning in a kitchen environment. Bar sink faucets are designed for use in smaller, secondary sinks, often located in entertainment areas or wet bars, where they support activities like drink preparation and light cleanup.
These differences reflect the distinct roles each type of faucet plays in a home setting.
How do I maintain and clean a kitchen faucet to ensure longevity?
To maintain and clean a kitchen faucet for longevity, follow these steps:
1. **Regular Cleaning**: Wipe the faucet daily with a soft cloth and mild dish soap to remove water spots and grime. Rinse with water and dry with a clean towel to prevent mineral buildup.
2. **Deep Cleaning**: Once a week, use a mixture of equal parts water and white vinegar. Soak a cloth in the solution and wrap it around the faucet for 15-20 minutes to dissolve mineral deposits. Rinse thoroughly and dry.
3. **Aerator Maintenance**: Every few months, unscrew the aerator from the faucet spout. Soak it in vinegar for 30 minutes to remove mineral deposits. Use a toothbrush to scrub away any remaining debris, rinse, and reattach.
4. **Check for Leaks**: Regularly inspect the faucet for leaks or drips. Tighten any loose parts and replace worn-out washers or O-rings to prevent water wastage and damage.
5. **Handle Care**: Clean the handle with a damp cloth. If it becomes stiff, apply a small amount of plumber’s grease to the moving parts to ensure smooth operation.
6. **Avoid Harsh Chemicals**: Do not use abrasive cleaners, steel wool, or harsh chemicals, as they can damage the faucet’s finish.
7. **Water Softener**: If you have hard water, consider installing a water softener to reduce mineral buildup.
8. **Professional Inspection**: Have a plumber inspect the faucet annually to ensure all components are in good condition and to address any potential issues early.
By following these steps, you can maintain your kitchen faucet’s functionality and appearance, ensuring it lasts for many years.