Call +(254) 703 030 000 / 751 483 999 / 721 704 777

Frequently Asked Questions
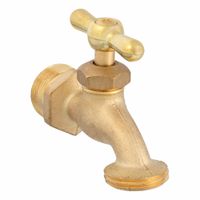
What is the difference between a hose bibb and a sillcock?
A hose bibb and a sillcock are both types of outdoor faucets, but they have distinct differences in design and functionality.
A hose bibb, also known as a spigot or outdoor faucet, is a simple valve that allows water to flow from a building's plumbing system to the outside. It is typically installed on the exterior wall of a house and is used for connecting garden hoses. Hose bibbs are generally made of brass or stainless steel and have a threaded outlet for hose attachment. They are straightforward in design and are suitable for mild climates where freezing temperatures are not a concern.
A sillcock, on the other hand, is a type of hose bibb that is specifically designed for cold climates. It is a frost-proof faucet that extends through the wall of a building, with the valve seat located inside the structure where it is protected from freezing temperatures. This design prevents water from being trapped in the pipe, reducing the risk of freezing and bursting. Sillcocks are longer than standard hose bibbs and often include a vacuum breaker to prevent backflow, which is a feature that helps maintain water quality by preventing contamination.
In summary, the main difference between a hose bibb and a sillcock is their suitability for different climates. Hose bibbs are ideal for warmer regions, while sillcocks are designed to withstand freezing conditions, offering additional protection against pipe damage.
How do I prevent my outdoor faucet from freezing?
To prevent your outdoor faucet from freezing, follow these steps:
1. **Shut Off Water Supply**: Locate the shut-off valve inside your home that controls the water flow to the outdoor faucet. Turn it off to stop water from reaching the faucet.
2. **Drain the Faucet**: Open the outdoor faucet to allow any remaining water to drain out. This step is crucial as standing water can freeze and cause pipes to burst.
3. **Disconnect Hoses**: Remove any attached hoses from the faucet. Water trapped in hoses can freeze and back up into the faucet, leading to damage.
4. **Install a Frost-Free Faucet**: Consider replacing your existing faucet with a frost-free model. These are designed to prevent freezing by keeping the water supply further inside the house where it is warmer.
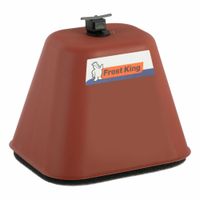
5. **Use Faucet Covers**: Purchase and install an insulated faucet cover. These covers provide an extra layer of protection against cold temperatures.
6. **Insulate Pipes**: Wrap the pipes leading to the outdoor faucet with foam pipe insulation. This helps maintain a warmer temperature around the pipes.
7. **Seal Gaps**: Check for and seal any gaps or cracks in the wall around the faucet. Cold air entering through these gaps can increase the risk of freezing.
8. **Heat Tape**: Apply heat tape or a heat cable to the pipes. This electrically powered tape provides warmth to prevent freezing.
9. **Keep a Trickle**: In extremely cold conditions, consider leaving the faucet slightly open to allow a small trickle of water. Moving water is less likely to freeze.
10. **Regular Maintenance**: Regularly inspect your outdoor faucet and pipes for any signs of wear or damage, and address issues promptly to prevent freezing.
By following these steps, you can effectively protect your outdoor faucet from freezing during cold weather.
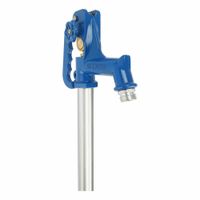
How do I install a yard hydrant?
1. **Choose Location**: Select a spot with good drainage, away from septic systems or underground utilities.
2. **Dig a Trench**: Excavate a trench from the water source to the hydrant location, typically 3-4 feet deep to prevent freezing.
3. **Install Supply Line**: Lay a PVC or PEX pipe in the trench, ensuring it slopes slightly towards the hydrant for drainage.
4. **Connect to Water Source**: Attach the supply line to the main water line using appropriate fittings and a shut-off valve.
5. **Prepare Hydrant Site**: Dig a hole at the hydrant location, about 1 foot deeper than the trench, and wide enough to accommodate gravel.
6. **Add Gravel**: Pour a layer of gravel at the bottom of the hole for drainage.
7. **Install Hydrant**: Position the hydrant in the hole, ensuring the drain hole is above the gravel. Connect the hydrant to the supply line using a fitting.
8. **Backfill**: Fill the hole and trench with soil, compacting it as you go to prevent settling. Ensure the hydrant stands upright.
9. **Test for Leaks**: Turn on the water supply and check for leaks at all connections.
10. **Adjust Hydrant**: Ensure the hydrant operates smoothly and drains properly when turned off.
11. **Secure Hydrant**: If necessary, add a concrete pad or brace to stabilize the hydrant.
12. **Final Check**: Verify the hydrant drains completely to prevent freezing, and make any necessary adjustments.
What are the common problems with outdoor hose bibbs and hydrants?
Common problems with outdoor hose bibbs and hydrants include:
1. **Leaks**: Over time, washers and seals can wear out, leading to leaks around the handle or spout. This can waste water and increase utility bills.
2. **Freezing**: In colder climates, water left in the pipes can freeze, causing the pipe or the bibb itself to crack. Frost-free hose bibbs can mitigate this issue but must be installed correctly.
3. **Corrosion**: Metal components, especially those made of brass or copper, can corrode due to exposure to the elements, leading to weakened structures and potential leaks.
4. **Low Water Pressure**: Sediment buildup or partial blockages in the pipes can reduce water flow, resulting in low pressure at the hose bibb.
5. **Stiff Handles**: Over time, the handle can become difficult to turn due to mineral deposits or corrosion, making it hard to operate the bibb.
6. **Backflow Issues**: Without a proper backflow preventer, contaminated water can siphon back into the home’s water supply, posing health risks.
7. **Loose Connections**: The connection between the hose and the bibb can become loose, leading to leaks and inefficient water use.
8. **Cracked or Damaged Components**: Physical damage from impacts or wear and tear can lead to cracks in the bibb or hydrant, necessitating repairs or replacements.
9. **Valve Failure**: The internal valve can fail, preventing the bibb from shutting off completely, which can lead to continuous dripping.
10. **Improper Installation**: Incorrect installation can lead to a variety of issues, including leaks, poor water flow, and increased susceptibility to freezing.
Regular maintenance and timely repairs can help mitigate these common problems.
How do I repair a leaking outdoor faucet?
1. **Turn Off Water Supply**: Locate the shut-off valve for the outdoor faucet and turn it off. If there isn't a dedicated valve, turn off the main water supply to your home.
2. **Drain the Faucet**: Open the faucet to drain any remaining water and relieve pressure.
3. **Remove the Handle**: Use a screwdriver to remove the screw holding the handle in place. Pull the handle off the faucet.
4. **Detach the Packing Nut**: Use an adjustable wrench to unscrew the packing nut located behind the handle.
5. **Extract the Valve Stem**: Once the packing nut is removed, pull out the valve stem. This may require some wiggling.
6. **Inspect the Washer**: At the end of the valve stem, you'll find a rubber washer. Check for wear or damage. If it's worn out, replace it with a new washer of the same size.
7. **Check the Packing**: Inspect the packing material around the valve stem. If it's worn, replace it with new packing or a new O-ring.
8. **Reassemble the Faucet**: Reinsert the valve stem and tighten the packing nut with the wrench. Reattach the handle and secure it with the screw.
9. **Turn On Water Supply**: Slowly turn the water supply back on and check for leaks.
10. **Test the Faucet**: Open and close the faucet to ensure it operates smoothly and no leaks are present.
11. **Additional Repairs**: If the leak persists, the faucet seat may be damaged. Use a seat wrench to remove and replace it, or consider replacing the entire faucet if necessary.
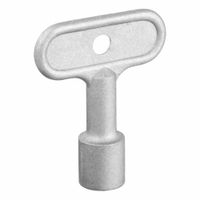
What is the purpose of a wall hydrant key?
A wall hydrant key is a specialized tool used to operate wall hydrants, which are fixtures that provide access to water supply systems, typically for firefighting or maintenance purposes. These hydrants are often installed on the exterior walls of buildings or in public spaces and are designed to be tamper-resistant to prevent unauthorized access. The wall hydrant key serves several purposes:
1. **Access Control**: The key ensures that only authorized personnel, such as firefighters or maintenance workers, can access the water supply. This prevents misuse or vandalism, which could lead to water wastage or damage.
2. **Operational Efficiency**: In emergency situations, such as fires, quick access to water is crucial. The wall hydrant key allows trained personnel to rapidly open the hydrant and connect hoses or other firefighting equipment, facilitating a swift response.
3. **Security**: By requiring a specific key to operate, wall hydrants are protected from unauthorized use. This security measure helps maintain the integrity of the water supply system and ensures it is available when needed.
4. **Maintenance**: Regular maintenance of water systems is essential for their proper functioning. The wall hydrant key allows maintenance workers to access the hydrant for inspections, repairs, or cleaning, ensuring the system remains in good working order.
5. **Standardization**: Wall hydrant keys are often standardized within a region or organization, allowing for uniformity in equipment and training. This standardization simplifies operations and ensures that personnel can operate hydrants across different locations without confusion.
In summary, the wall hydrant key is a critical tool for ensuring controlled, efficient, and secure access to water supply systems, particularly in emergency and maintenance scenarios.
How do I replace parts on a yard hydrant?
1. **Turn Off Water Supply**: Locate the main water valve and turn it off to stop water flow to the hydrant.
2. **Drain the Hydrant**: Open the hydrant to drain any remaining water. This prevents water from spilling during disassembly.
3. **Remove the Head**: Use a pipe wrench to unscrew the head of the hydrant. Be careful not to damage the threads.
4. **Extract the Rod**: Pull out the operating rod from the standpipe. This rod connects the handle to the plunger at the bottom.
5. **Inspect and Replace Parts**: Check the rod, plunger, and any washers or seals for wear or damage. Replace any worn or damaged parts. Common replacements include the plunger, O-rings, and seals.
6. **Reassemble the Rod**: Insert the new or repaired rod back into the standpipe, ensuring it aligns correctly with the plunger.
7. **Reattach the Head**: Screw the hydrant head back onto the standpipe. Ensure it is tight to prevent leaks.
8. **Test the Hydrant**: Turn the water supply back on and test the hydrant for leaks and proper operation. Open and close the hydrant to ensure smooth operation.
9. **Adjust as Necessary**: If there are leaks or operational issues, adjust the components or tighten connections as needed.
10. **Final Check**: Ensure the hydrant is functioning correctly and there are no leaks at any connection points.
By following these steps, you can effectively replace parts on a yard hydrant, ensuring it operates efficiently and without leaks.