Sinks, Wash Fountains & Repair Parts

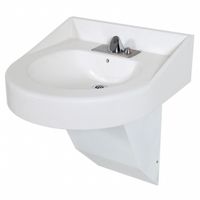
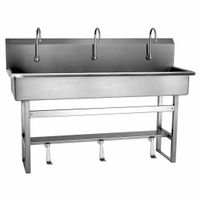
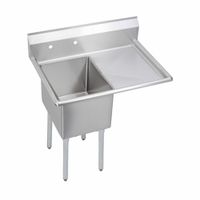
Sinks, wash fountains, and repair parts promote cleanliness and hygiene wherever there is access to plumbed or portable water. Bathroom sinks are used for handwashing and grooming tasks in restrooms. Hand sinks and wash stations include single sinks to multi-user stations for washing hands, foods, a .....Read More

Frequently Asked Questions

What are the different types of sinks and their uses?

There are several types of sinks, each designed for specific uses and settings: 1. **Top-Mount Sink**: Also known as drop-in sinks, these are installed from above the countertop. The rim sits on the counter, making them easy to install and replace. They are commonly used in kitchens and bathrooms. 2. **Undermount Sink**: Installed beneath the countertop, these sinks offer a seamless look and make countertop cleaning easier. They are popular in modern kitchens and bathrooms for their sleek appearance. 3. **Farmhouse Sink**: Also called apron-front sinks, these have a deep basin and an exposed front. They are ideal for kitchens, providing ample space for washing large pots and pans. 4. **Vessel Sink**: These sit on top of the counter and are often used in bathrooms for a stylish, contemporary look. They come in various shapes and materials, adding a decorative element. 5. **Pedestal Sink**: Supported by a pedestal, these are common in bathrooms with limited space. They offer a classic look and are ideal for small bathrooms. 6. **Wall-Mounted Sink**: Attached directly to the wall, these sinks save floor space and are often used in small bathrooms or utility areas. 7. **Bar Sink**: Smaller than standard kitchen sinks, bar sinks are used in home bars or entertainment areas for convenience in preparing drinks and snacks. 8. **Utility Sink**: Found in laundry rooms or garages, these are larger and deeper, designed for heavy-duty cleaning tasks. 9. **Integrated Sink**: Made from the same material as the countertop, these sinks offer a seamless look and are easy to clean. They are often used in modern kitchens and bathrooms. 10. **Corner Sink**: Designed to fit into a corner, these are used in small kitchens or bathrooms to maximize space. Each type of sink serves a specific purpose, catering to different functional and aesthetic needs.

How do I choose the right sink for my kitchen or bathroom?

1. **Assess Your Needs**: Consider the primary use of the sink. For kitchens, think about cooking habits, cleaning needs, and family size. For bathrooms, consider the frequency of use and available space. 2. **Size and Space**: Measure the available space. Ensure the sink fits comfortably without overwhelming the area. In kitchens, larger sinks are ideal for frequent cooking, while smaller sinks suit compact spaces. In bathrooms, choose a size that complements the vanity and allows for easy movement. 3. **Material**: Choose durable materials. Stainless steel is popular for kitchens due to its durability and ease of cleaning. Porcelain and ceramic are common in bathrooms for their aesthetic appeal. Consider maintenance and longevity. 4. **Style and Design**: Match the sink style with your decor. Undermount sinks offer a seamless look, while drop-in sinks are easier to install. Farmhouse sinks add a rustic touch to kitchens, while vessel sinks can be a stylish choice for bathrooms. 5. **Configuration**: Decide on the number of basins. Single-basin sinks are versatile, while double-basin sinks offer more functionality. In bathrooms, consider whether you need a single or double sink based on usage. 6. **Faucet Compatibility**: Ensure the sink is compatible with your chosen faucet. Check the number of holes and their configuration. 7. **Budget**: Set a budget. Prices vary based on material, size, and brand. Balance cost with quality and features. 8. **Installation**: Consider the complexity of installation. Some sinks may require professional installation, adding to the cost. 9. **Maintenance**: Choose a sink that is easy to clean and maintain. Consider stain resistance and durability. 10. **Aesthetics**: Ensure the sink complements the overall design and color scheme of the room.

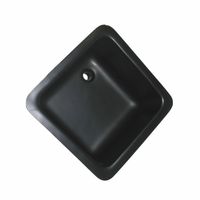
What materials are sinks typically made from?

Sinks are typically made from a variety of materials, each offering distinct advantages in terms of durability, aesthetics, and functionality. Common materials include: 1. **Stainless Steel**: Popular for its durability, resistance to corrosion, and ease of maintenance. It is available in various gauges, with thicker gauges offering more durability and noise reduction. 2. **Porcelain/Enamel**: Often used in bathroom sinks, these materials provide a classic look and are available in various colors. They are easy to clean but can chip or crack under heavy impact. 3. **Cast Iron**: Coated with enamel, cast iron sinks are known for their strength and longevity. They offer a glossy finish and are resistant to stains and scratches, though they are heavy and require sturdy support. 4. **Composite Granite**: Made from a blend of granite stone dust and acrylic resins, these sinks are durable, resistant to scratches and chips, and offer a natural stone appearance. 5. **Fireclay**: Similar to porcelain but more durable, fireclay sinks are made by molding clay and glazing it at high temperatures. They are resistant to scratches and stains and offer a traditional farmhouse look. 6. **Acrylic**: Lightweight and affordable, acrylic sinks are easy to install and come in various colors and styles. They are less durable than other materials and can be prone to scratches and stains. 7. **Copper**: Known for its antimicrobial properties, copper sinks develop a unique patina over time. They are durable and offer a rustic aesthetic but require regular maintenance to prevent tarnishing. 8. **Solid Surface**: Made from a blend of acrylic and polyester, these sinks offer seamless integration with countertops and are available in various colors and patterns. They are easy to clean but can be susceptible to scratches. 9. **Natural Stone**: Materials like marble, granite, or soapstone provide a luxurious appearance. They are durable but require sealing to prevent staining and damage. Each material offers unique benefits, making the choice dependent on personal preference, budget, and intended use.

How do I install a new sink or replace an old one?

1. **Turn Off Water Supply**: Shut off the water valves under the sink. If there are no valves, turn off the main water supply. 2. **Remove Old Sink**: Disconnect the water supply lines using a wrench. Detach the drain pipe by loosening the slip nuts. If the sink is secured with clips, unscrew them. Cut any sealant around the sink with a utility knife. Lift the sink out. 3. **Prepare the Area**: Clean the countertop surface. Check for any damage and repair if necessary. 4. **Install Faucet and Accessories**: Before placing the new sink, install the faucet and any accessories like a sprayer or soap dispenser. Follow the manufacturer's instructions. 5. **Position the New Sink**: Apply a bead of silicone sealant around the edge of the sink cutout. Lower the new sink into place, ensuring it fits snugly. 6. **Secure the Sink**: If the sink uses clips, attach them underneath the countertop to secure the sink. Tighten them evenly. 7. **Connect Water Supply Lines**: Attach the water supply lines to the faucet. Use plumber’s tape on the threads to ensure a tight seal. 8. **Connect Drain Assembly**: Attach the drain assembly to the sink. Connect the P-trap and ensure all connections are tight to prevent leaks. 9. **Check for Leaks**: Turn on the water supply and check for leaks. Tighten connections if necessary. 10. **Seal the Edges**: Apply a bead of silicone sealant around the edge of the sink where it meets the countertop. Smooth it with a finger or tool. 11. **Clean Up**: Wipe away any excess sealant and clean the area. 12. **Test Functionality**: Run water to ensure everything is working properly and there are no leaks.

What are common sink repair issues and how can they be fixed?

Common sink repair issues include: 1. **Leaky Faucet**: Often caused by worn-out washers, O-rings, or seals. Fix by turning off the water supply, disassembling the faucet, and replacing the damaged parts. 2. **Clogged Drain**: Usually due to hair, soap, or food debris. Use a plunger, plumber’s snake, or a mixture of baking soda and vinegar to clear the blockage. For persistent clogs, disassemble the P-trap to remove debris. 3. **Low Water Pressure**: Often results from mineral buildup in the aerator. Unscrew the aerator, clean it with vinegar, and reattach. If the issue persists, check for leaks or blockages in the pipes. 4. **Leaking Pipes**: Caused by loose connections or damaged pipes. Tighten connections with a wrench or replace damaged sections. Use plumber’s tape on threaded connections to ensure a tight seal. 5. **Dripping Sink**: Typically due to a faulty faucet or valve. Replace worn-out washers or cartridges. Ensure all connections are tight and properly sealed. 6. **Rust or Corrosion**: Common in older sinks. Sand down rust spots and apply a rust-resistant primer and paint. For severe corrosion, consider replacing the affected parts. 7. **Loose Sink Mounting**: Caused by worn-out mounting hardware. Tighten or replace the mounting clips or brackets to secure the sink. 8. **Bad Odors**: Often from trapped food or bacteria. Clean the drain with baking soda and vinegar, and ensure the P-trap is functioning properly to block sewer gases. 9. **Noisy Pipes**: Known as water hammer, caused by high water pressure or loose pipes. Install water hammer arrestors or secure loose pipes with brackets. 10. **Cracked Sink**: Small cracks can be sealed with epoxy or a porcelain repair kit. For larger cracks, replacement may be necessary.

How do I maintain and clean my sink to ensure hygiene?

To maintain and clean your sink for optimal hygiene, follow these steps: 1. **Daily Rinse and Wipe**: After each use, rinse the sink with hot water to remove food particles and soap residue. Wipe it down with a clean cloth or sponge to prevent water spots and soap scum. 2. **Weekly Deep Clean**: Once a week, sprinkle baking soda over the sink's surface. Scrub with a soft sponge or cloth, focusing on corners and around the drain. Rinse thoroughly with hot water. 3. **Disinfect**: Mix equal parts of water and white vinegar in a spray bottle. Spray the solution over the sink and let it sit for 5-10 minutes. Wipe with a clean cloth. Vinegar acts as a natural disinfectant. 4. **Remove Stains**: For stubborn stains, make a paste of baking soda and water. Apply it to the stained area, let it sit for 10-15 minutes, then scrub gently and rinse. 5. **Clean the Drain**: Pour a cup of baking soda followed by a cup of vinegar down the drain. Let it fizz for 10-15 minutes, then flush with boiling water to clear any buildup and odors. 6. **Polish**: For stainless steel sinks, apply a few drops of olive oil or a stainless steel cleaner on a soft cloth and buff the sink to restore shine. 7. **Avoid Harsh Chemicals**: Use mild, non-abrasive cleaners to prevent damage to the sink's surface. 8. **Regular Maintenance**: Check for leaks and ensure the faucet and handles are clean. Replace worn-out parts promptly. By following these steps, you can maintain a clean, hygienic sink that is free from bacteria and unpleasant odors.

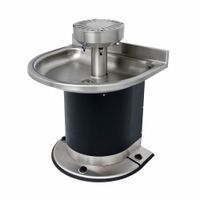
What are the benefits of using wash fountains in high-traffic areas?

Wash fountains offer several benefits in high-traffic areas: 1. **Space Efficiency**: Wash fountains are designed to accommodate multiple users simultaneously, reducing the need for multiple individual sinks. This design optimizes space, making them ideal for areas with limited room. 2. **Cost-Effective**: By serving multiple users at once, wash fountains reduce the need for additional plumbing fixtures, which can lower installation and maintenance costs. They also typically require fewer plumbing connections, which can further reduce expenses. 3. **Water Conservation**: Many wash fountains are equipped with automatic sensors or foot pedals that control water flow, minimizing water waste. This feature is particularly beneficial in high-traffic areas where water usage can be significant. 4. **Durability**: Constructed from robust materials like stainless steel or solid surface materials, wash fountains are designed to withstand heavy use and resist vandalism, making them a durable choice for busy environments. 5. **Ease of Maintenance**: With fewer fixtures to clean and maintain, wash fountains simplify janitorial tasks. Their design often includes smooth surfaces and fewer crevices, reducing the accumulation of dirt and bacteria. 6. **Hygiene**: Many wash fountains incorporate touchless technology, such as infrared sensors, which helps reduce the spread of germs by minimizing contact with surfaces. This is particularly important in high-traffic areas where hygiene is a concern. 7. **Accessibility**: Wash fountains can be designed to accommodate users of different heights and abilities, including those with disabilities, ensuring compliance with accessibility standards. 8. **Aesthetic Appeal**: Modern wash fountains come in various designs and finishes, allowing them to complement the aesthetic of the surrounding environment while providing a functional solution. Overall, wash fountains are a practical, efficient, and hygienic choice for high-traffic areas, offering both functional and economic advantages.

How do I find the right repair parts for my sink or wash fountain?

1. **Identify the Problem**: Determine the specific issue with your sink or wash fountain, such as a leaky faucet, clogged drain, or broken handle. 2. **Gather Information**: Note the brand, model, and any serial numbers of your sink or wash fountain. This information is often found on the underside or back of the fixture. 3. **Consult the Manual**: Refer to the user manual or installation guide for part numbers and diagrams. If you don’t have a physical copy, search online for a digital version using the model number. 4. **Research Online**: Use the model and part numbers to search for replacement parts on manufacturer websites or online retailers. Websites like Amazon, Home Depot, or specialized plumbing supply stores can be useful. 5. **Visit a Local Store**: Bring the faulty part to a local hardware or plumbing supply store. Staff can help identify the correct replacement and may offer advice on installation. 6. **Contact the Manufacturer**: Reach out to the manufacturer’s customer service for assistance in identifying and ordering the correct parts. They may also provide guidance on installation. 7. **Consider Compatibility**: Ensure that the replacement part is compatible with your specific model. Some parts are universal, while others are model-specific. 8. **Check Reviews and Ratings**: Before purchasing, check reviews and ratings of the parts to ensure quality and compatibility. 9. **Purchase and Install**: Once you have the correct part, follow the installation instructions carefully. If unsure, consider hiring a professional plumber to avoid further damage. 10. **Keep Records**: Save receipts, part numbers, and any correspondence for future reference.

What are the differences between plumbed and portable sinks?

Plumbed sinks are permanently installed fixtures connected to a building's plumbing system. They have a continuous water supply and drainage, making them ideal for locations with established infrastructure, such as kitchens and bathrooms in homes or commercial spaces. Plumbed sinks offer convenience and efficiency, as they provide a steady flow of hot and cold water and are typically more durable due to their fixed installation. They require professional installation and maintenance, which can be costly and time-consuming. Portable sinks, on the other hand, are self-contained units that do not require a connection to a building's plumbing system. They are equipped with their own water tanks and waste collection systems, making them versatile and easy to relocate. Portable sinks are ideal for temporary setups, outdoor events, or locations without access to traditional plumbing. They are generally easier and cheaper to install and maintain, as they do not require professional plumbing services. However, they may have limitations in water capacity and pressure, and they require regular refilling and waste disposal. In summary, the main differences between plumbed and portable sinks lie in their installation, mobility, and maintenance requirements. Plumbed sinks offer a permanent, reliable solution with continuous water supply, while portable sinks provide flexibility and convenience for temporary or remote use.

How do I prevent clogs and other plumbing issues in my sink?

To prevent clogs and other plumbing issues in your sink, follow these steps: 1. **Use Drain Guards**: Install mesh or perforated drain covers to catch food particles, hair, and other debris before they enter the pipes. 2. **Avoid Pouring Grease**: Never pour cooking grease or oil down the sink. Instead, let it cool and dispose of it in the trash or recycle it if possible. 3. **Dispose of Food Properly**: Scrape food scraps into the trash or compost bin before washing dishes. Avoid using the garbage disposal for fibrous or starchy foods like potato peels and celery. 4. **Regular Cleaning**: Clean the sink and drain regularly with a mixture of baking soda and vinegar. Pour half a cup of baking soda followed by half a cup of vinegar down the drain, let it sit for 15 minutes, then flush with hot water. 5. **Hot Water Flush**: Run hot water down the drain after each use to help dissolve and wash away any grease or soap residue. 6. **Mindful Product Use**: Use minimal amounts of soap and cleaning products to reduce residue buildup. Opt for liquid soap over bar soap to minimize soap scum. 7. **Avoid Chemical Drain Cleaners**: These can damage pipes over time. Use natural alternatives or call a professional for persistent clogs. 8. **Regular Maintenance**: Periodically check under the sink for leaks or signs of wear. Tighten fittings and replace worn-out parts as needed. 9. **Educate Household Members**: Ensure everyone in the household knows what can and cannot go down the sink to prevent accidental clogs. 10. **Professional Inspection**: Have a plumber inspect your plumbing system annually to catch potential issues early. By following these practices, you can significantly reduce the risk of clogs and maintain a smoothly functioning sink.