Call +(254) 703 030 000 / 751 483 999 / 721 704 777
.....Read More


Frequently Asked Questions
What items should be included in a basic first-aid kit?
A basic first-aid kit should include the following items:
1. **Adhesive Bandages**: Various sizes for minor cuts and abrasions.
2. **Sterile Gauze Pads**: Different sizes for larger wounds.
3. **Adhesive Tape**: To secure bandages and gauze.
4. **Antiseptic Wipes**: For cleaning wounds to prevent infection.
5. **Antibiotic Ointment**: To apply on cuts and scrapes.
6. **Hydrocortisone Cream**: For itching and skin irritations.
7. **Pain Relievers**: Such as aspirin, ibuprofen, or acetaminophen.
8. **Tweezers**: For removing splinters or debris from wounds.
9. **Scissors**: For cutting tape, gauze, or clothing.
10. **Safety Pins**: To secure bandages or slings.
11. **Instant Cold Packs**: For reducing swelling and pain.
12. **Elastic Bandages**: For sprains and strains.
13. **Thermometer**: To check for fever.
14. **Disposable Gloves**: To maintain hygiene and prevent infection.
15. **CPR Face Shield**: For safe resuscitation.
16. **First-Aid Manual**: For guidance on handling emergencies.
17. **Alcohol Swabs**: For disinfecting tools and skin.
18. **Eye Wash Solution**: For rinsing out eyes.
19. **Triangular Bandage**: For slings or as a tourniquet.
20. **Burn Cream or Gel**: For minor burns.
21. **Medical Adhesive Strips**: For securing dressings.
22. **Cotton Balls and Swabs**: For applying ointments or cleaning.
23. **Emergency Blanket**: To prevent hypothermia.
24. **Mouth-to-Mouth Resuscitation Mask**: For safe breathing assistance.
25. **Notepad and Pencil**: For recording medical information or instructions.
Ensure the kit is regularly checked and restocked, and familiarize yourself with the use of each item.
How do you properly clean and dress a wound?
To properly clean and dress a wound, follow these steps:
1. **Preparation**: Wash your hands thoroughly with soap and water. Wear disposable gloves if available to prevent infection.
2. **Stop Bleeding**: Apply gentle pressure with a clean cloth or bandage. Elevate the wound above heart level if possible.
3. **Clean the Wound**: Rinse the wound under cool running water to remove debris. Use a saline solution or mild soap if necessary, but avoid using hydrogen peroxide or iodine directly on the wound as they can damage tissue.
4. **Debridement**: If debris remains, use sterilized tweezers to gently remove it. Ensure tweezers are cleaned with alcohol before use.
5. **Disinfect**: Apply an antiseptic solution or ointment to prevent infection. Avoid using alcohol or hydrogen peroxide directly on the wound.
6. **Dry the Area**: Gently pat the wound and surrounding skin dry with a clean cloth or sterile gauze.
7. **Apply a Dressing**: Choose a sterile bandage or gauze pad that covers the wound completely. Secure it with medical tape or a bandage wrap, ensuring it is snug but not too tight.
8. **Monitor and Change Dressings**: Change the dressing daily or whenever it becomes wet or dirty. Check for signs of infection, such as redness, swelling, or pus.
9. **Seek Medical Attention**: Consult a healthcare professional if the wound is deep, won't stop bleeding, shows signs of infection, or if you haven't had a tetanus shot in the last five years.
10. **Aftercare**: Keep the wound clean and dry. Avoid exposing it to dirt or bacteria. Follow any additional care instructions provided by a healthcare professional.
What is the best way to treat a minor burn?
To treat a minor burn, follow these steps:
1. **Cool the Burn**: Immediately hold the burned area under cool (not cold) running water for 10-15 minutes or apply a clean, cool, wet cloth. This helps reduce swelling by conducting heat away from the skin.
2. **Clean the Burn**: Gently clean the burn with mild soap and water. Avoid scrubbing, which can irritate the skin further.
3. **Protect the Burn**: Cover the burn with a sterile, non-stick bandage or clean cloth. Avoid using fluffy cotton, which can stick to the wound. This protects the area from infection and irritation.
4. **Apply a Moisturizer**: Use an aloe vera gel or a burn ointment to keep the area moist. Aloe vera has soothing properties and can aid in healing. Avoid using butter, oils, or other home remedies that can trap heat.
5. **Pain Relief**: Take over-the-counter pain relievers like ibuprofen or acetaminophen to alleviate pain and reduce inflammation.
6. **Avoid Breaking Blisters**: If blisters form, do not pop them. Blisters protect the underlying skin and breaking them increases the risk of infection.
7. **Monitor for Infection**: Watch for signs of infection, such as increased redness, swelling, pus, or a fever. If these occur, seek medical attention.
8. **Avoid Sun Exposure**: Keep the burn out of direct sunlight as the skin will be sensitive and more prone to damage.
9. **Seek Medical Attention if Needed**: If the burn covers a large area, is on the face, hands, feet, or genitals, or if you have any concerns about healing, consult a healthcare professional.
These steps can help ensure proper healing and minimize complications from minor burns.
How do you use a cold pack for injury relief?
To use a cold pack for injury relief, follow these steps:
1. **Select the Right Cold Pack**: Choose a gel-based cold pack or a bag of frozen vegetables if a commercial pack is unavailable. Ensure the pack is flexible enough to mold around the injury.
2. **Prepare the Cold Pack**: If using a gel pack, ensure it is adequately frozen. For homemade packs, wrap ice cubes in a towel or use a resealable plastic bag filled with ice.
3. **Protect the Skin**: Always place a thin cloth or towel between the cold pack and the skin to prevent frostbite or skin irritation. Direct contact with ice can damage the skin.
4. **Apply the Cold Pack**: Place the cold pack on the injured area. Ensure it covers the entire affected region for optimal relief.
5. **Duration of Application**: Keep the cold pack on the injury for 15-20 minutes. Do not exceed this time to avoid skin damage. Allow the skin to return to normal temperature before reapplying.
6. **Frequency**: Apply the cold pack every 1-2 hours during the first 24-48 hours after the injury. This helps reduce swelling and numbs the area to alleviate pain.
7. **Monitor the Injury**: Check the skin under the cold pack regularly for any signs of frostbite or excessive redness. Discontinue use if any adverse reactions occur.
8. **Post-Application Care**: After removing the cold pack, gently pat the area dry. Avoid applying heat immediately after cold therapy, as it can exacerbate swelling.
9. **Consult a Professional**: If pain or swelling persists, seek medical advice. Cold therapy is a temporary relief method and may not address underlying issues.
By following these steps, you can effectively use a cold pack to manage pain and swelling from injuries.
What are the benefits of using topical first-aid medications?
Topical first-aid medications offer several benefits, including targeted treatment, reduced systemic side effects, and ease of application. By applying the medication directly to the affected area, these treatments provide immediate relief and faster healing for minor injuries such as cuts, scrapes, burns, and insect bites. This localized approach ensures that the active ingredients are concentrated where they are needed most, enhancing their effectiveness.
One of the primary advantages is the reduction in systemic absorption, which minimizes the risk of side effects that are more common with oral medications. This is particularly beneficial for individuals who may be sensitive to certain drugs or for those who are already taking multiple medications, as it reduces the likelihood of drug interactions.
Topical first-aid medications are also user-friendly, often available over-the-counter, and can be applied without the need for medical supervision. This accessibility allows for prompt treatment, which is crucial in preventing infections and promoting quicker recovery. Many of these products contain antiseptic or antibacterial agents that help prevent infection, as well as soothing ingredients like aloe vera or lidocaine to alleviate pain and discomfort.
Furthermore, these medications often come in various forms, such as creams, ointments, gels, and sprays, providing options that cater to different preferences and types of wounds. This versatility ensures that users can select the most appropriate form for their specific needs, enhancing compliance and effectiveness.
In summary, topical first-aid medications offer a convenient, effective, and safe option for managing minor injuries, providing targeted relief with minimal risk of systemic side effects.
How do you treat insect bites and stings effectively?
To effectively treat insect bites and stings, follow these steps:
1. **Immediate Action**: Remove the stinger if present, especially in bee stings, by scraping it off with a flat object like a credit card. Avoid using tweezers as squeezing can release more venom.
2. **Clean the Area**: Wash the affected area with soap and water to prevent infection.
3. **Cold Compress**: Apply a cold pack or a cloth filled with ice to the bite or sting site for 10-15 minutes. This helps reduce swelling and numb the pain.
4. **Pain Relief**: Take over-the-counter pain relievers such as ibuprofen or acetaminophen to alleviate pain and discomfort.
5. **Itch Relief**: Apply topical treatments like calamine lotion, hydrocortisone cream, or antihistamine creams to reduce itching. Oral antihistamines like diphenhydramine can also be effective.
6. **Elevation**: If the bite or sting is on an extremity, elevate the limb to reduce swelling.
7. **Monitor for Allergic Reactions**: Watch for signs of a severe allergic reaction (anaphylaxis), such as difficulty breathing, swelling of the face or throat, rapid heartbeat, or dizziness. If these occur, seek emergency medical help immediately.
8. **Avoid Scratching**: Refrain from scratching the area to prevent infection and further irritation.
9. **Natural Remedies**: Some people find relief using natural remedies like aloe vera, honey, or baking soda paste, which can soothe the skin.
10. **Medical Attention**: Seek medical attention if symptoms worsen, if there are multiple stings, or if the bite is from a potentially dangerous insect like a black widow spider or brown recluse spider.
By following these steps, you can effectively manage and treat insect bites and stings, minimizing discomfort and preventing complications.
What are the differences between various types of bandages and dressings?
Bandages and dressings serve distinct purposes in wound care. Dressings are applied directly to the wound to promote healing and protect from infection, while bandages hold dressings in place and provide support.
1. **Gauze Dressings**: Made from woven or non-woven materials, gauze dressings are highly absorbent and used for wounds with moderate to heavy exudate. They can be impregnated with antiseptics for added protection.
2. **Hydrocolloid Dressings**: These are occlusive or semi-occlusive dressings that form a gel when in contact with wound exudate, maintaining a moist environment conducive to healing. They are suitable for low to moderate exudate wounds.
3. **Hydrogel Dressings**: Composed of water or glycerin-based gels, these dressings provide moisture to dry wounds, aiding in autolytic debridement. They are ideal for dry or necrotic wounds.
4. **Foam Dressings**: Made from polyurethane, foam dressings are highly absorbent and provide cushioning. They are used for wounds with moderate to heavy exudate and can be left in place for several days.
5. **Alginate Dressings**: Derived from seaweed, alginate dressings are highly absorbent and form a gel upon contact with wound exudate. They are suitable for wounds with heavy exudate.
6. **Transparent Film Dressings**: These are thin, adhesive, and semi-permeable, allowing oxygen exchange while protecting the wound from bacteria. They are used for superficial wounds with minimal exudate.
7. **Compression Bandages**: Used primarily for venous leg ulcers, these bandages apply pressure to improve circulation and reduce swelling.
8. **Elastic Bandages**: These provide support and compression for sprains and strains, helping to reduce swelling and stabilize the area.
9. **Tubular Bandages**: These are seamless and provide even pressure, often used for support and compression on limbs.
Each type of bandage and dressing is selected based on the wound's characteristics, location, and healing requirements.
How do you know when a wound requires medical attention?
A wound requires medical attention if it exhibits certain signs or characteristics. If the wound is deep, longer than half an inch, or the edges are gaping or jagged, it may need stitches. Profuse bleeding that doesn't stop after applying pressure for 10 minutes is a critical sign. Wounds caused by animal or human bites, or those that contain foreign objects like glass or dirt, also require professional care to prevent infection.
Signs of infection, such as redness, warmth, swelling, or pus, indicate the need for medical evaluation. If the wound is accompanied by a fever, this could suggest a systemic infection. Wounds located on sensitive areas like the face, hands, or genitals, or those that impair function, should be assessed by a healthcare provider.
If the injured person hasn't had a tetanus shot in the last five years, or if the wound is contaminated, a tetanus booster may be necessary. Additionally, if the wound results from a high-risk situation, such as a puncture wound from a rusty object, medical advice is crucial.
Chronic wounds, such as those that don't show signs of healing within a few days, or those that worsen, should be evaluated. If the person has underlying health conditions like diabetes or a compromised immune system, even minor wounds may require medical attention.
In summary, seek medical care for wounds that are deep, bleeding heavily, show signs of infection, are located on sensitive areas, or if the injured person has specific health concerns or hasn't had a recent tetanus shot.
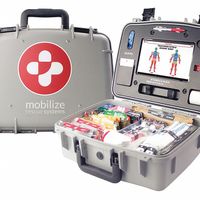
What are the best practices for storing first-aid supplies?
To effectively store first-aid supplies, follow these best practices:
1. **Location**: Choose a cool, dry, and easily accessible location. Avoid areas with extreme temperatures or humidity, such as bathrooms or kitchens, to prevent degradation of supplies.
2. **Visibility and Accessibility**: Store supplies in a clearly marked, easily accessible container. Use a transparent or labeled box to quickly identify contents. Ensure everyone in the household or workplace knows the location.
3. **Organization**: Arrange items systematically. Use compartments or dividers to separate different types of supplies, such as bandages, antiseptics, and medications. This organization aids in quick retrieval during emergencies.
4. **Inventory Management**: Regularly check and update the inventory. Replace expired items and replenish used supplies. Keep a checklist inside the kit for easy tracking.
5. **Labeling**: Clearly label all items, especially medications, with their names, uses, and expiration dates. Include instructions for use if necessary.
6. **Protection**: Use waterproof and dustproof containers to protect supplies from contamination. Ensure the container is durable and secure.
7. **Training and Information**: Provide basic first-aid training to potential users. Include a first-aid manual or instructions in the kit for reference during emergencies.
8. **Special Considerations**: Tailor the contents to specific needs, such as including allergy medications or special equipment for individuals with known medical conditions.
9. **Regular Review**: Schedule periodic reviews of the kit to ensure it remains fully stocked and up-to-date. This should be done at least twice a year.
10. **Legal Compliance**: Ensure the kit meets any legal or regulatory requirements specific to your location or industry.
By adhering to these practices, you ensure that first-aid supplies are ready and effective when needed.
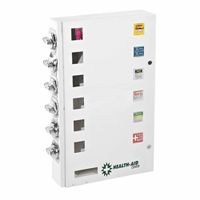
How do medicine vending machines work in the workplace?
Medicine vending machines in the workplace function similarly to traditional vending machines but are specifically designed to dispense over-the-counter (OTC) medications and health-related products. These machines are strategically placed in accessible areas within the workplace, such as break rooms or near restrooms, to provide employees with convenient access to necessary medications without leaving the premises.
The machines are stocked with a variety of OTC medications, including pain relievers, cold and flu remedies, allergy medications, and sometimes basic first-aid supplies. They may also offer wellness products like vitamins or energy supplements. The selection is typically tailored to common workplace health needs.
To use the machine, employees select the desired product using a touchscreen interface or keypad. Payment is usually made via credit/debit card, mobile payment apps, or employee ID cards linked to a payroll deduction system. Some machines may also accept cash. Once the transaction is completed, the machine dispenses the selected item through a retrieval slot.
Advanced medicine vending machines may include features like user authentication to ensure that employees are eligible to access certain medications, especially if the workplace has specific health policies. They might also have inventory management systems that alert suppliers when stock is low, ensuring continuous availability of products.
These machines offer several benefits, including reducing downtime by allowing employees to quickly address minor health issues, promoting workplace wellness, and potentially reducing healthcare costs by minimizing unnecessary doctor visits. They also maintain privacy for employees seeking medication for personal health issues.