Call +(254) 703 030 000 / 751 483 999 / 721 704 777
.....Read More

Frequently Asked Questions
What are the different types of first aid bandages and their uses?
There are several types of first aid bandages, each designed for specific uses:
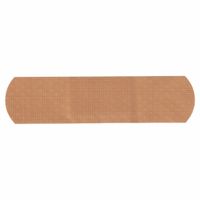
1. **Adhesive Bandages**: Commonly known as Band-Aids, these are used for minor cuts, abrasions, and blisters. They consist of a small pad attached to a sticky strip that holds the bandage in place.
2. **Gauze Bandages**: Made from woven cotton, these are used for dressing larger wounds. They can be used to absorb fluids and protect the wound from infection. Gauze can be secured with medical tape or a bandage roll.
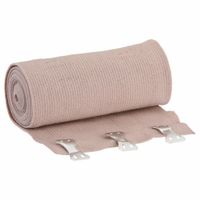
3. **Elastic Bandages**: Often referred to as Ace bandages, these are used to provide support and compression for sprains, strains, and swelling. They are stretchy and can be wrapped around joints or limbs.
4. **Triangular Bandages**: These versatile bandages can be used as slings to support injured arms or as a tourniquet. They can also be folded to create a bandage for head injuries.
5. **Tubular Bandages**: Designed to fit over fingers, toes, or limbs, these provide support and protection without the need for adhesive. They are often used for sprains or to hold dressings in place.
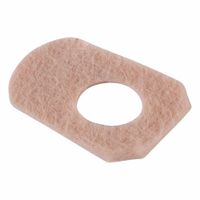
6. **Hydrocolloid Bandages**: These are used for blisters and burns. They create a moist environment that promotes healing and reduces pain.
7. **Compression Bandages**: Used to control bleeding and reduce swelling, these bandages apply pressure to the wound area. They are often used in emergency situations to manage severe bleeding.
8. **Liquid Bandages**: A type of adhesive that forms a protective layer over small cuts and abrasions. They are waterproof and flexible, ideal for areas that are difficult to bandage with traditional materials.
Each type of bandage serves a specific purpose, ensuring proper wound care and support for various injuries.
How do adhesive bandages protect minor wounds?
Adhesive bandages protect minor wounds through several mechanisms. Firstly, they act as a physical barrier, shielding the wound from external contaminants such as dirt, bacteria, and other pathogens that could cause infection. This barrier helps maintain a clean environment conducive to healing.
Secondly, adhesive bandages help in maintaining a moist wound environment. The moisture balance is crucial as it promotes cell migration and proliferation, which are essential for tissue repair. A moist environment also reduces the risk of scab formation, which can slow down the healing process and increase the likelihood of scarring.
Additionally, adhesive bandages provide a cushioning effect, protecting the wound from further mechanical injury or irritation. This is particularly important for wounds located on parts of the body that are prone to friction or pressure, such as fingers or knees.
The adhesive component of the bandage ensures that it stays in place, providing consistent protection and coverage. This adhesive is typically designed to be gentle on the skin to prevent irritation or damage upon removal.
Some adhesive bandages are also infused with antiseptic agents, which can help reduce the risk of infection by killing or inhibiting the growth of bacteria around the wound area.
Overall, adhesive bandages facilitate the body's natural healing processes by providing protection, maintaining an optimal healing environment, and preventing further injury or infection.
What is the proper way to apply a wound dressing?
To properly apply a wound dressing, follow these steps:
1. **Hand Hygiene**: Wash your hands thoroughly with soap and water or use an alcohol-based hand sanitizer to prevent infection.
2. **Prepare the Wound**: Gently clean the wound with saline solution or mild soap and water. Pat dry with a sterile gauze pad.
3. **Assess the Wound**: Check for signs of infection such as redness, swelling, or pus. If present, seek medical advice.
4. **Select the Dressing**: Choose an appropriate dressing based on the wound type, size, and location. Options include gauze, hydrocolloid, or foam dressings.
5. **Apply Antiseptic**: If advised by a healthcare professional, apply a thin layer of antiseptic ointment to the wound to prevent infection.
6. **Apply the Dressing**: Place the dressing over the wound, ensuring it covers the entire area. Avoid touching the side that will contact the wound to maintain sterility.
7. **Secure the Dressing**: Use medical tape, adhesive bandages, or a bandage roll to secure the dressing in place. Ensure it is snug but not too tight to allow circulation.
8. **Monitor the Wound**: Check the dressing regularly for signs of leakage or saturation. Change the dressing as recommended, typically every 24-48 hours or when it becomes wet or dirty.
9. **Reapply as Needed**: Repeat the cleaning and dressing process until the wound heals. Consult a healthcare professional if healing does not progress or if signs of infection develop.
10. **Dispose Properly**: Dispose of used dressings and gloves in a sealed plastic bag to prevent contamination.
Following these steps helps promote healing and reduces the risk of infection.
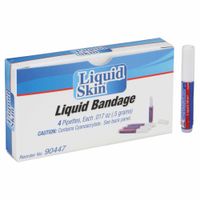
How do spray and liquid bandages work?
Spray and liquid bandages are innovative wound care solutions designed to protect minor cuts, abrasions, and burns. They work by forming a protective barrier over the wound, which helps to keep out dirt, bacteria, and other contaminants, thereby reducing the risk of infection.
When applied, these bandages create a thin, flexible film that adheres to the skin. This film is typically made from a polymer that is safe for skin contact. In the case of spray bandages, the product is dispensed from an aerosol can, allowing for an even application over the wound. Liquid bandages, on the other hand, are applied using a brush or dropper.
The key component in these bandages is a polymer, such as cyanoacrylate or acrylate, which rapidly dries upon contact with the skin, forming a waterproof and breathable seal. This seal allows the wound to heal naturally by maintaining a moist environment, which is conducive to faster healing and reduces the likelihood of scab formation.
Additionally, many spray and liquid bandages contain antiseptic agents that help to further protect the wound from infection. Some formulations may also include pain-relieving ingredients to provide immediate comfort.
These bandages are particularly useful for areas of the body where traditional adhesive bandages may not adhere well, such as joints or areas with hair. They are also advantageous for individuals with sensitive skin or allergies to adhesive materials.
Overall, spray and liquid bandages offer a convenient, effective, and hygienic alternative to traditional bandages, promoting faster healing while providing a protective barrier against external elements.
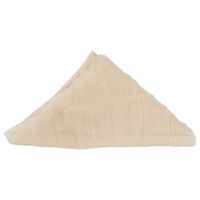
When should you use a triangular bandage?
A triangular bandage is a versatile first aid tool used in various situations. It is typically employed when:
1. **Arm Sling**: To support and immobilize an injured arm or shoulder, a triangular bandage can be fashioned into a sling. This helps reduce pain and prevent further injury.
2. **Head Injury**: It can be used to secure dressings on head wounds. The bandage is wrapped around the head and tied at the back, keeping the dressing in place.
3. **Fractures and Sprains**: For immobilizing fractures or sprains, the bandage can be used to create a splint. It helps stabilize the injured area until professional medical help is available.
4. **Bleeding Control**: In cases of bleeding, a triangular bandage can be folded to apply pressure to a wound, helping to control bleeding until further treatment is possible.
5. **Chest Injuries**: It can be used to secure dressings on chest wounds, ensuring they remain in place and provide necessary pressure.
6. **Knee or Foot Support**: When dealing with knee or foot injuries, the bandage can be wrapped around the joint to provide support and limit movement.
7. **Emergency Tourniquet**: In extreme cases, a triangular bandage can be used as a makeshift tourniquet to control severe bleeding from a limb.
8. **Eye Injuries**: It can be used to cover and protect an injured eye, preventing further damage and contamination.
9. **Burns**: The bandage can be used to cover burns, protecting the area from infection and further injury.
10. **Improvised Uses**: In emergencies, it can serve as a temporary bandage, cloth, or even a signaling device.
A triangular bandage is an essential component of any first aid kit due to its adaptability in various emergency situations.
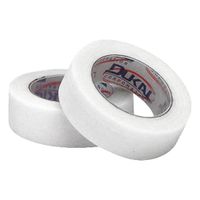
How do you properly secure a bandage with first aid tape?
To properly secure a bandage with first aid tape, follow these steps:
1. **Clean and Dry the Area**: Ensure the wound and surrounding skin are clean and dry to promote adhesion and prevent infection.
2. **Apply the Bandage**: Place the sterile bandage or gauze pad over the wound, ensuring it completely covers the area.
3. **Select the Right Tape**: Use medical-grade first aid tape, which is designed to be skin-friendly and adhesive.
4. **Cut the Tape**: Cut strips of tape long enough to extend beyond the edges of the bandage, providing a secure hold.
5. **Position the Tape**: Start by placing one end of the tape on the skin, a few centimeters away from the bandage edge.
6. **Secure the Bandage**: Gently press the tape over the bandage, smoothing it down to avoid wrinkles or gaps. Ensure the tape is taut but not too tight to avoid restricting circulation.
7. **Cross-Pattern for Stability**: For added security, apply additional strips of tape in a cross or crisscross pattern over the bandage.
8. **Check for Comfort**: Ensure the bandage is snug but comfortable. The tape should not cause discomfort or restrict movement.
9. **Monitor the Bandage**: Regularly check the bandage to ensure it remains secure and replace it if it becomes loose, wet, or dirty.
10. **Remove Carefully**: When changing the bandage, gently peel the tape back, pulling it parallel to the skin to minimize discomfort.
By following these steps, you can effectively secure a bandage with first aid tape, ensuring the wound is protected and healing is promoted.
What is the purpose of using IV and arterial tourniquets?
The purpose of using IV (intravenous) and arterial tourniquets is to facilitate medical procedures by controlling blood flow in specific areas of the body.
IV tourniquets are primarily used to make veins more prominent and easier to access for venipuncture or intravenous cannulation. By applying pressure to the limb, usually the arm, the tourniquet temporarily restricts venous blood flow, causing the veins to dilate and become more visible and palpable. This aids healthcare professionals in accurately inserting needles or cannulas into the vein for blood sampling, medication administration, or fluid infusion.
Arterial tourniquets, on the other hand, are used to control arterial blood flow, often in emergency or surgical settings. They are applied to limbs to stop severe bleeding from an artery, which can be life-threatening. By compressing the artery, the tourniquet prevents blood loss and allows time for medical intervention. In surgical settings, arterial tourniquets can create a bloodless field, improving visibility and reducing the risk of complications during procedures on extremities.
Both types of tourniquets must be used with caution. Prolonged application can lead to tissue damage, nerve injury, or complications due to restricted blood flow. Therefore, they are typically used for short durations and monitored closely to minimize risks. Proper training and adherence to guidelines are essential to ensure their safe and effective use.